BDP10: The Grand Suspension Bridge
Posted by CapnRex101,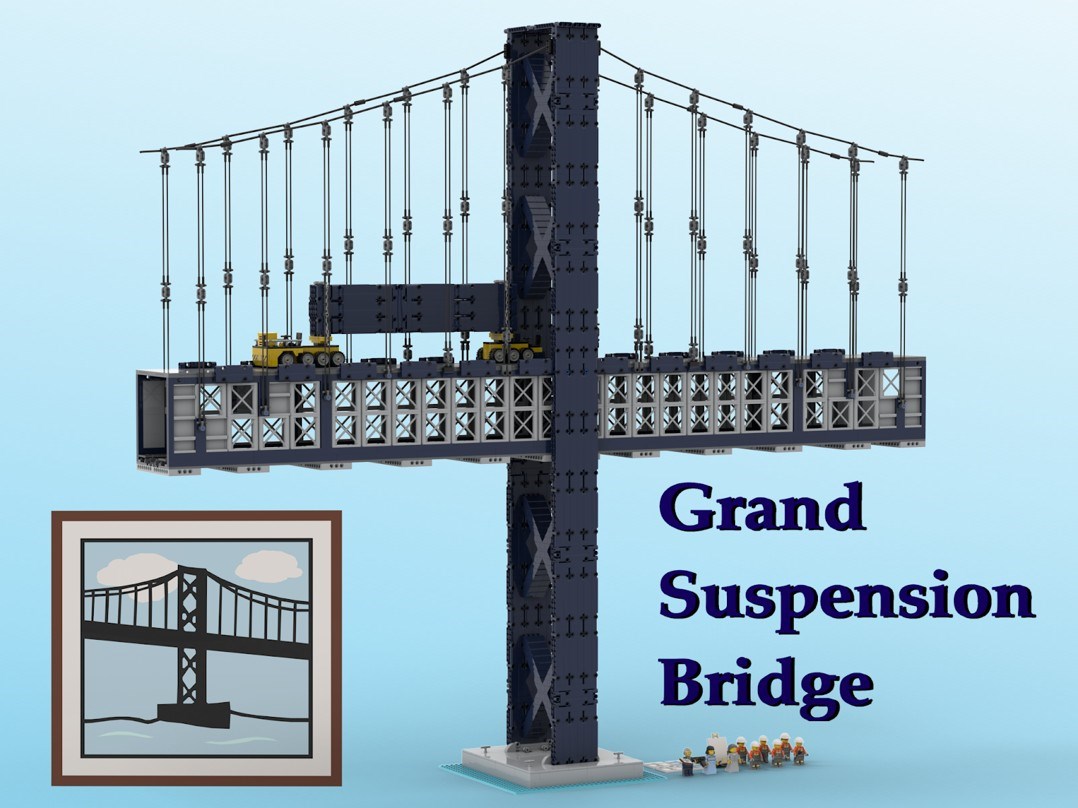
Our next BrickLink Designer Program Series 10 showcase focuses on The Grand Suspension Bridge by LobsterHouse44:
Hello everyone! I am excited to present today my model for Series 10 of the Bricklink Designer Program: The Grand Suspension Bridge!
This is not just any bridge. This is indeed supposed to be THAT bridge, the one seen printed on a 2x2 tile for over 10 years. I was thinking to myself about how fun it is when Lego models include smaller versions of other models, implying that particular building, vehicle, or object is well-known. Then it hit me that the chance to do the reverse was right in front of me, the chance to put a complete face to a picture that has found itself into a vast number of Lego Cities around the world. As I also strive to build models that could fit into a Lego City, this felt like the perfect idea!
Obviously, I had to start at the source. As it turns out, this piece originates from the Lego Big Bang Theory set from 2015. I’ve never watched the show, but it is supposedly a picture of a real bridge. Some said it was likely the Golden Gate Bridge, but the X-shaped beams didn’t match. The best match I could find was the San Francisco–Oakland Bay Bridge.

The Lego version has taken on a bit of history of its own. It has continued to appear in other sitcom sets, Sesame Street, a few BDP sets, and most notably appearing in 7 of the 11 Modular Buildings since 2016! It seemed to me that most city builders were familiar with this piece in some way, but its consistent appearances have gone mostly undiscussed.
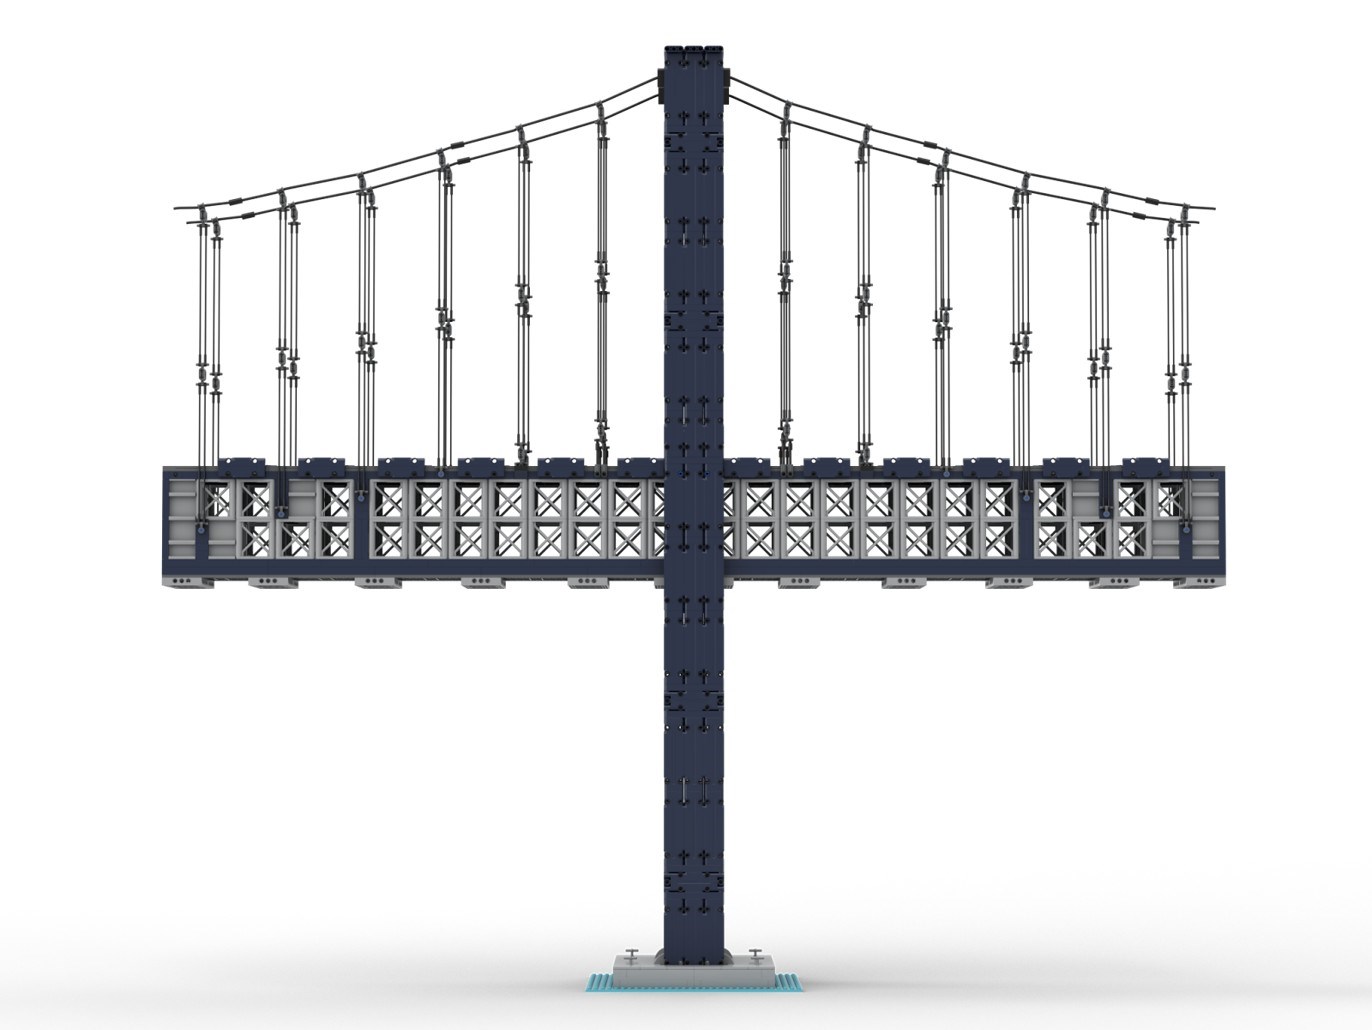
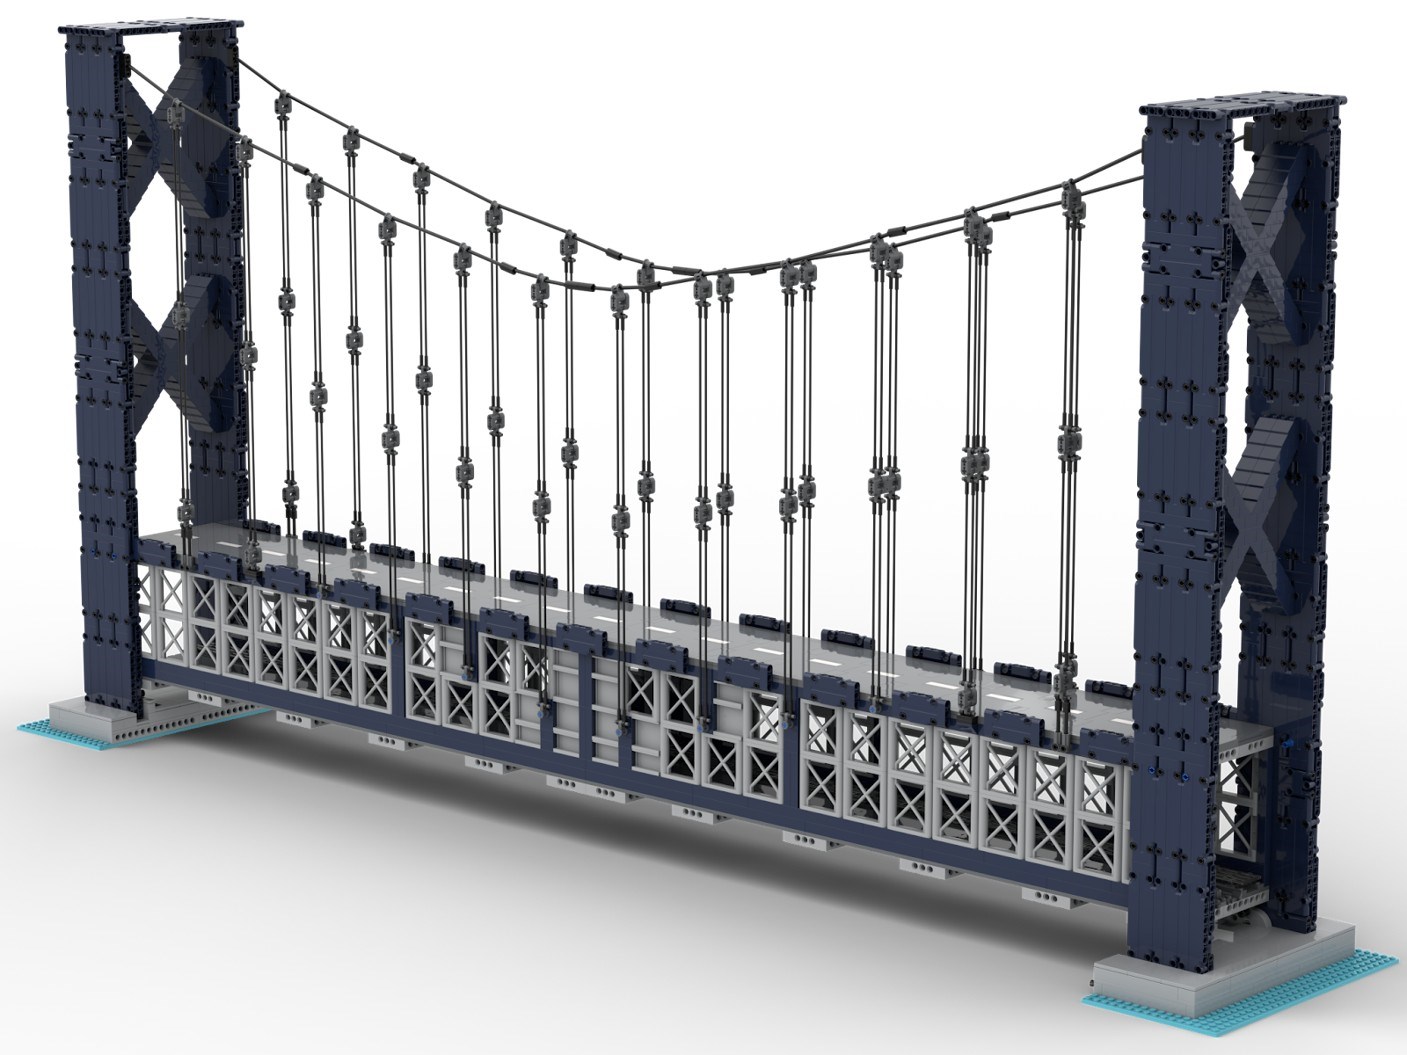
My main goal was to recreate the bridge as it is seen in the picture. That means 4 X-shaped beams (2 below the road and 2 above), and 6 main cables on both ends. Obviously this picture only shows a part of a bridge, but I wanted to at least start with that and see where the piece count was before adding anything beyond the picture.
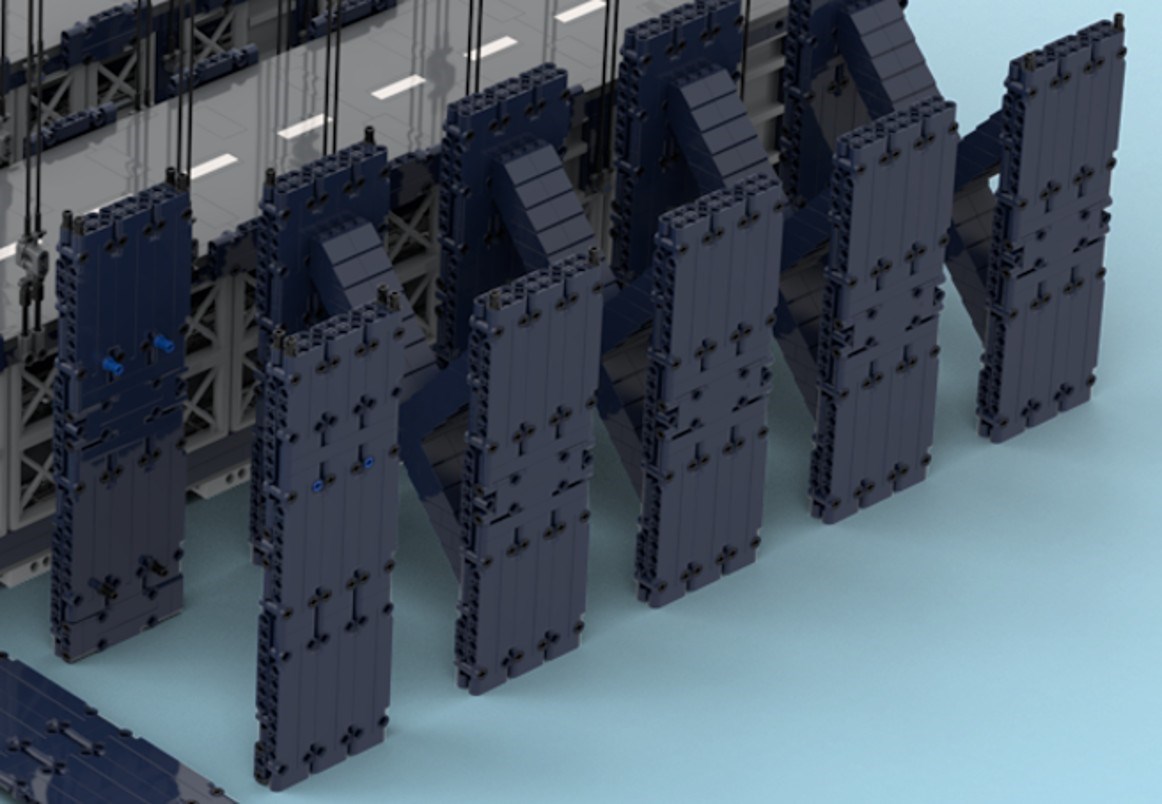
The best way to make the X-beams seemed to be with slopes and inverted slopes. It was here that I quickly discovered the sheer size of the project I was undertaking! My 2nd goal with this project was to make something usable for a Lego city, so I knew that the best way to test fit it with Lego vehicles (and hopefully bring the piece count down) would be to use road plates. The end result was far taller than I had anticipated. I tried out other kinds of slopes, or even making it a one-lane half road plate. But they were still tall enough that I decided the extra size and pieces justified the huge boost in usability and display factor. Thankfully, I was able to reach the necessary size and stability by using parts 71709 and 15458. The colour options for both of those pieces (and the inverted 2x2 slopes) is what led me to ultimately decide on the dark blue colour scheme for the bridge. They also give the bridge an excellent industrial look!
The next major challenge was the cables. I ultimately went with part 27965, which has the right look for a cable, and is connected with a loop that won’t pop out easily. Finding a bar connection was difficult until I found part 99021, which required that the cables be in pairs. Serendipitously, that ended up being accurate to many kinds of suspension bridges! I had to work around part 27965 only existing in one size, but that ended up helping me better understand what I wanted for the road section.
I knew I wanted the road to be thick enough to look the part in the picture, and to be stable. I thought about doing a tunnel to make use of the space. Some bridges have one lane of traffic on top, and the other below. But others instead use that space for rail traffic! As a huge Lego train fan, I knew that’s what I wanted to do! I used Lego’s new “rerailer” piece for multiple reasons. 1. It looks nice, 2. Regular track pieces only come in groups of 4, (and I was using 10). 3. It would be nice to have more of them on the market! I also had fun coming up with the grated floor design!
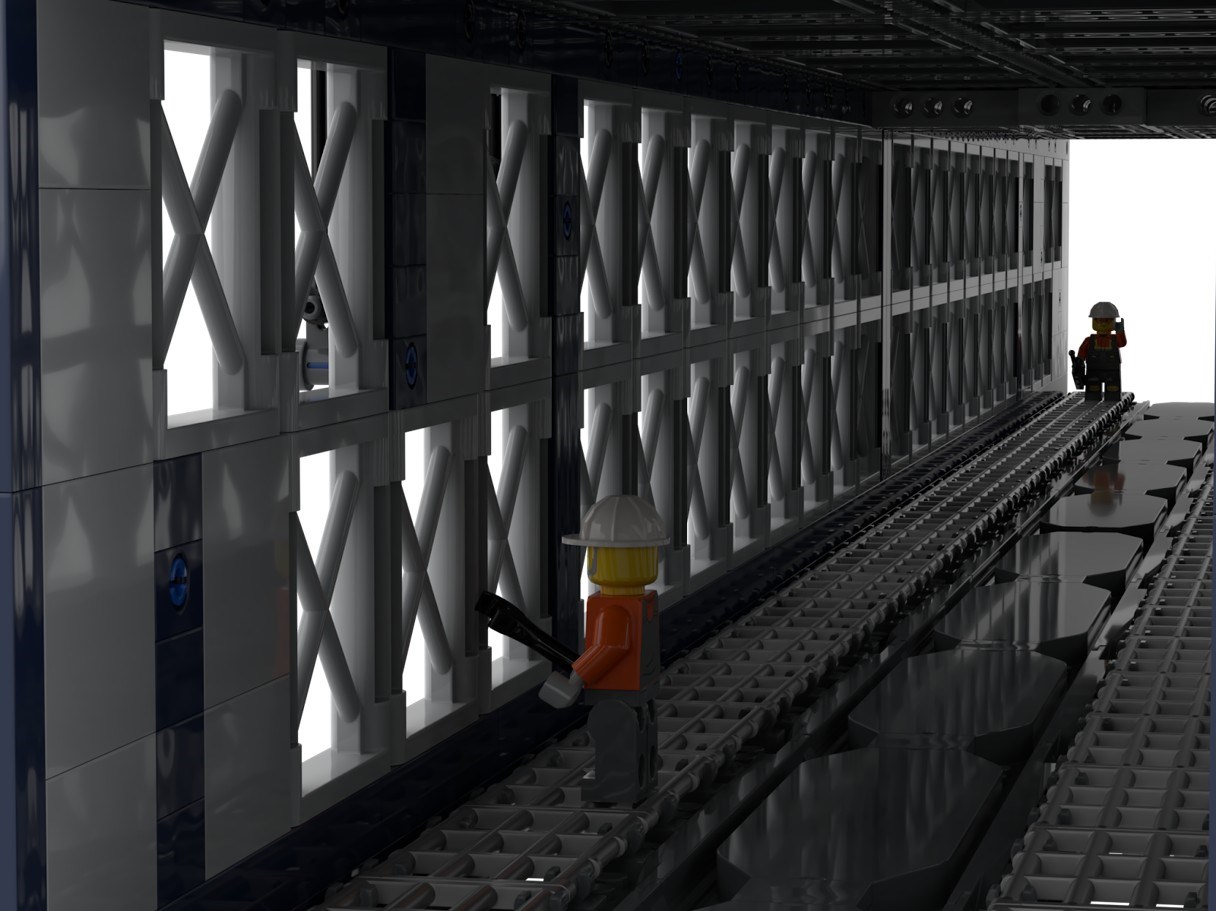
Of important note: the tunnel should be tall enough to fit even the BDP Wild West Train!
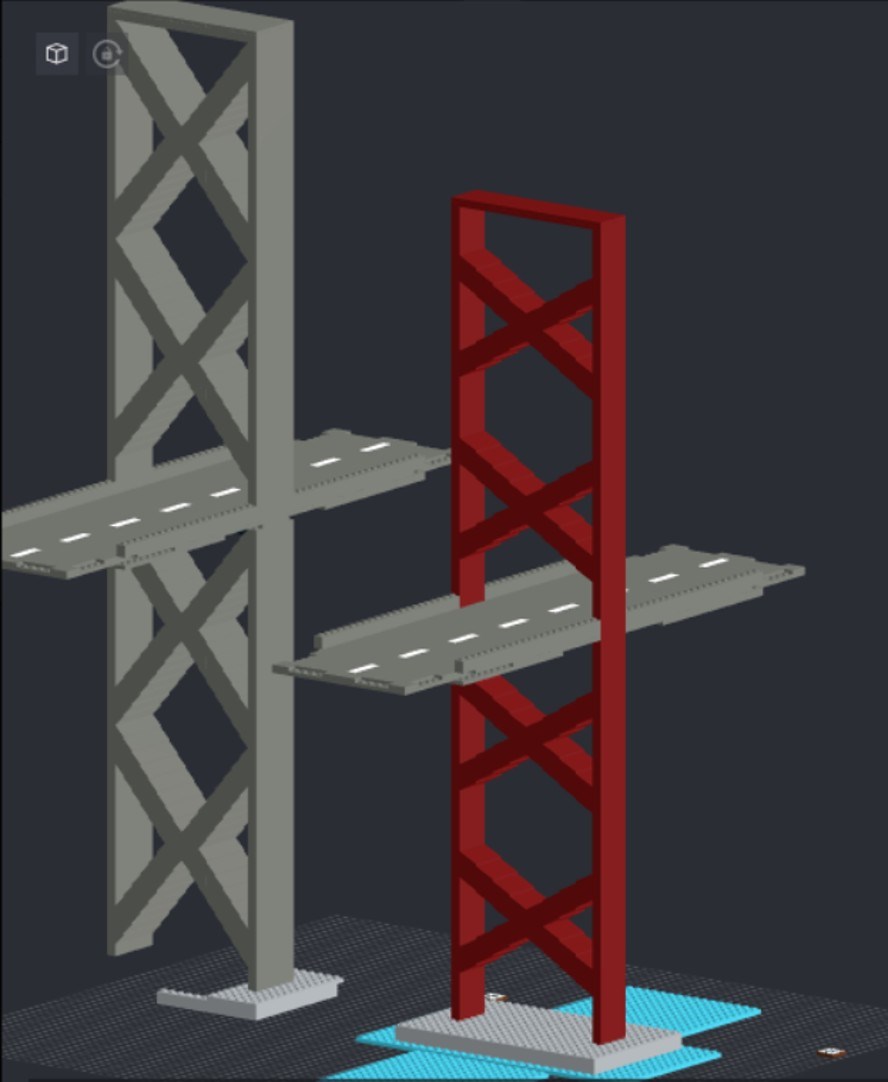
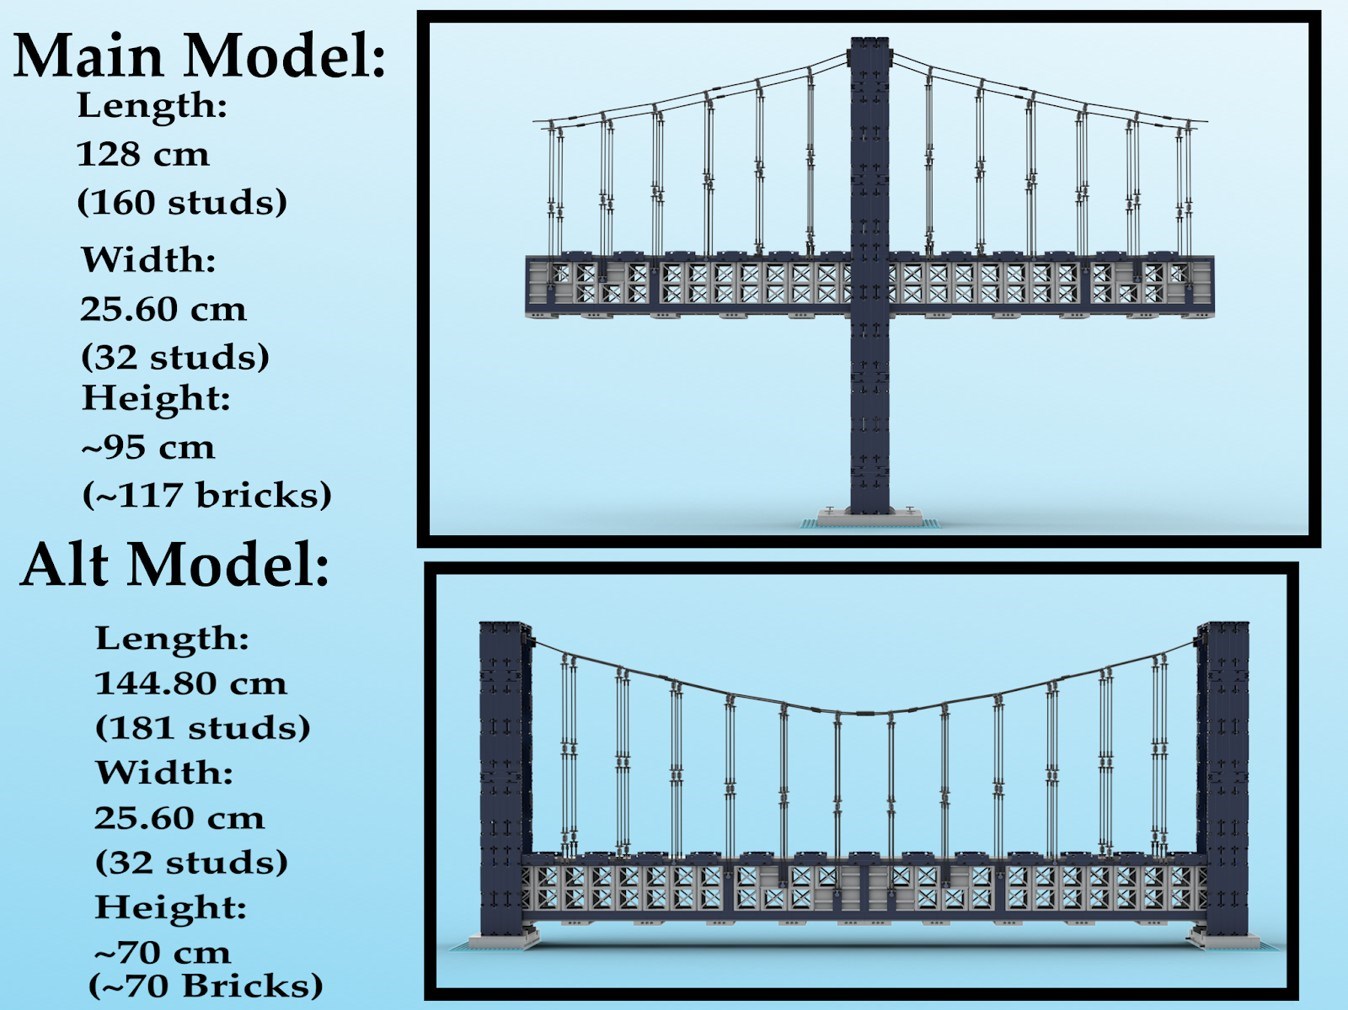
As I progressed with the build, and the piece count kept on rising, I knew there was something important I needed to address: Is this model, as it is, something that could fit into a Lego city? The height of the bridge makes that difficult, unless someone has a huge gap between tables they need filled. I knew I wanted to build the bridge into chunks that could be rearranged for a more city-friendly model. I could make the bridge split in half, take the bottom X-girders and use them to build a second pylon for the bridge. Thus, the options for usability and displayability would be dramatically increased, and I’d still be able to fulfil my initial goal of accurately recreating the bridge from the picture!
(It took a bit of trial and error, but eventually I was able to make the bridge the right length where the gaps between each cable set was 10 studs, including the gap between the two halves when placed in this configuration. All while maintaining the proportions seen in the picture).
There was only one problem: A second pylon would also require a second base, top, and side beams (the beams that connect to the side of the road/tunnel portion of the bridge). I did not want to include a bunch of pieces that would increase the cost if they weren't even going in the main model of the set. But I had an idea of how to put those extra pieces to good use!
My first idea was that rather than have two bases, I could make the main model’s base be able to split into two halves. The challenge here was creating an unobtrusive build with two Technic connection points at two different spots and heights. The Lego math was difficult (especially because I was working with halves), but I am very happy with the end result!

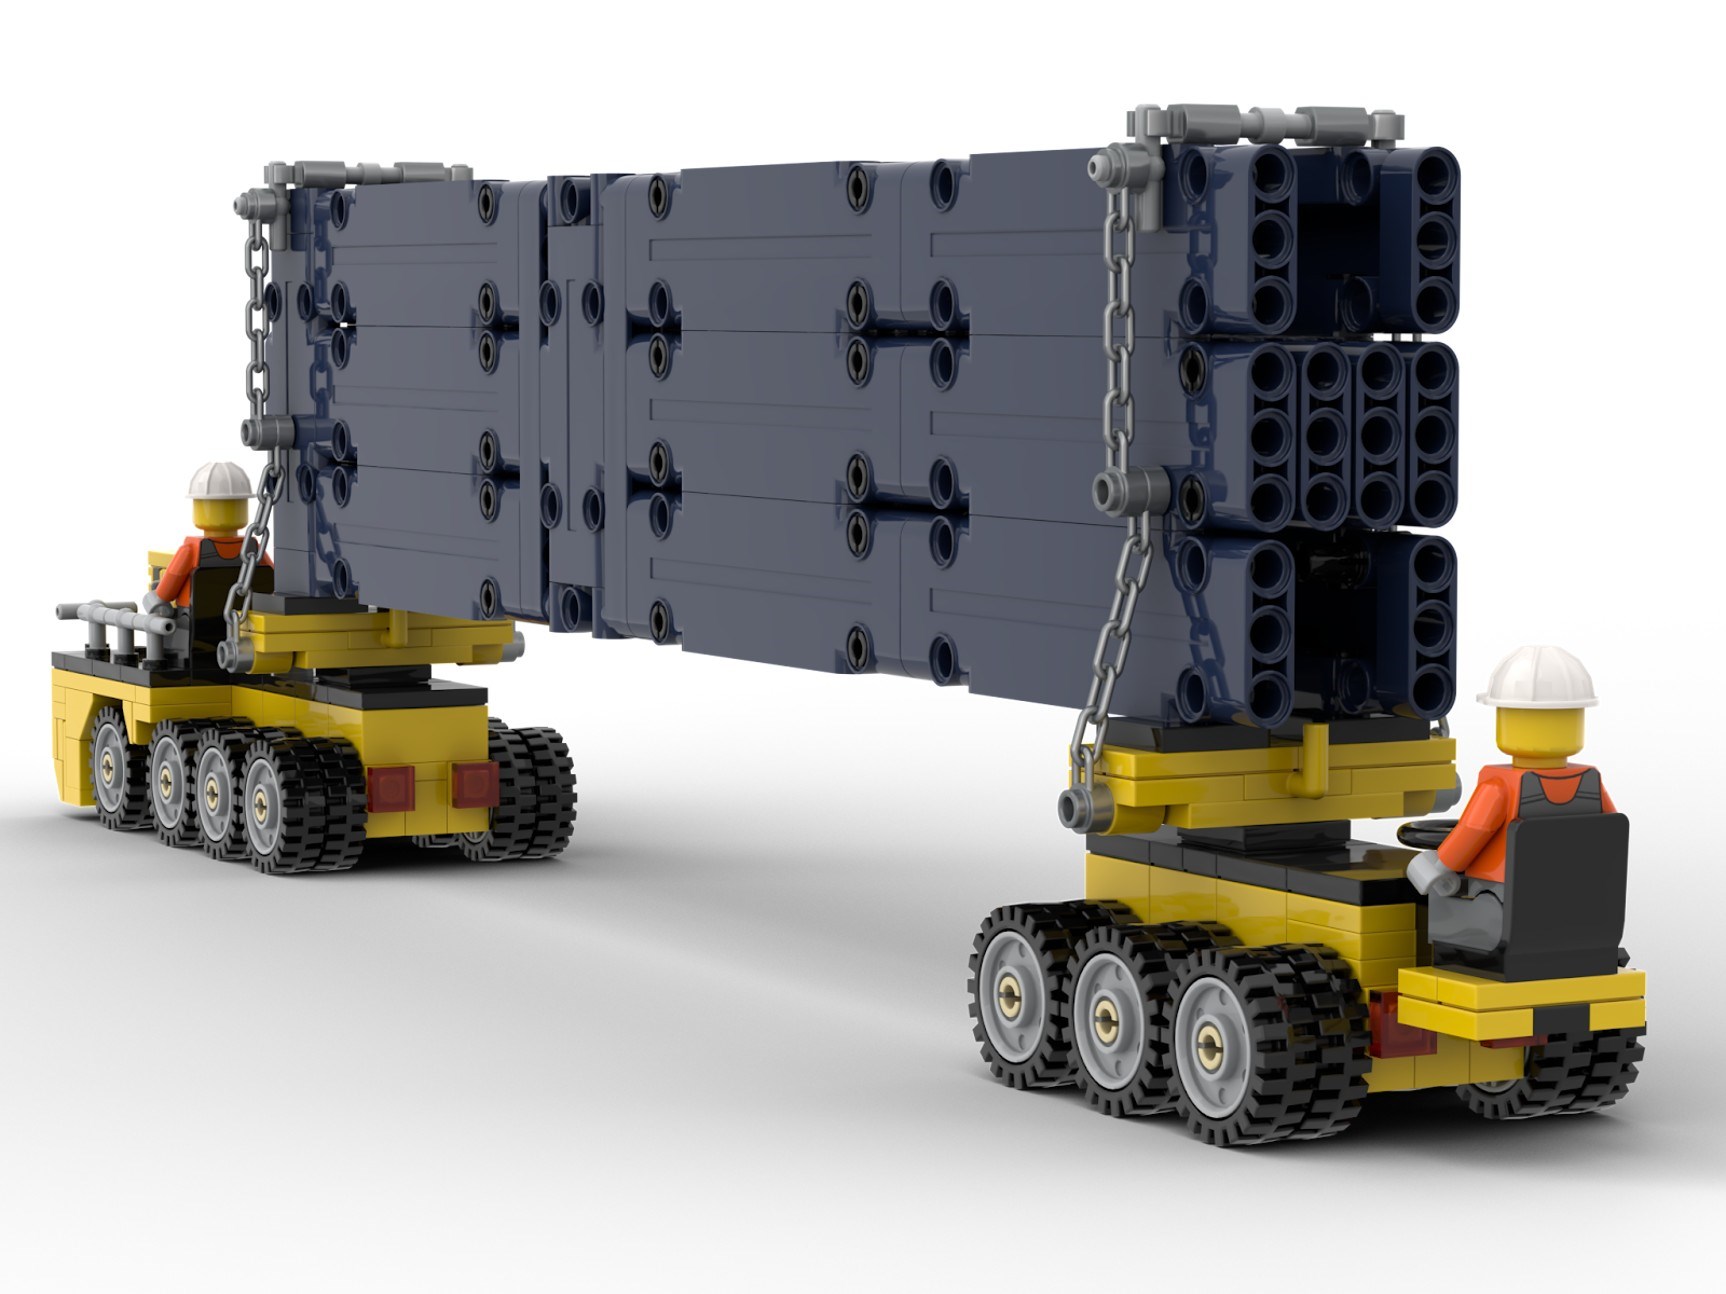
To give the extra girders a home, I decided to make them cargo for a vehicle to go with the set. Having a vehicle for the bridge would be great anyway! I needed something I could build to the deluxe level people expect from BDP models, but limit the piece count. In researching girder transporters, I found that some of them are actually two flat vehicles placed on opposite ends of a huge girder. That was just what I needed!
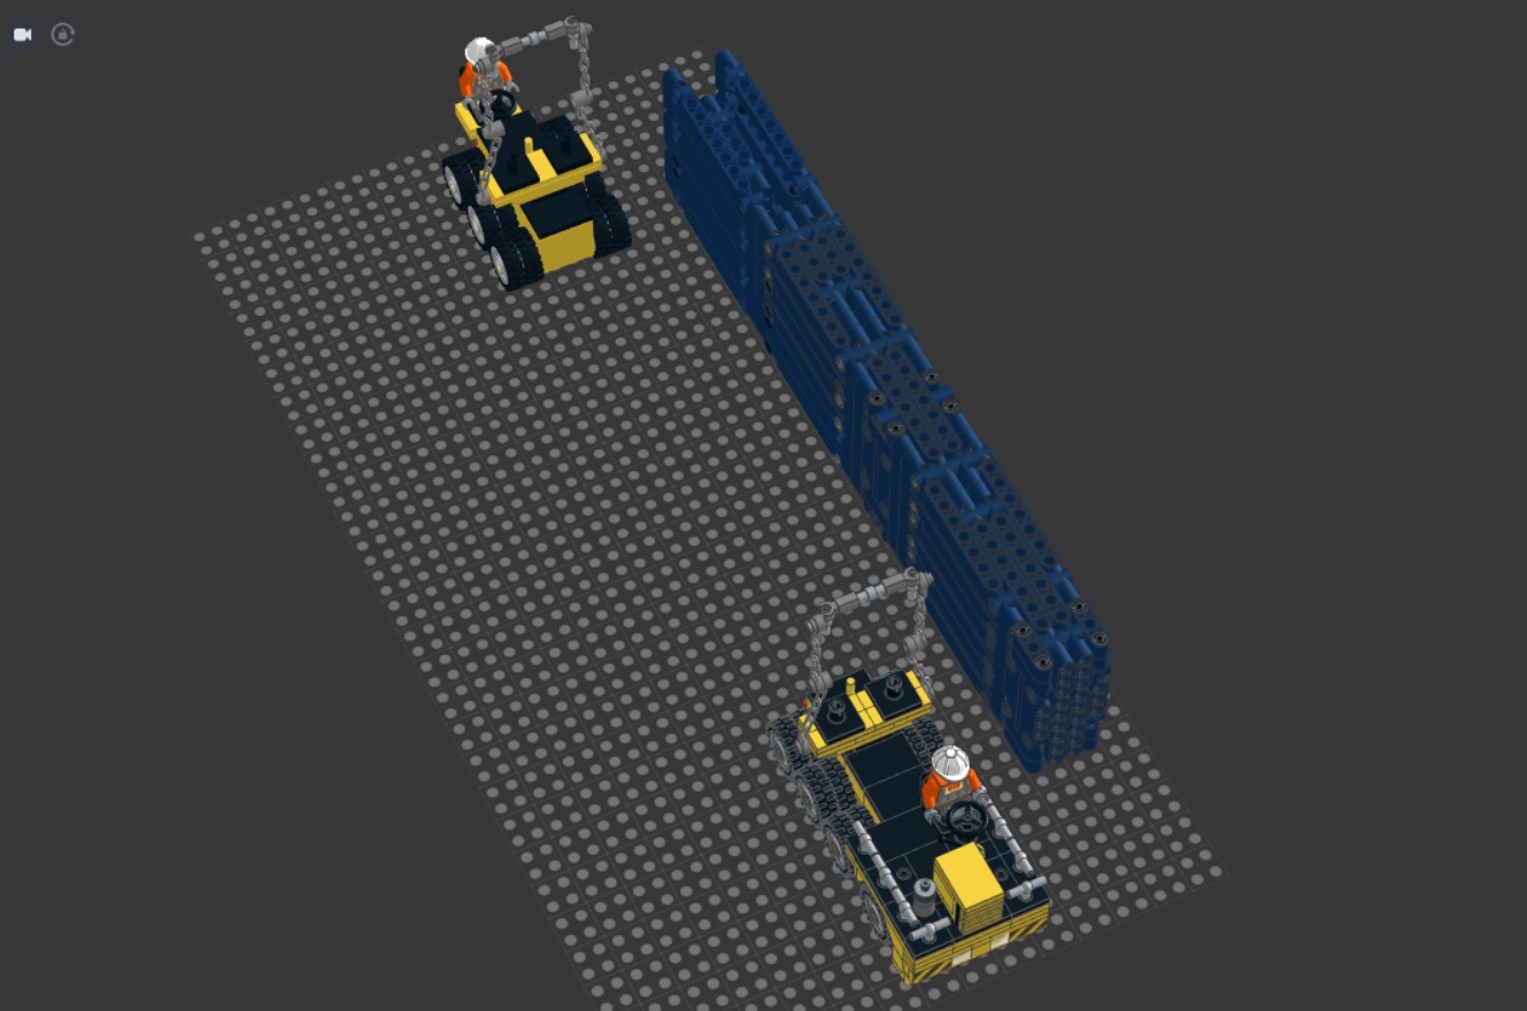
I wanted the transporter to feel big and industrial, but still fit on most Lego roads (including the 7 1⁄2 wide lanes on the road plates used for the bridge). That meant making a vehicle that was 7-studs wide. Working with odd numbers is a fun challenge, and I am pleased with the result! I’ve even submitted the girder transporter as its own model on the BDP.
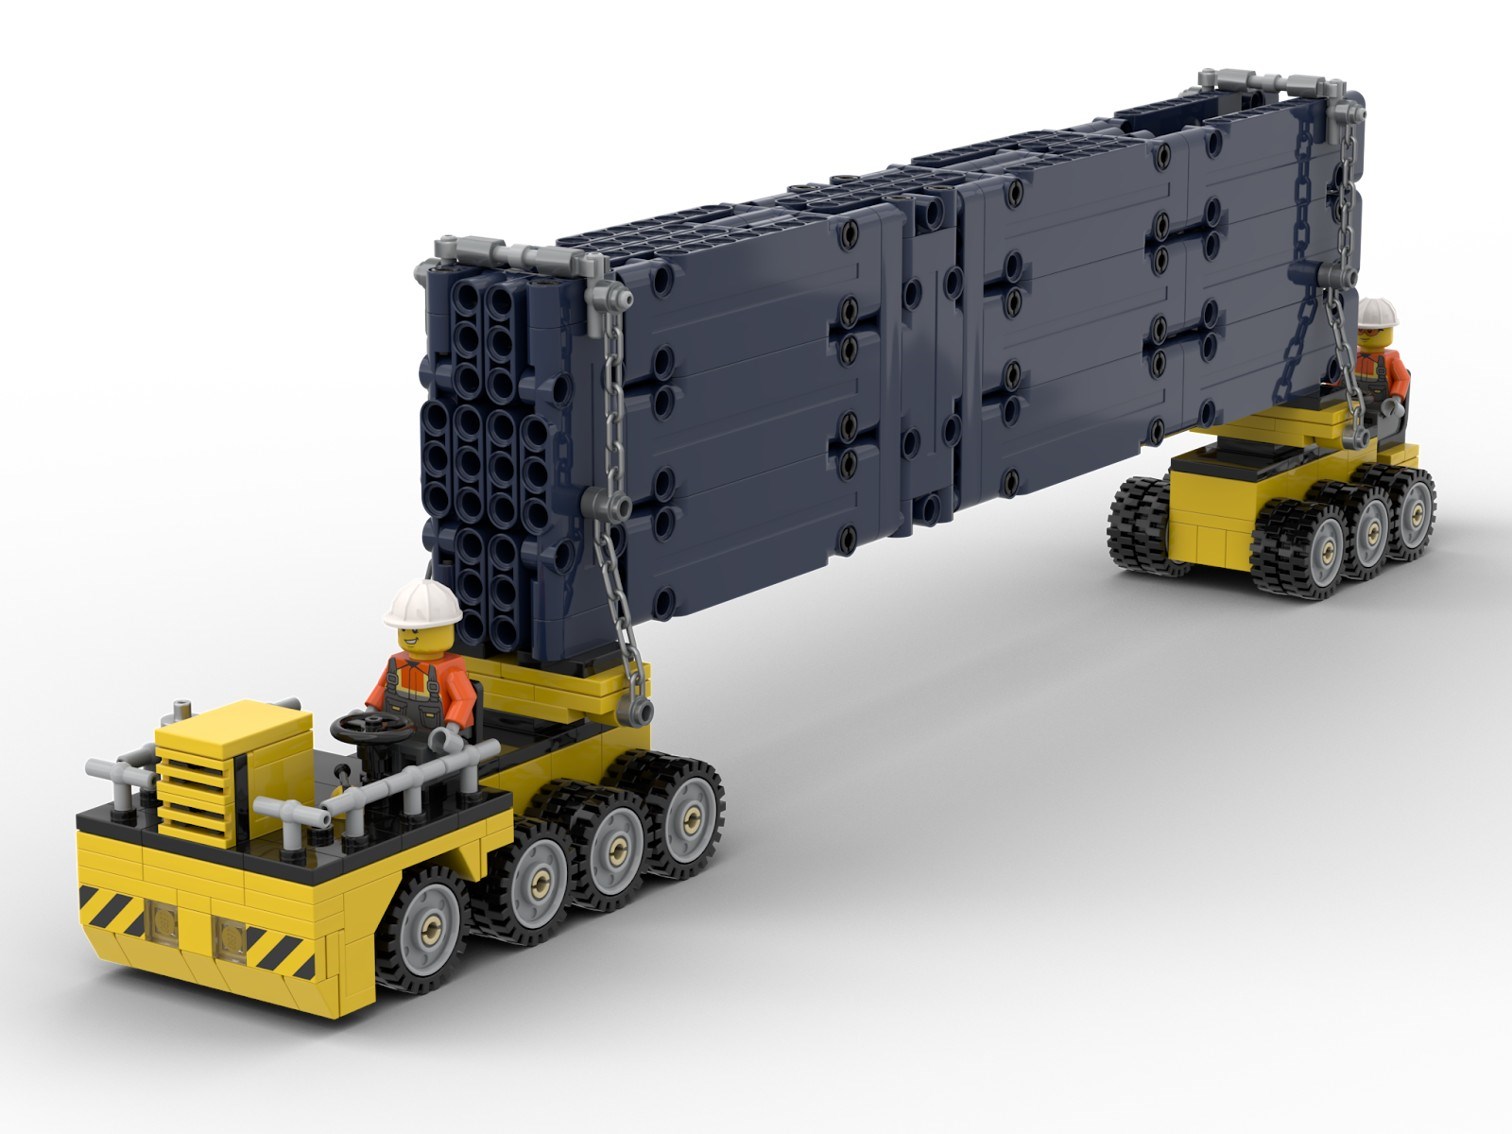
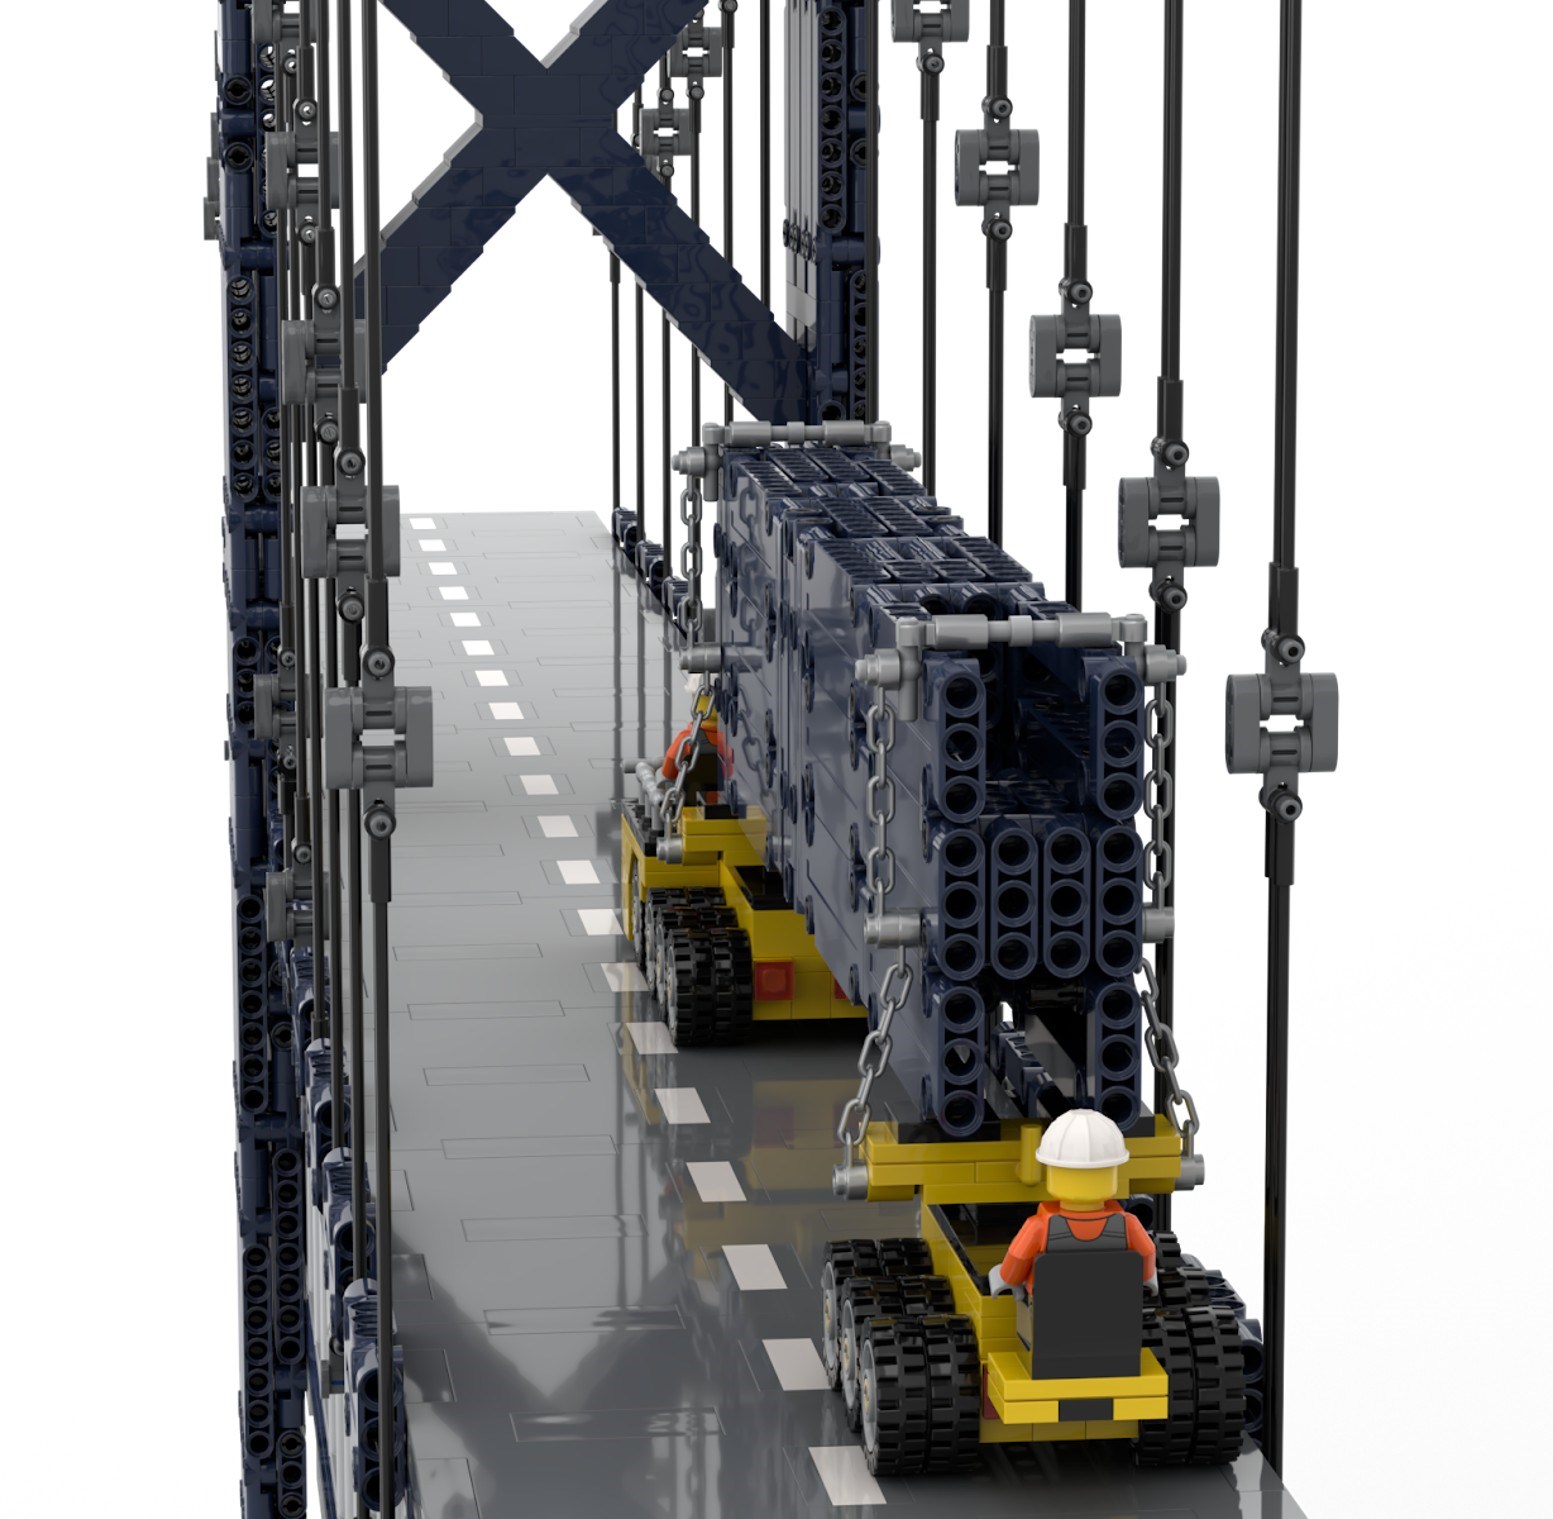
I built the beams to be high enough that even big Lego trucks like 60440 LEGO Delivery Truck could fit under them just fine. But I hadn’t accounted for the beams as cargo. Thankfully, if a delivery like this were crossing the bridge, traffic would be closed and the transporter could comfortably pass through the middle.
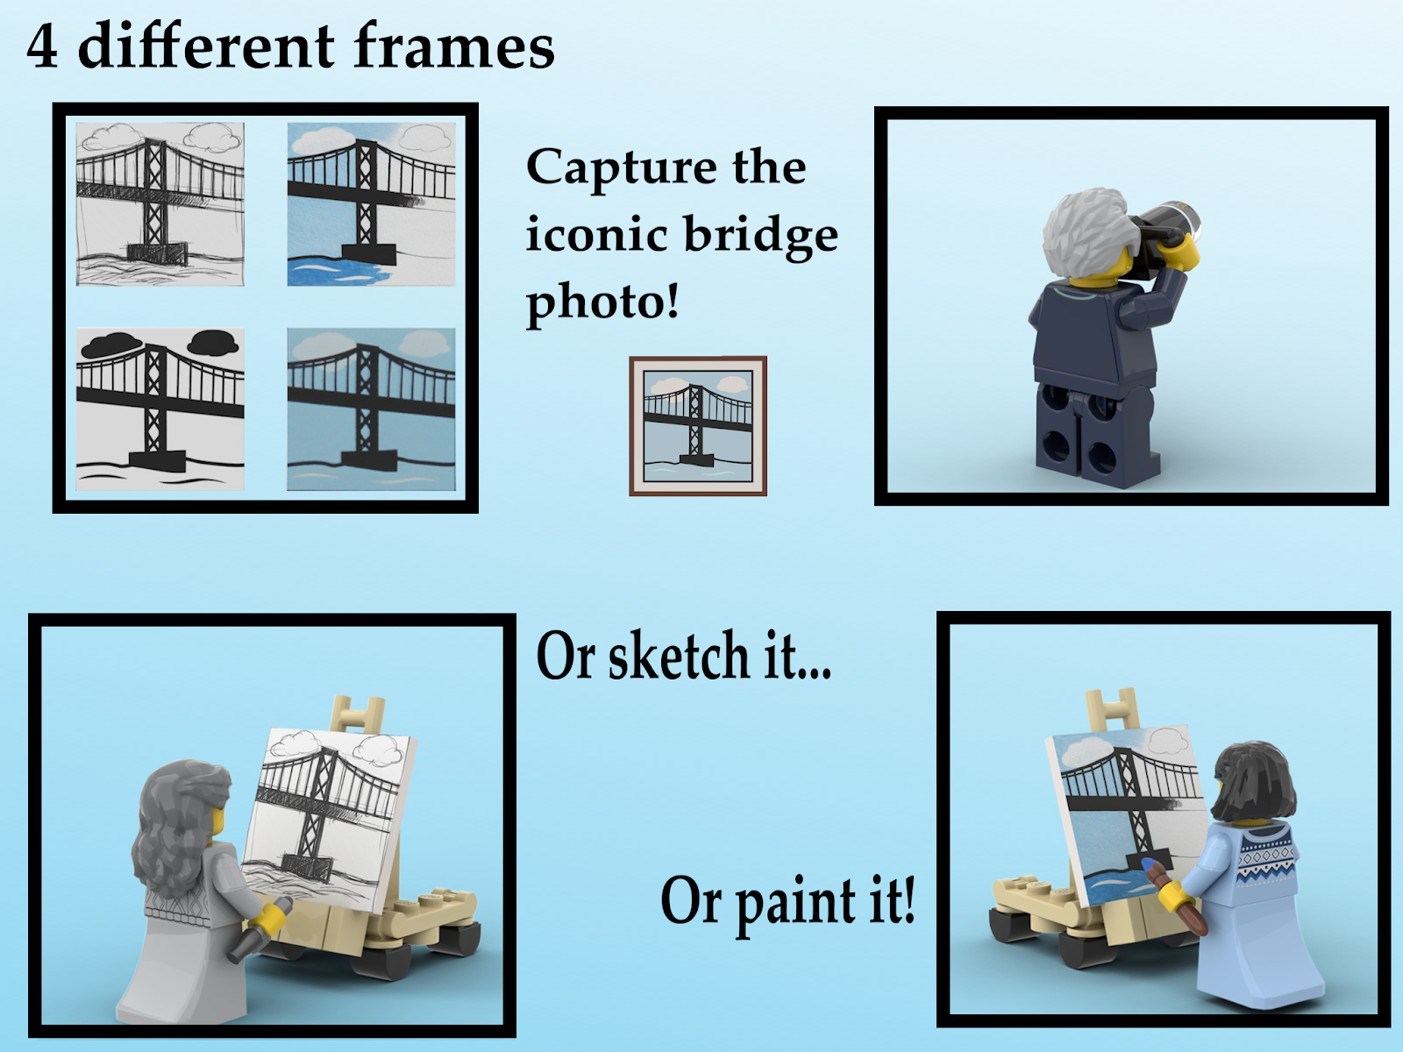
The final step was to create a few accessories and minifigs for the model. Bridge workers were a must, and they could also go on the girder transporter! But since the beginning stages of the model, I knew that I wanted to include a few bridge spotters. Specifically, I wanted to include a way for the model to depict the moment the famous bridge picture was created. A camera was absolutely necessary, but I also thought “what if this picture is not a photo, but a painting/drawing?” Since the BDP allows for exclusive stickers, I could capitalise on that and depict the image of the bridge as several different levels of completion! With the piece count I was at, I could have technically included more minifigs and stickers. So if the model were chosen, the final model could easily include even more depictions of the bridge, in different sizes too.
The final design is a sight to behold! Both bridge models are 32 studs in width. The main model is 160 studs long, or 5 32x32 baseplates long (5 modular buildings), and about 117 bricks tall! If it were an official model, it would be the 6th tallest Lego set, and the 2nd longest Lego set! The alternative model is shorter at about 70 bricks tall, but longer at 181 studs, which would break the record for the longest Lego set!
Thank you for reading about my design! I hope the process of building it was interesting to you. Best of luck to everyone participating in Series 10 of the Bricklink Designer Program, and a huge thank you to Brickset for featuring my design!
If you want to see this model become a real Lego set, then please give it a vote on the BrickLink website.
42 likes
8 comments on this article
I hope it can take the weight of the Martian Probe Rocket!
https://youtu.be/nfcdhOAeqQM?si=L7tSGOZlS6elb0Pb
I do really like this, I am so curious how stable it will turn out to be in real life. What a fun concept and interesting execution!
This is a typical build that I respect as a MOC, but don't care much for as a set. I mean, I loved reading how much thought went into this design, and I think it fully succeeded in what it tried to achieve, so kudos to LobsterHouse44! But would I want to build and display it myself? Nah....
Well… I do have a huge gap between tables… this is pretty awesome! Supported!
Sorry to be all skeptical, but have you tried building at least sections of this with physical parts to test stability? It looks like the cables would be very flimsy and prone to bending, considering the sheer size of it all. I'm especially worried about the main model, where the cables are just supporting themselves in the air at the outer ends. How would that stay neat and upright?
Fun concept, but I think unfeasible at this scale. If not physically, then economically as it would also be hugely expensive with that many large pieces. Perhaps I'm wrong, but there can't be that many people interested in actually purchasing it.
Technically interesting concept, but I can’t imagine this being interesting enough for too many people to buy
I'm so happy to see this article published, I had a fun time writing it! Thank you again Brickset for letting me share my story and my design!
@RTS013 said:
"Sorry to be all skeptical, but have you tried building at least sections of this with physical parts to test stability? It looks like the cables would be very flimsy and prone to bending, considering the sheer size of it all. I'm especially worried about the main model, where the cables are just supporting themselves in the air at the outer ends. How would that stay neat and upright?
Fun concept, but I think unfeasible at this scale. If not physically, then economically as it would also be hugely expensive with that many large pieces. Perhaps I'm wrong, but there can't be that many people interested in actually purchasing it."
Those are all fair questions, I respect them!
I am not able to afford much Lego at the moment, so I was not able to test build it in real life, haha! The cables bending was a concern of mine too. But the BDP team didn't have any issues with it as far as I was aware. I think if it were chosen a small cross beam or two could be added. I'm sure they'd find a way to save parts in other places of the design to equal the needed pieces out.
As for the price, I usually go by the metric of "100 pieces = $10, then subtract $20 from the total." Yes there are a lot of big pieces, but there are also a lot of small pieces (lots of technic pins). So I don't think it would be any more expensive than any other model at its piece count. I could be mistaken, though.