Review: 21307 Caterham Seven 620R
Posted by DrDaveWatford,
As reported here the latest LEGO Ideas offering, 21307 Caterham 7 620R, was unveiled to the LEGO and non-LEGO press a couple of weeks ago. I attended the launch event and was therefore able to finally cast my eyes over the set for the first time. My initial impressions were positive, but final judgment could not be made until I had had the opportunity to build it for myself. I am therefore delighted to now bring you my review of the set which you will find after the break.
Box & Contents
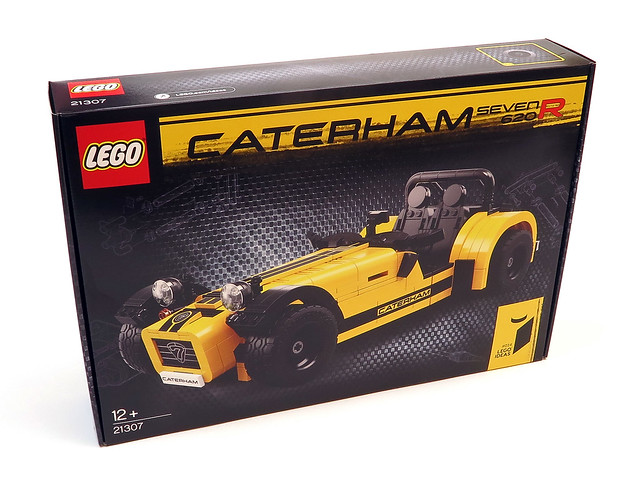
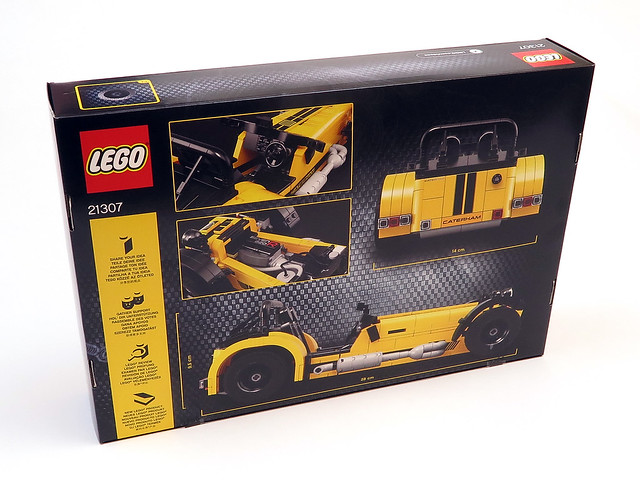
The box is an elegant affair which brings to mind the LEGO Architecture theme. The front (above) is dominated by an image of the completed build against a background printed to look like carbon fibre. The LEGO Ideas logo is prominent bottom right and the set name across the top is streaked with what are supposed to look like tyre tracks. The back of the box (below) offers a number of different views of the model together with its dimensions as well as highlighting some features of interest.
The outside of the box is not the only thing reminiscent of the Architecture theme - as was the case for the Buckingham Palace set that I reviewed on Brickset a couple of weeks ago the box is opened by flipping it over, cutting a couple of tape seals and lifting the front cover. Box contents include six bags of elements numbered with a ‘1’, a ‘2’ or a ‘3’ and a compact but weighty perfect-bound 180-page booklet. The inside cover of the booklet features an exploded view of the final model which highlights a number of notable features, after which there are a few pages of background information about the real Caterham Seven car including a couple of photographs, followed by the building instructions. At the back of the booklet you will find brief interviews with Carl Greatrix, who submitted the original Caterham Seven design to the LEGO Ideas platform, and Henrik Andersen, who turned Carl’s design into an official set. There is also a two-page inventory of parts and a couple of pages of advertising for the LEGO Ideas platform, with a LEGO Ideas-themed product survey bringing up the rear.
The Build
The build is broken into three stages. Stage 1 begins with the assembly of a quartet of red axle stands, after which attention shifts to the car itself, specifically the chassis and rear axle assembly. We were told at the media launch that no new elements had been made for this set, but it does nevertheless include a host of elements which have not appeared in any other sets to date and which are therefore presumably earmarked for as-yet unreleased new sets. These elements begin to make an appearance during construction of the car’s rear axle assembly, starting with what will presumably be called a ‘modified 2 x 4 plate with pin holes’ once the Bricklink folks add it to their catalogue; it basically looks like an extended modified 2 x 2 plate with pin holes. In addition to previously unseen elements, the set also includes numerous printed elements, with the first of these to be encountered during the build being a black 3 x 3 disc printed with a realistic brake disc pattern. Other elements of note appearing during this stage of the build include black 2 x 3 tiles which I had not seen before, and fourteen yellow 1 x 6 x 3 1/3 brick arch with curved top which have previously appeared in just one set - 5767 Cool Cruiser - although neither Bricklink nor Brick Owl recognise the 7-digit element I.D. printed in the instruction booklet so it may be a new mould. The yellow brick arches form the rear wheel arches of the Caterham, and there is clever use of modified 1 x 1 plates with clip light to anchor them at their highest point; use of this element for SNOT building is a well-recognised technique in AFOL circles but it is not generally seen in official sets.

Following assembly of the rear wheel arches focus shifts to the cockpit and engine compartment. A dark bluish grey 1L bar with towball, which has only previously appeared in a single set in this colour, is used to represent the gear stick; it is mounted on a dark bluish grey 1 x 2 hinge top which has never previously appeared in this colour. A black bar holder with handle is used to represent the hand brake and has only previously appeared in six sets, while three Battle Droid arms represent the pedals. A light bluish grey round 2 x 2 tile with open stud forms the top of the oil tank and is new in this colour, while a glow in the dark unprinted minifigure head is pressed into service as the coolant reservoir and is topped off with a black 1 x 1 round tile which has only previously appeared in five sets in this colour.

Stage 2 of the build kicks off with construction of the 620R’s supercharged 2.0-litre Ford Duratec engine. There is ingenious use of dark bluish grey pistols to represent exhaust headpipes, and the engine is topped off with a printed black 1 x 4 tile as you can see in the photograph below. In addition to the engine itself there is some nice detailing within the engine compartment, including the use of a light bluish grey 12L pneumatic hose previously seen in just a single Education set from 2008. This hose runs from the front of the car to the air box at the back of the engine compartment. With the contents of the engine compartment complete attention switches back to the cockpit. A couple of yellow 2 x 5 x 1 1/3 brackets, previously not available in this colour, form part of the floor, and a transmission tunnel is fashioned from a black modified 2 x 4 brick with curved top which has only previously appeared in six sets and has not been seen since its inclusion in 10194 Emerald Night back in 2009. Two racing seats are then constructed and installed on either side of the transmission tunnel. The sills, which run along either side of the body, are next to be built. These incorporate a couple of printed elements – a 1 x 2 yellow brick printed with a black diagonal pattern and a black 1 x 6 brick which carries the Caterham name – as well as a pair of yellow 65 degree 2 x 1 x 2 slopes which have only previously appeared in three sets. The car’s characteristic tapered body shape is recreated via the use of pairs of hinge plates which provide the necessary angles.
The rather impressive side-mounted exhaust system is next to be built. It is a veritable cornucopia of rare elements, including the first ever appearance in light bluish grey of a round 2 x 2 tile with hole, a round 1L Technic pin connector, and a round 2 x 2 dome bottom brick with studs. The exhaust system emerges from the engine compartment via four 1 x 1 90 degree round elbow bricks which are also new in light bluish grey and which somewhat bizarrely attach to the rest of the exhaust system via a pair of lipstick elements more commonly found in Friends sets. The open end of the exhaust system is held in place by a black modified 1 x 1 plate rounded with handle previously only found in three sets. The front wheel arches are constructed next, utilising more of the 1 x 6 x 3 1/3 brick arches that were used for the rear wheel arches but this time in black. Headlights and indicators are then attached at the front, at which point Stage 2 is done.

Stage 3 of the build begins with construction of the 620R’s detachable nose. This incorporates four blue 1 x 2 - 1 x 2 brackets which have never been seen in this colour before, and it is decorated with a host of printed elements which are unique to the set including an elegant radiator grille featuring the Caterham Seven logo printed on a black 2 x 4 tile. With the nose completed it is time to build the bonnet, or hood if you are from the U.S.. This incorporates a pair of yellow 1 x 4 plates with two studs and a couple of yellow 2 x 3 tiles, neither of which have previously appeared in a set in this colour. Once again the characteristic taper is achieved via the use of hinge plates. Similar to the nose the top of the bonnet is embellished with a number of unique printed elements, in this case yellow 1 x 8 and 2 x 4 tiles with a black print, which help to make it look faithful to the real car.
Next it’s on to the dashboard. This features three printed flat silver dials and a steering wheel only previously included in 10 sets. Ingeniously, the rear view mirror is mounted on the dash using a minifigure machine gun. The dashboard attaches to the rest of the car via a 2L notched axle connected to a 1 x 2 hinge cylinder. This attachment is not particularly secure – the dashboard fell off a couple of times when I accidentally touched it – so handle with care…. The 1 x 1 90 degree round elbow bricks seen earlier in the exhaust system now make a further appearance, this time in black, as part of the roll bar which attaches just behind the seats. Then it is finally time to attach the wheels; the black rims can be found in numerous sets, but the 49.5 x 20mm tyres are less common, having only previously appeared in a total of seven sets. The back of the car is next to be built; like the nose and bonnet this section features a number of unique printed elements including a black 1 x 1 round tile printed with a fuel filler cap pattern. Last to be assembled is a cover for the boot/trunk which incorporates a number of black 2 x 2 corner tiles only previously seen in four sets, after which we’re done.

The Verdict
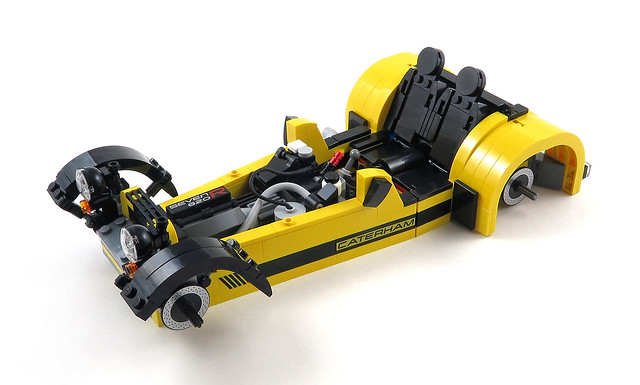
I have found the LEGO Ideas theme to be a bit hit and miss to be honest, which I suppose is inevitable given the diversity of the 14 Ideas offerings which have been released since 2010. I am really impressed with this set though. It is an excellent representation of the real car, with the general shape and feel accurately captured, and it is furthermore absolutely dripping with lovingly recreated details such as the contents of the engine bay, the exhaust system and the interior of the cockpit, not to mention the use of a large number of new printed elements rather than stickers. The attention to detail is such that the printed brake discs are not even visible unless you remove the wheels – that’s fan service for you. The model does not just look great either – I thought it was a really enjoyable build, with many examples of ingenious use of elements in evidence and a host of clever building techniques to enjoy and learn from along the way. The absence of steering, which was included in Carl Greatrix’ original Ideas submission but which was omitted from the final design for the sake of stability, is a shame and will bitterly disappoint some prospective purchasers, and the attachment of the dashboard is a bit temperamental, but apart from that it is hard to find anything much to complain about – this is an excellent set.

Set 21307 Caterham Seven 620R contains 771 elements and will be available from the 1st of October. At the media launch we were informed that the set would cost £69.99 in the UK, with folks in the US and mainland Europe paying US$79.99 and €79.99 respectively. Many thanks to the LEGO AFOL Relations & Programs Team for providing Brickset with a copy of the set. All opinions expressed in this review are my own.
52 likes
22 comments on this article
This model is stunning!! Expensive, but it seems worth it. The detail level is mind blowing.
1st October to do list:
1) buy Lego 21307 Caterham Seven 620R
2) build Lego 21307 Caterham Seven 620R
3) move around the room repeatedly looking at Lego 21307 Caterham Seven 620R from different angles
4) go to bed a happy man
It looks great. Perhaps there will be a Caterham in the Speed Champions series now?
I can't wait to get it with my set collection and with the new Death Star and Winter Holiday Train :) :)
I'm just hoping to get this on the 3rd October so I can get the free London bus as well. Looks like a great set.
No stickers? That's awesome! Love it even more now.
This is a good one, isn't it? Just as my interest in acquiring more Lego was waning a bit, they bring out something like this.
Must buy. London bus + 10€ discount on LEGO.com. Happy days
Incredibly ugly car, but seems like a neat set.
It's a nice set, but I would've preferred the original green color scheme.
Awesome. I'd probably get it if it weren't for all those modulars left to buy...
I wonder how much those elbow bricks will cost me on BrickLink.
How does it look next to the Mini Cooper or F40?
Glad they have the steering mounted on the correct side of the car.
Will be buying this during the next double VIP points offer.
One day I will buy it.
But I have to complete the speed champions collection first.
And thanks for the excellent review.
How big is this build when compared to the Creator vehicles, like the Mini Cooper or the VW Beetle?
"How big is this build when compared to the Creator vehicles, like the Mini Cooper or the VW Beetle?"
The Caterham (28 cm long) is almost the same length as the Beetle (29 cm long) and longer than the Mini Cooper (25 cm long).
There's a good review here of the Caterham Seven including two easy fixes for a few of the set's issues:
http://thebrickblogger.com/2016/09/lego-ideas-caterham-review-thoughts-fixes/
I am definitely going to buy this set, and include those fixes as well! :-)
Good but not as good as the original and way overpriced. This is a £49.99 set at the most. Wait for a 30% sale.
Having had the pleasure of rebuilding the front wheels when they did turn I can totally see why they were removed from this version (although I understand that Carl had improved the stability somewhat after that). This is a beautiful model and right at the top of my must-get list and the reviews just get me more excited about the build and displaying the model afterwards. Can't wait.
Nice review. I'll definitely buy this.
But 2x3 tiles! Whoop! :-)
as long as there are enough idiots willing to pay so much money for a kids toy TLG will not care about the few NZ customers...
I bought this (it's great!) but I think there's a mistake. The base of the dashboard uses two 1 x 5 Technic plates (32124) but the gap between the dash and the bonnet is too large; larger than the pictures on the box, for example. I removed one of the plates and it sits perfectly now.