BDP9: A Teahouse in the Japanese Sea
Posted by Huw,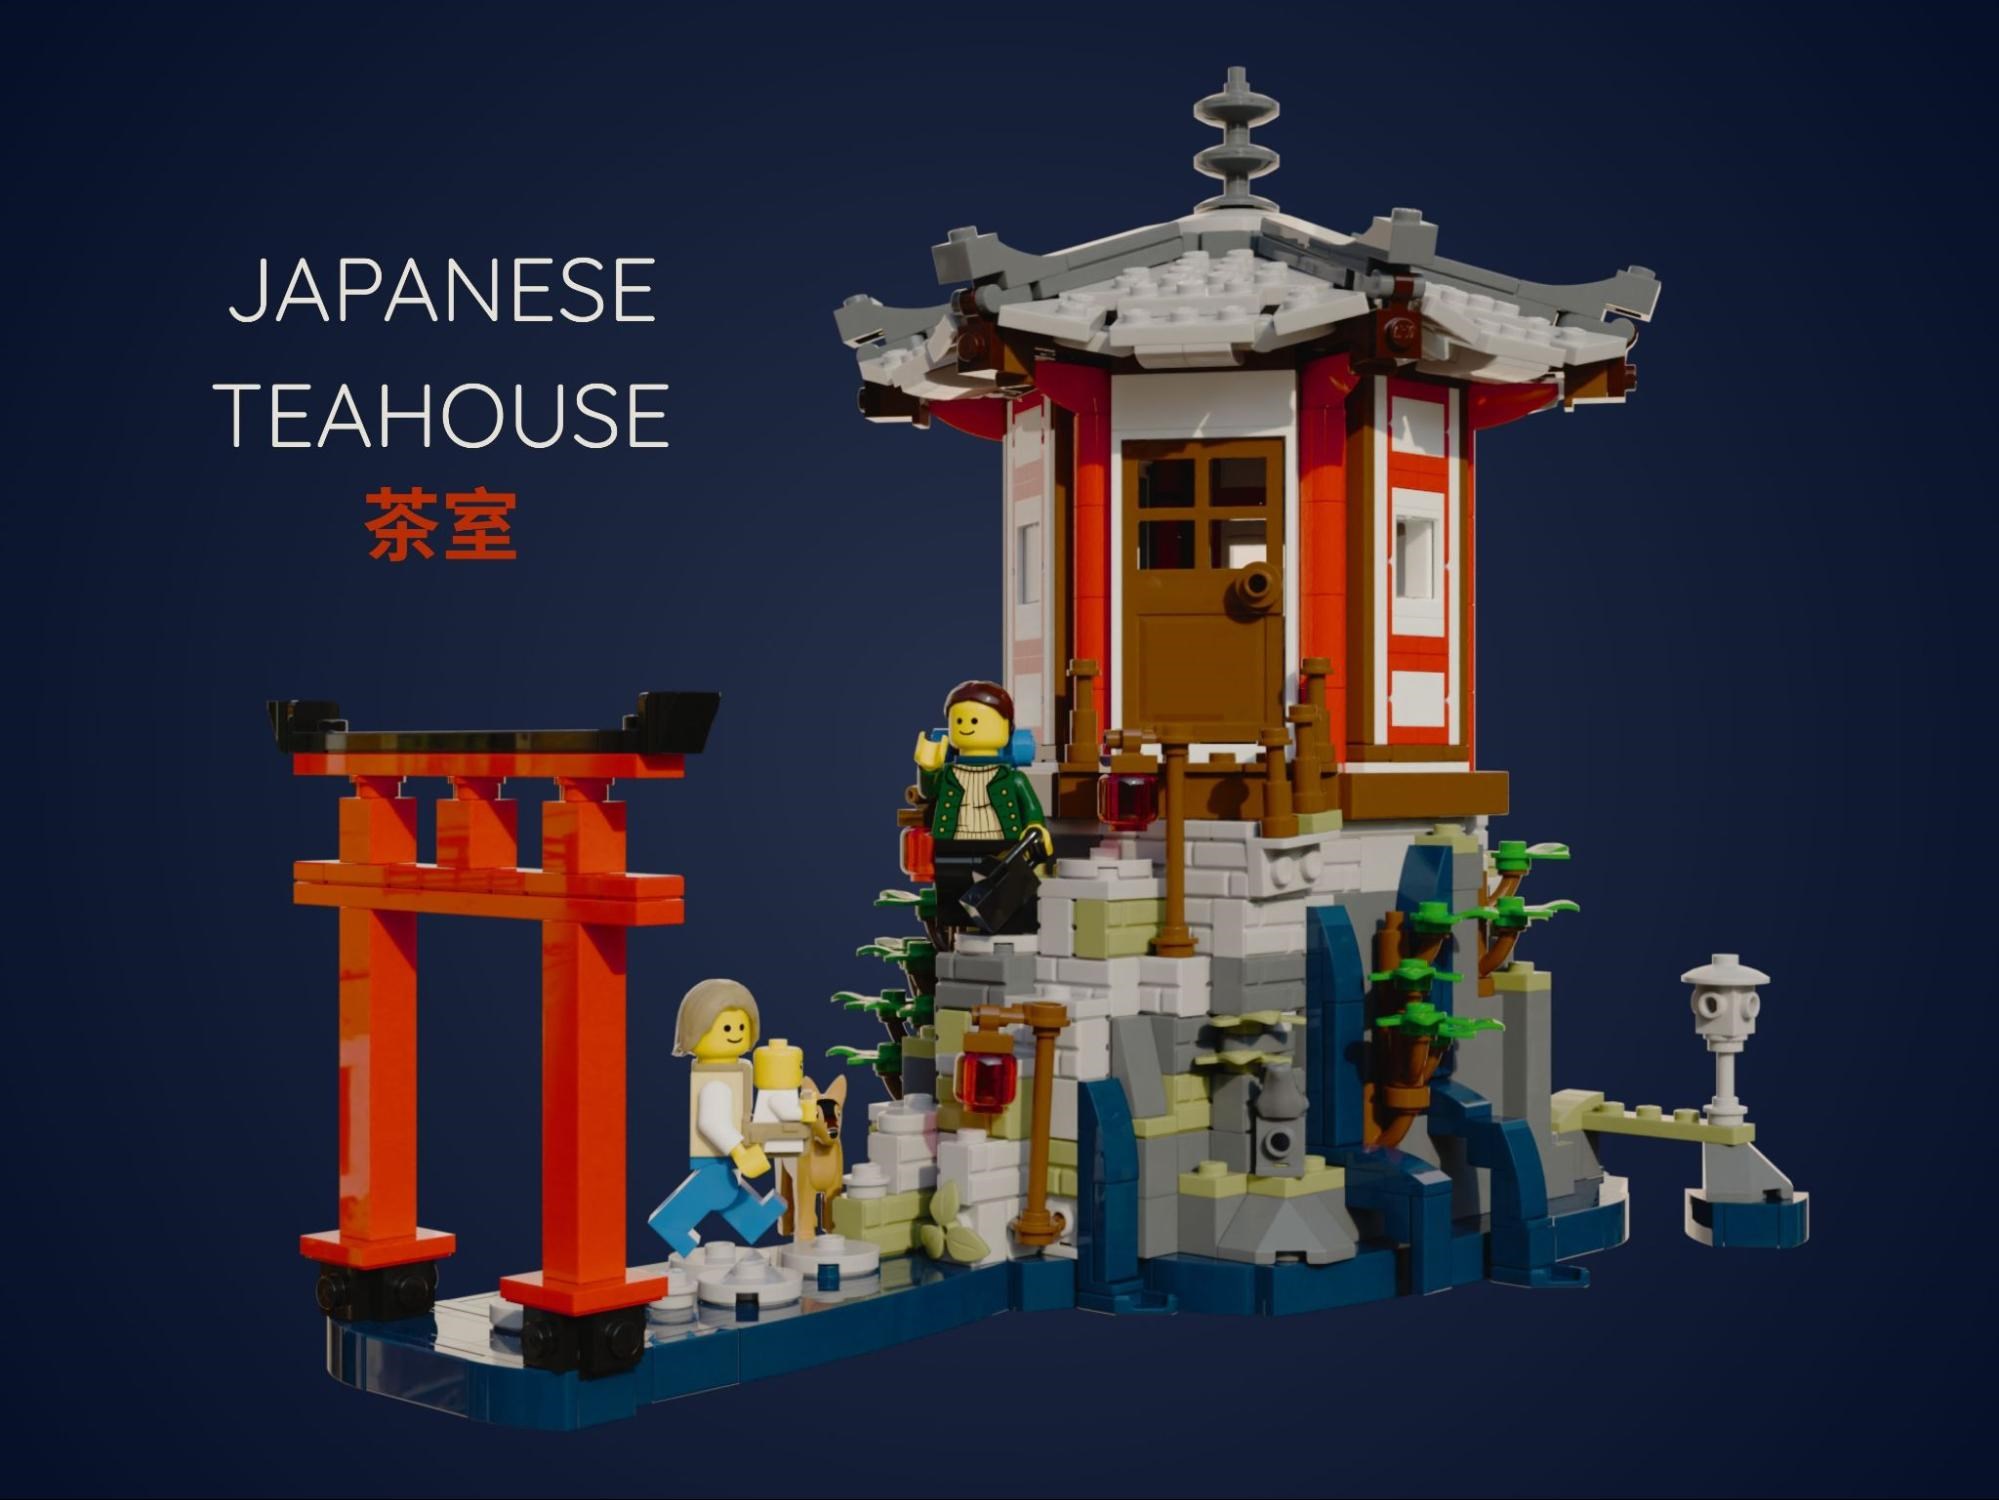
Hello readers! I’m Pau and I have been building MOCs for about a decade. The wonderful folks at Brickset have allowed me to write a couple of articles through the years. Two about modular buildings (1 | 2) and one about my (admittedly failed) Bricklink Designer Program model based on the Ishtar Gate. The articles have been very positively received so far, so here is another one about my latest model for the Bricklink Designer Program, the Japanese Teahouse!
After completing many larger builds in recent times, I wanted to challenge myself to design something compact with a lot of character and a reasonable piece count (and therefore, price!). As I’m sure many fellow MOC builders, I have lots of started and abandoned projects. This one started when Lego released 80107 Spring Lantern Festival in 2021. The technique for the hexagonal open air shrine using the Technic rotor piece was particularly inspiring. I wanted to build a similar structure, but fully enclosed. Not long after starting, I felt an itch to do a new modular using similarly funky techniques (which resulted in the Florentine Palazzo, which I have free instructions for if you want to build it). Therefore, the project sat abandoned for about three years, until about six months ago when I decided to pick it back up again with a revised plan in mind.
That’s when I usually go into deep research mode. This time, the model was not a direct interpretation of something real, but an amalgamation of a series of real temples and teahouses, allowing me extra freedom to manoeuvre.
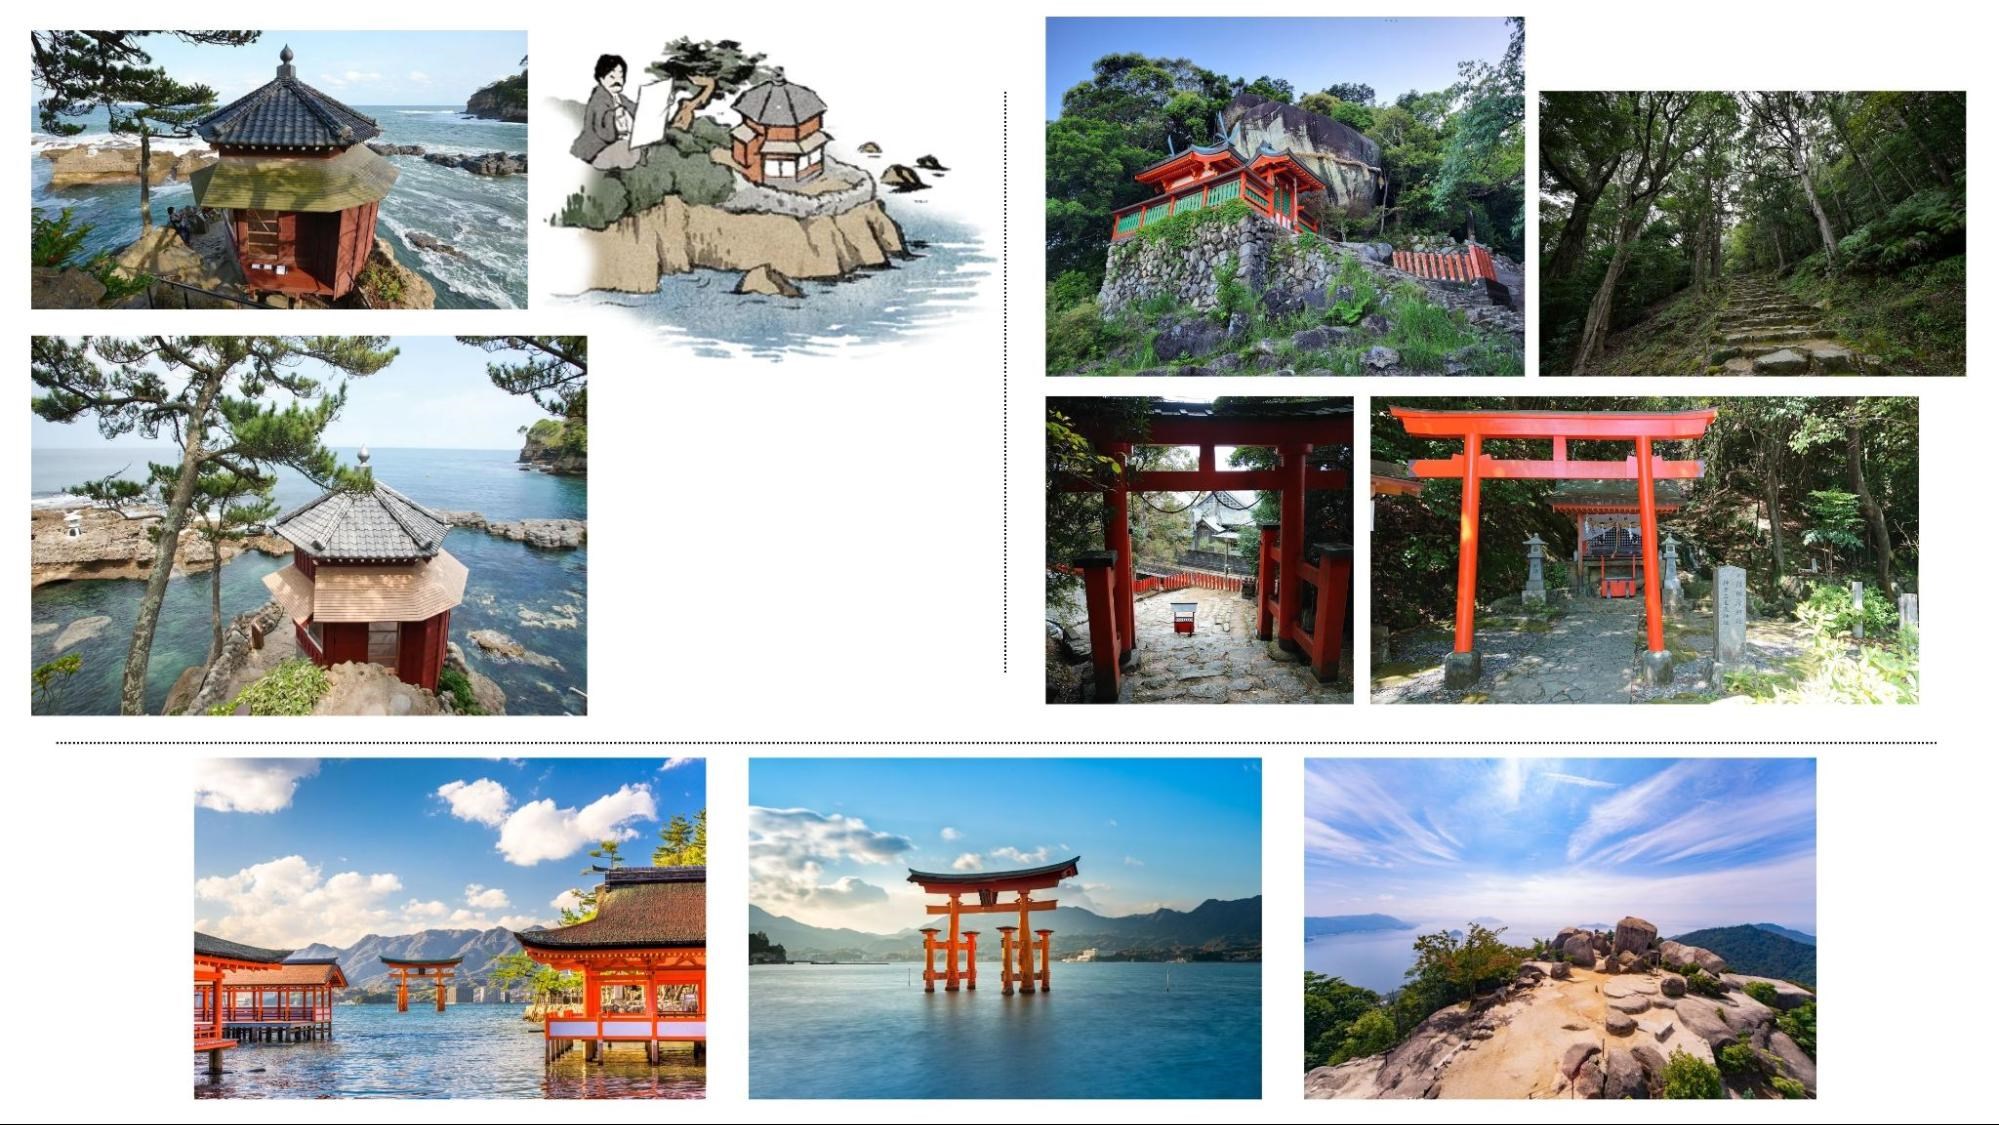
The main inspirations for this model were the Rokkakudo Hall in northern Ibaraki Prefecture near Iwaki, a gorgeous little hexagonal building structure perched on top of a rock (top left); Kamikura-jinja shrine in Wakayama Prefecture, located at the foot of a large rock (top right) and the famous Itsukushima Shrine, in the island of Itsukushima, near Hiroshima, famous for its Torii gate in the middle of the sea (bottom).
Starting the model
As already stated, the model did not start from scratch. Because I was basing myself off the temple in the Spring Lantern Festival, the proportions and overall scale were set from the start. It was clear that I wanted to place the temple in a stunning location. With a bit of trial and error, I came to the solution adopted, by mixing the three temples previously mentioned into a single model. The torii in the sea from Itsukushima, the building on top of a rock surrounded by the sea from Rokkakudo and the pathway up the mountain from Kamijura-jinja.
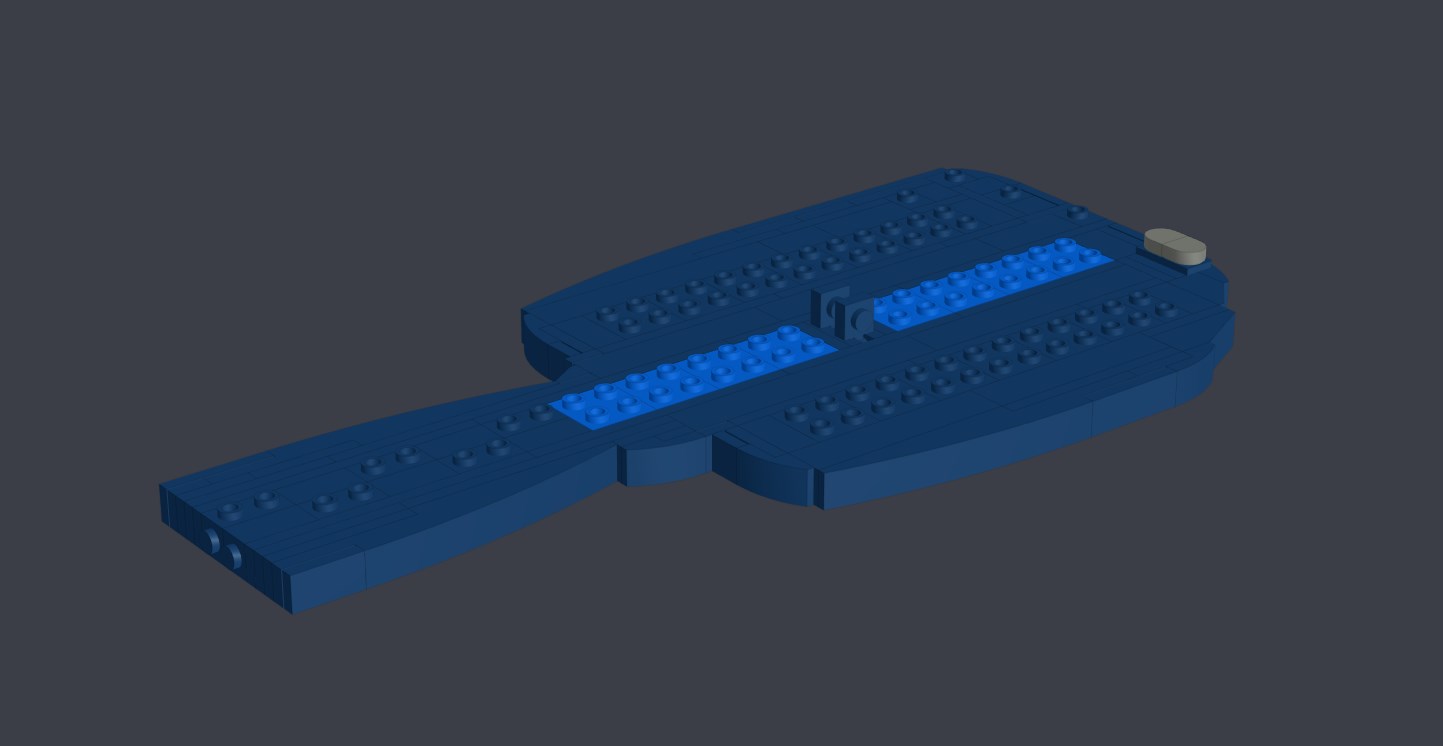
I wanted the model to have a certain sleekness, hence why I decided to make the sea monochrome and use SNOT from a central core. A fully studless look for the sea around the model meant reversing the alignment of the central core under the mountain, using perhaps the most rudimentary of techniques to achieve it, a pair of lamp holder parts on their side. It is also fairly easy to add more SNOT bricks to go back to a studded finish to attach detail such as the skipping stones using this technique.
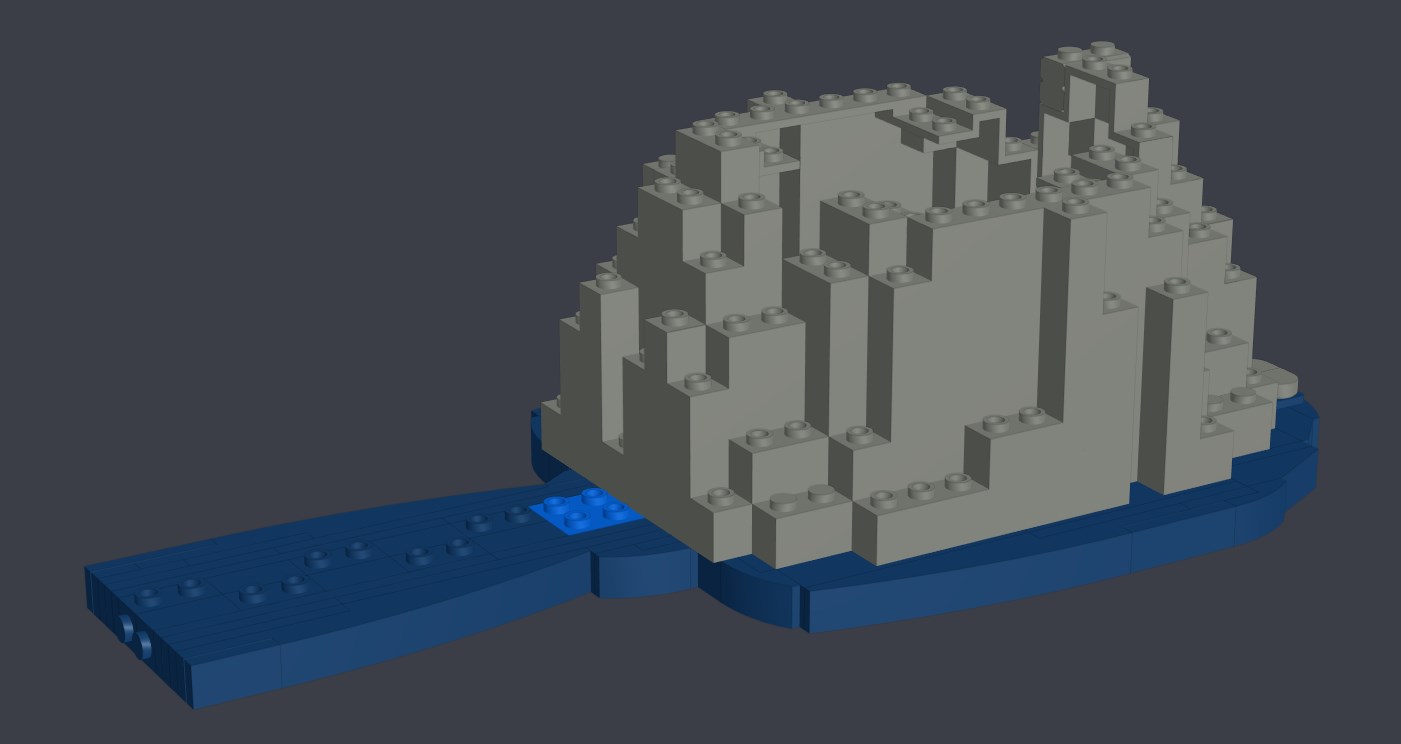
I know LURPs get a lot of hate, but there aren’t many ways of building mountains that are as structurally sound and piece-efficient. I think they make a wonderful base to then fill to the brim with detail. I wanted to keep the piece count under a thousand pieces, so being efficient where necessary was key.
The next step was placing the footprint of the temple in the mountain. I wanted to have a relatively small island, so the temple would extend over retaining stone walls built on the cliffside, similar to what happens in the Kamijura-jinja shrine.
Once the structural elements of the base were set, I moved to the focal point of the build: the teahouse.
The Teahouse
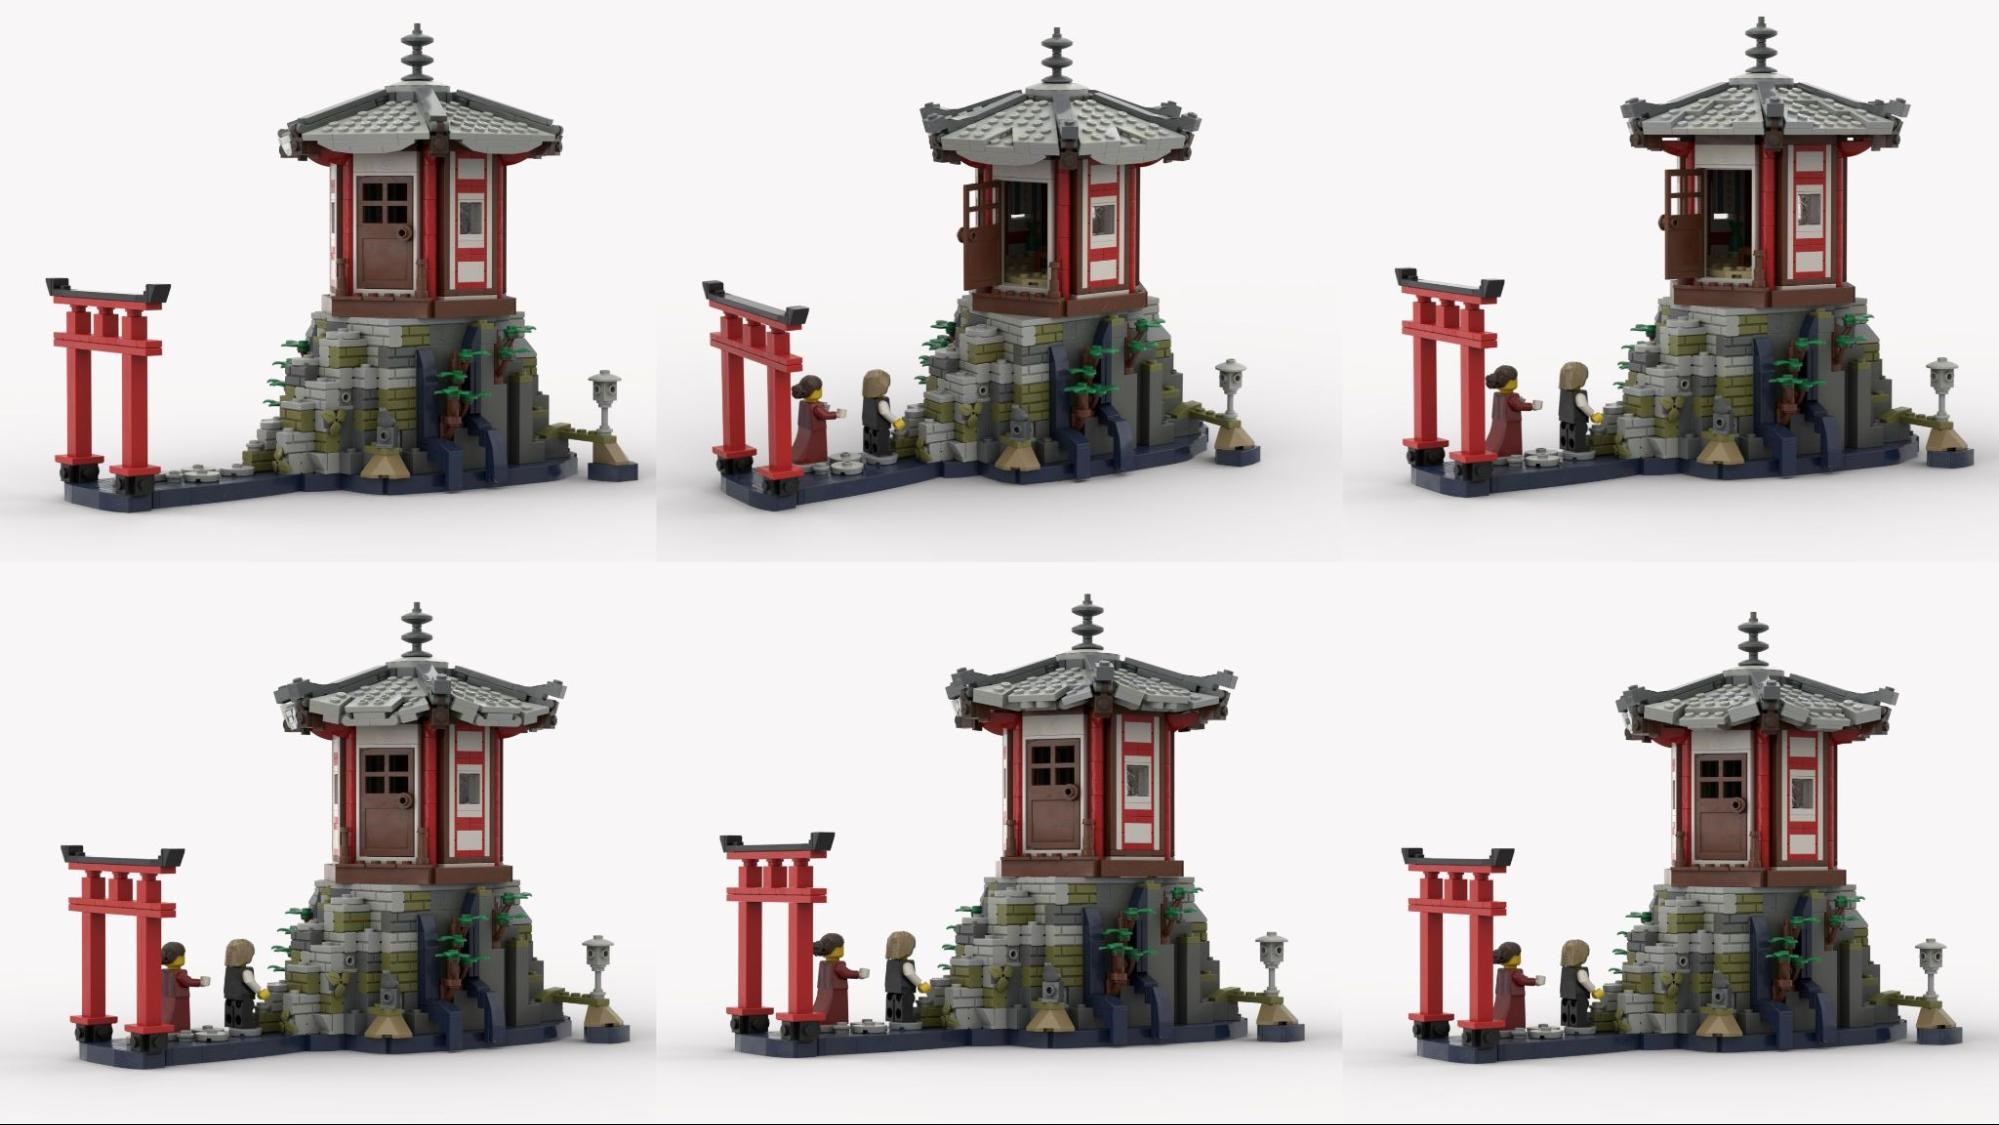
Starting from the hexagonal base, the first thing I had to figure out is how to attach it on the base. Using this set-up, only opposing sides are actually in-system, forcing the connection to be done at these points. The relatively weak connection does have the benefit of being fully removable.
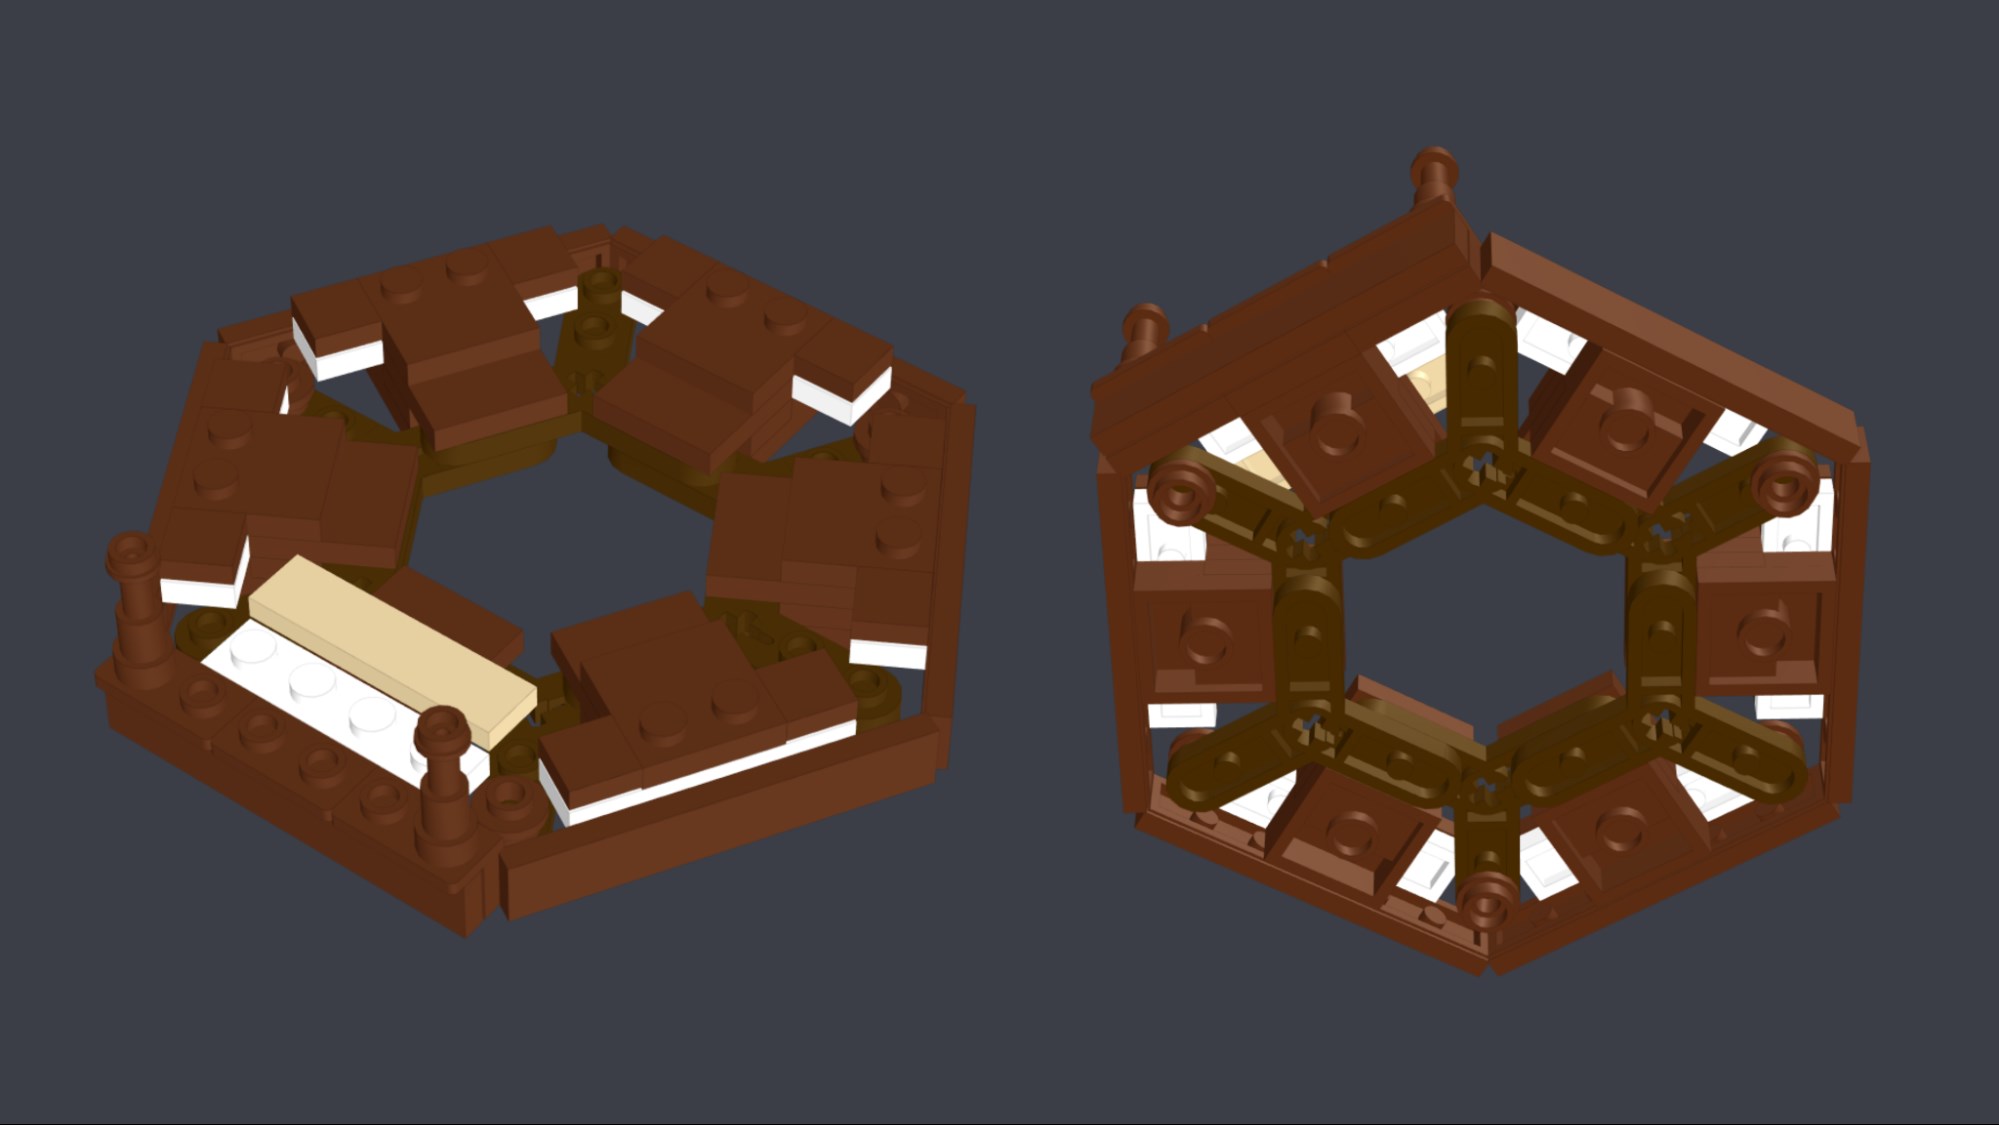
The columns of the building sitting in the points of the base is quite a natural solution, and identical to what the designers did in the Spring Festival set. The columns have one of my favourite NPU of the build with Bionicle tooth pieces as beams holding the roof, capping the columns. Between the columns, the walls slot just in place. These walls are attached from the straight sides of the hexagonal core. In order to leave minimal gaps, the wall is built using brackets, which (beside creating a very fitting painted wood beam look) allow it to sit flush to the columns.
The internal structure of the roof is very similar to the whole building, using the same Technic rotor core. In the case of the roof, the columns become the hip of the roof, in dark grey; and the walls, the main roof, in light grey.
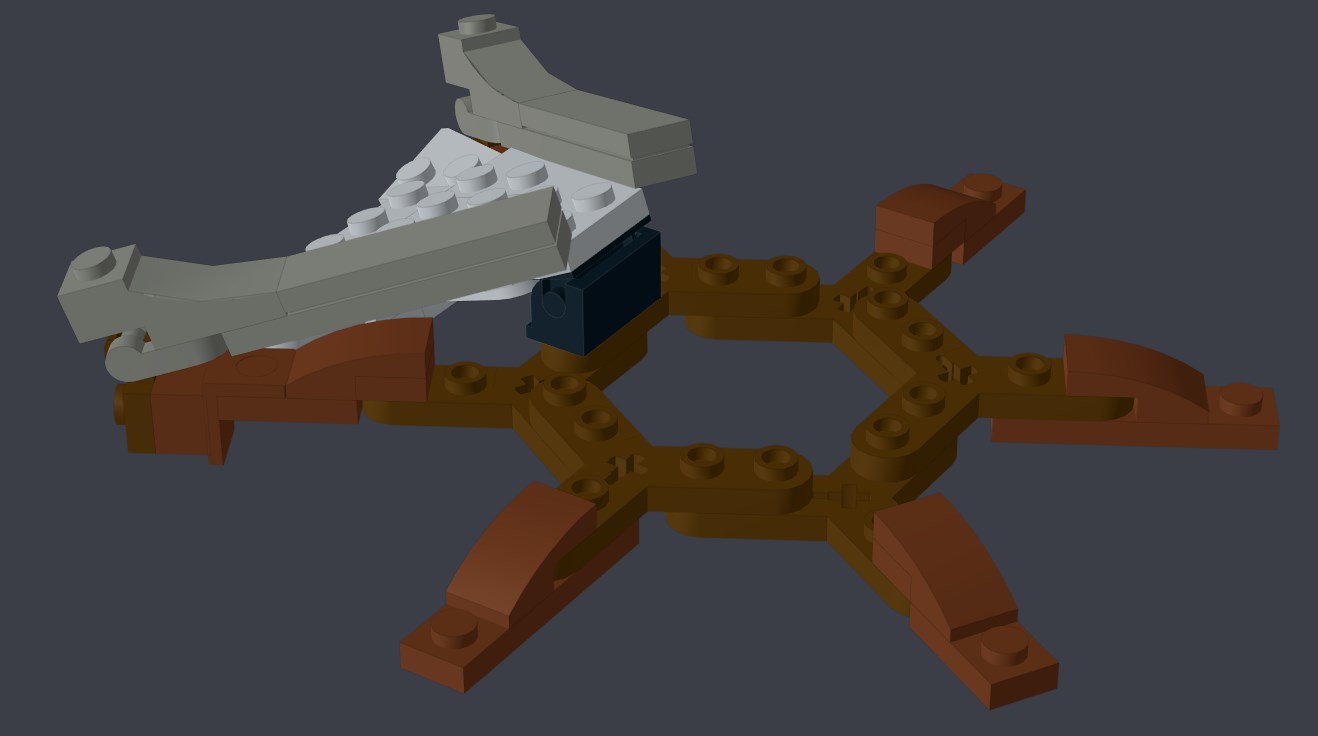
The weirdest technique of the whole build is the one between the structural core of the roof and the central spire, using the spanner piece to suspend the subassembly in mid air. I had to do it this way because the panels of the roof itself got in the way if I did it on the upper part of the hexagonal core.
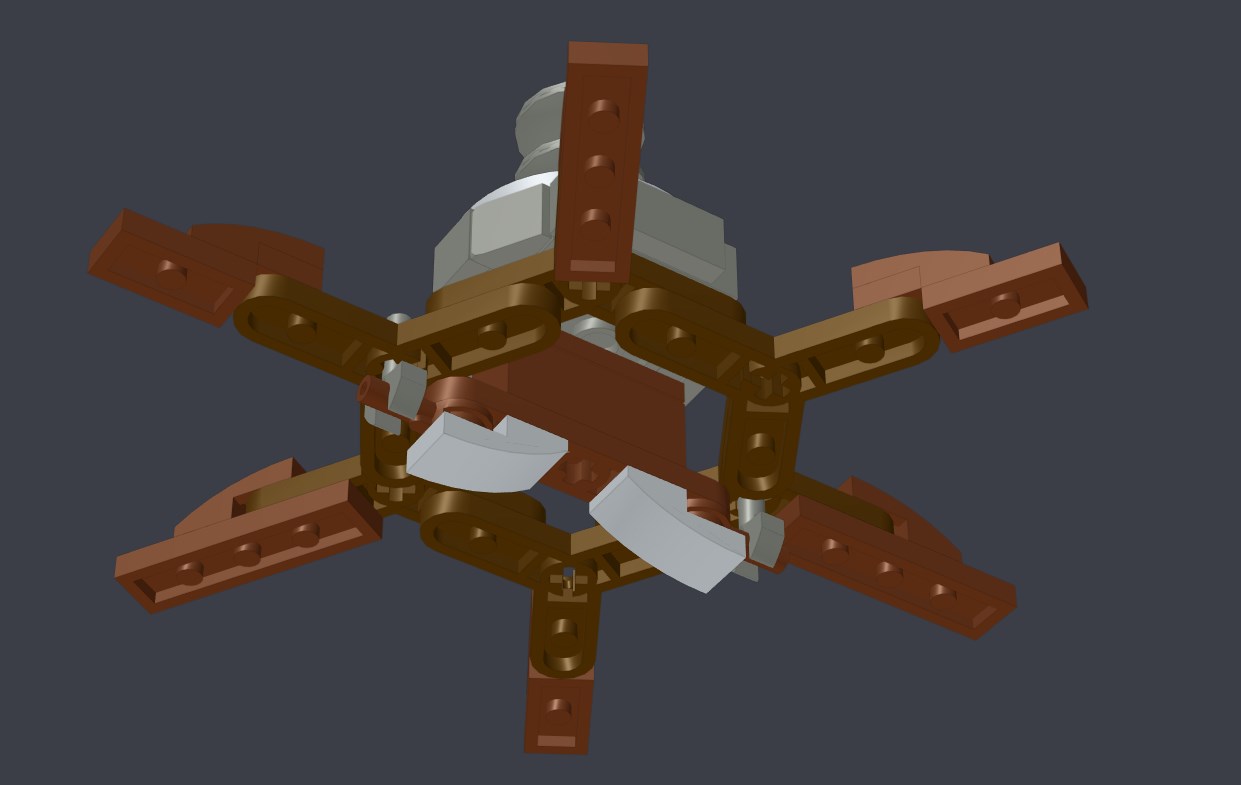
The roof was the part of the whole model that saw the biggest iteration. As you can probably imagine, getting all the internal attachments done without collisions between them was very tricky. But besides technical challenges, I also changed the visual appearance of the roof many times. At first, I went for a simpler approach, leaving the edge as a straight line. I even went as far as rendering it in that state, and that’s precisely when I realised it was not conveying the character of the building well. I then spent months building variants of all kinds until I finally settled on the one you see, which was both curvy and gapless enough. You’ll have to tell me if I made the right choice!
The Landscape
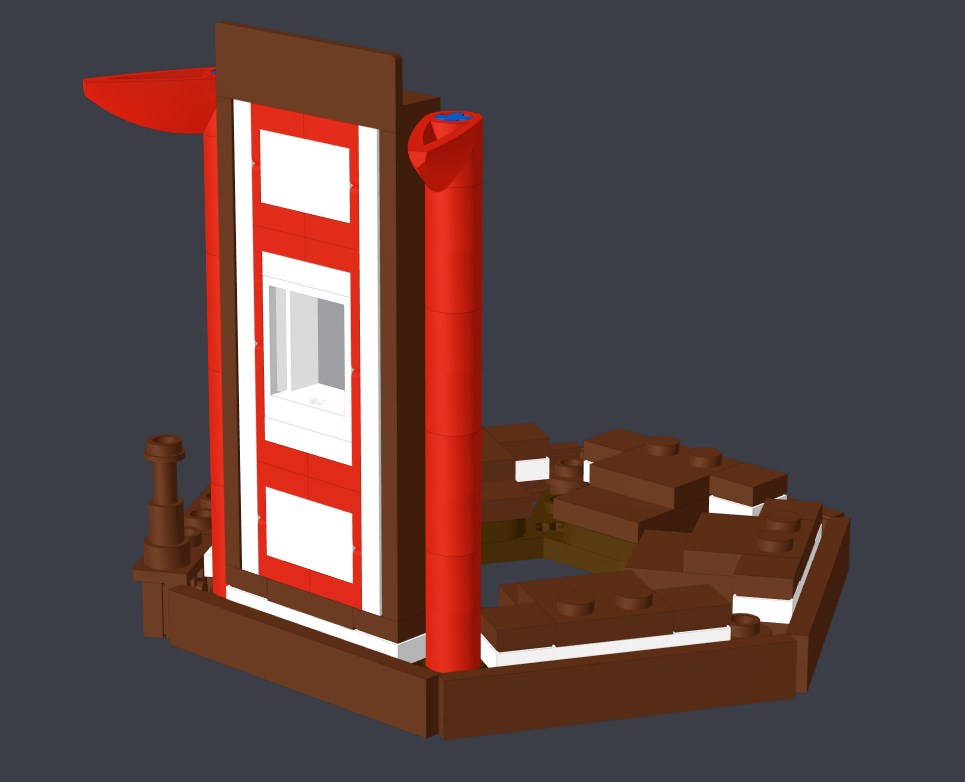
In parallel to advancing the building, I carried on work on the island. Whenever I got frustrated with how to build the little temple, I relaxed for a bit by landscaping the island and adding fun easter eggs around. The torii greets visitors to this former shrine. The build for the torii is comparatively simple. The key here was to get the proportions right and to not overdo it. For instance the top part had a lot of iteration, but I ended up settling for a simple bracket and a cheese slope, as that suggested the shaping very elegantly. At one point I did consider adding the four extra masts the one in Itsukushima has, but felt it would take too much protagonism away from the temple and the main island.
As for the island, I mostly kept a rule of dark grey for natural rock and light grey for manmade walls and moss in olive green sprinkled around to create a harmonious effect. Taller trees, bushes and natural water springs keep alternating around the model to create a varied look.
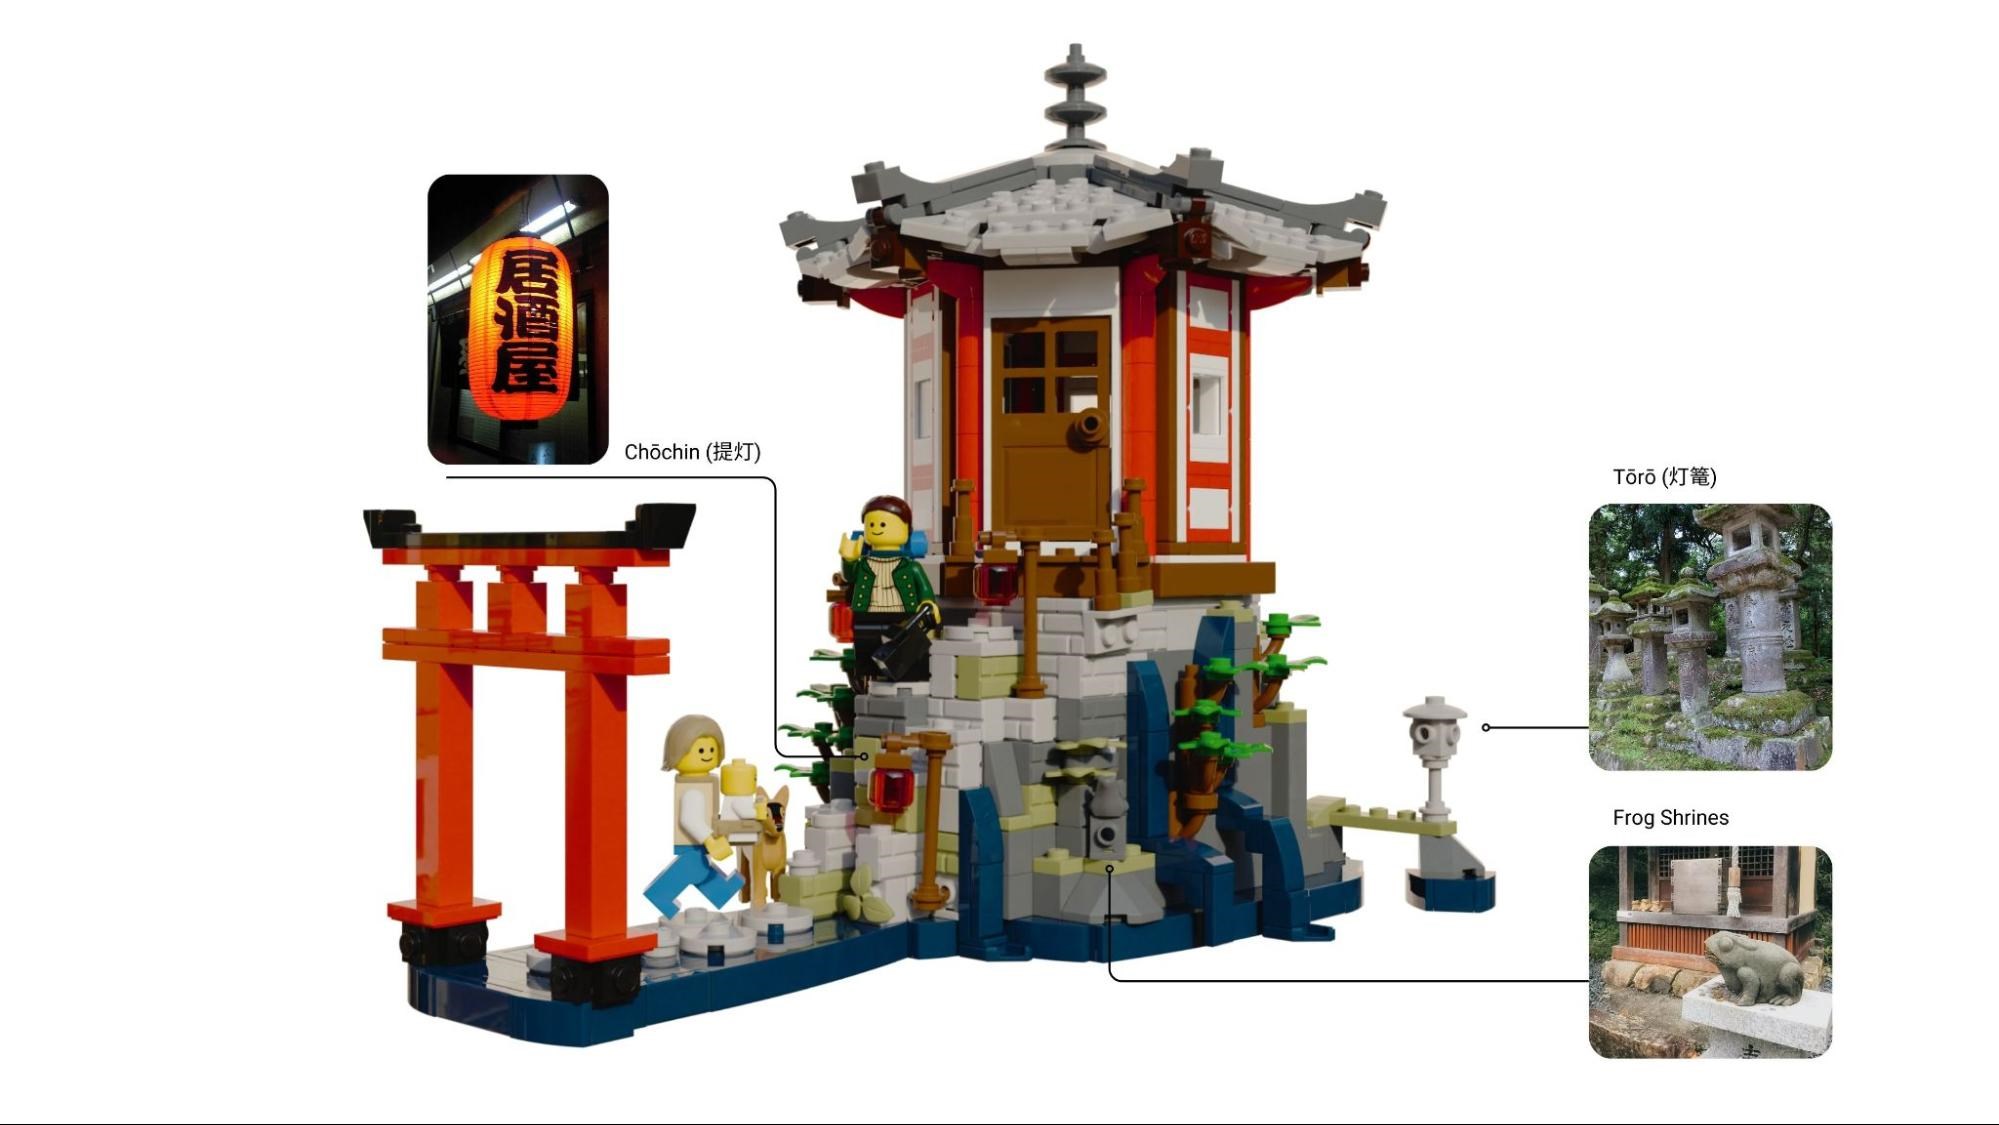
There are also a few fun easter eggs around. Little frog shrines hide in the rockface. These are surprisingly common. A little peek behind the model will unveil a sign reading ????? “be careful!”, because kappas, a turtle-shaped mythical creature might be roaming around! I must admit I made the graphic design for my Lego-ised kappa way too cute. Around the back there are also a few lotus flowers, symbols of purity. A particularly nerdy easter egg is that around the model there are two kinds of traditional lighting fixtures: toro (??), the stone lantern, in this case a kasuga-doro (????), sitting on top of a rock in a little side island; and chochin (??), the red paper lights, which are lighting the main steps.

The Tearoom
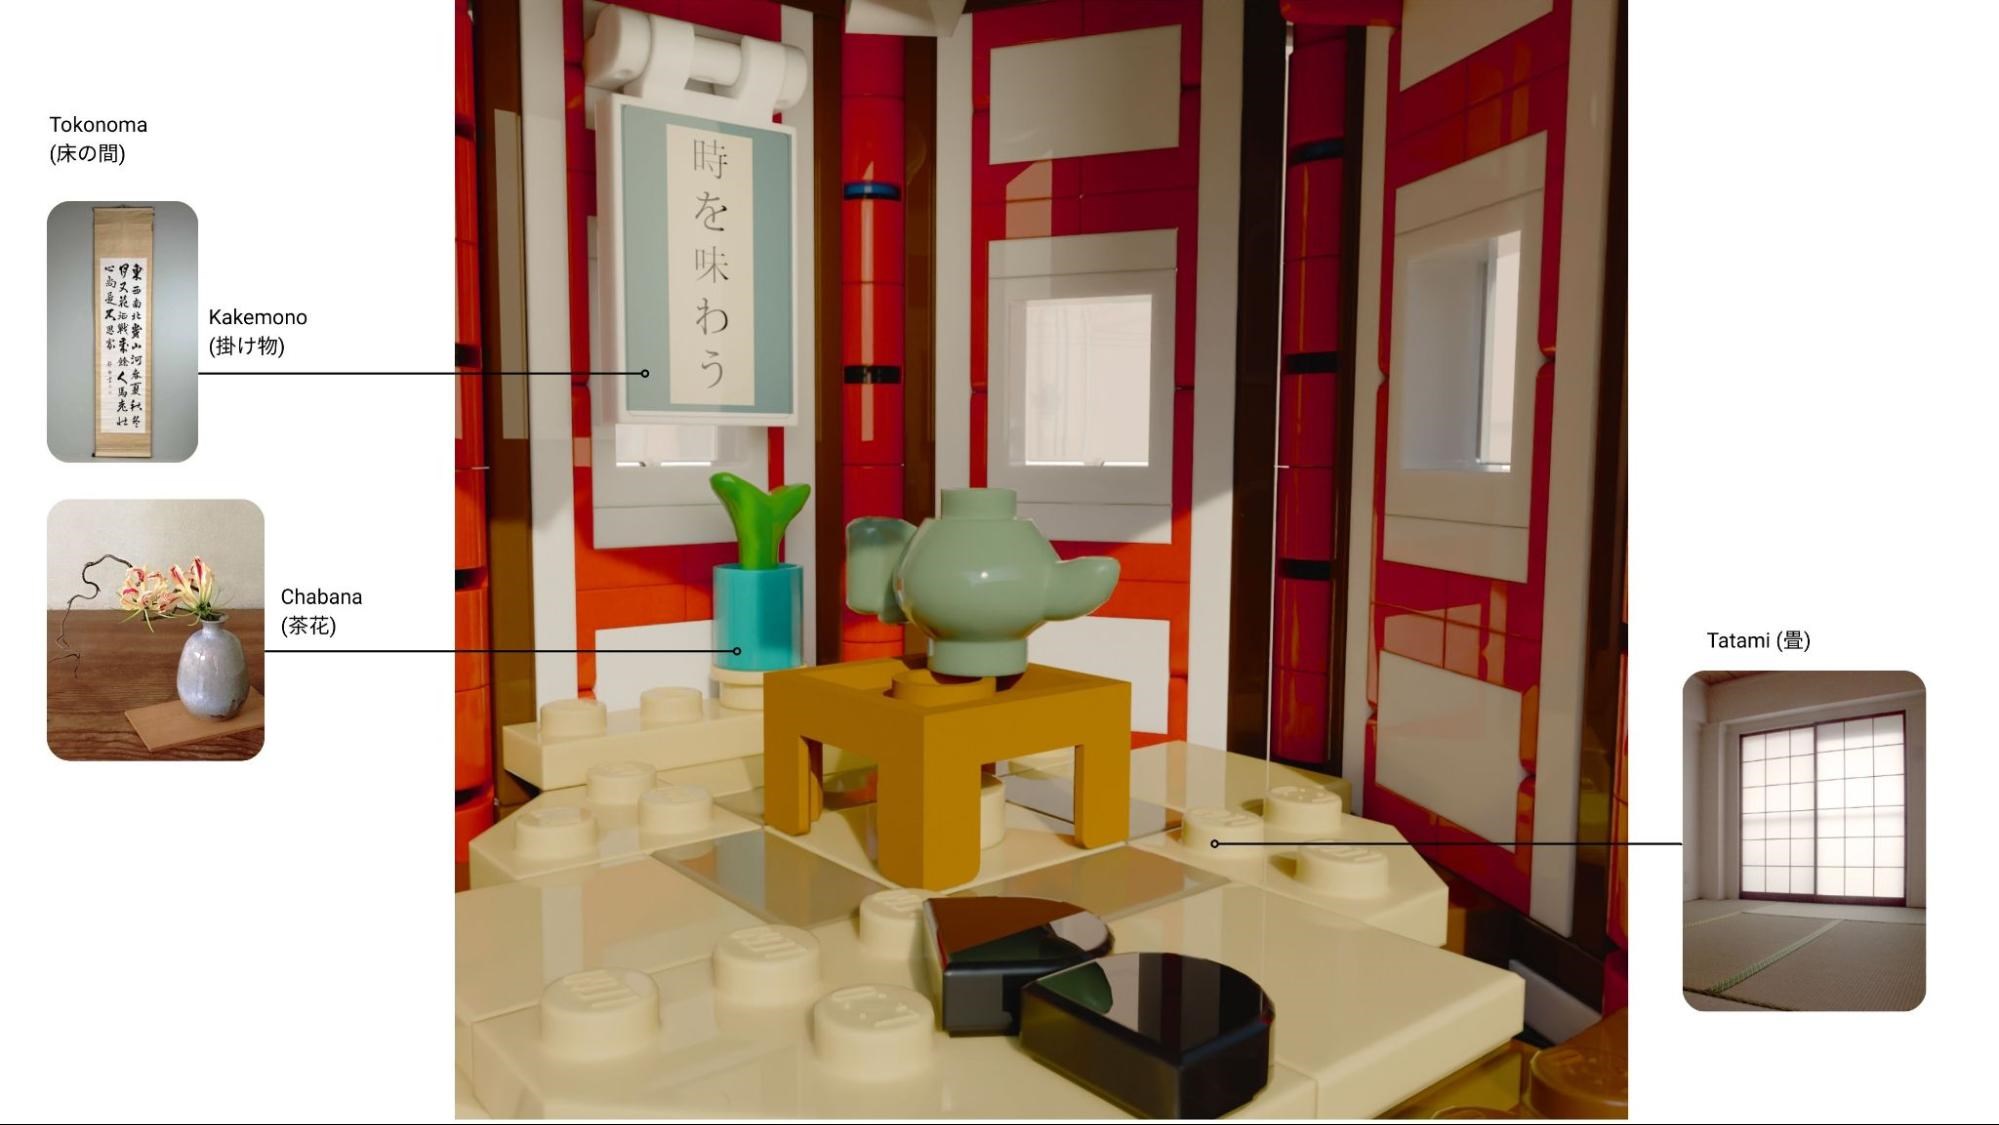
The walls of the model are also removable, allowing full access to the interior. The chashitsu or tea room is the space specifically designed for the tea ceremony. Its elements and their respective positioning are carefully crafted. In the centre of the room, there is a low table. That is because tea is drunk whilst kneeling on the tatami floors, here represented with tan and dark tan tiles. Presiding the room, there is the tokonoma, the alcove, with a hanging scroll or kakemono, which translates to “enjoy the time”. Right under the scroll there is a vase of tea flowers, or chabana.
And that’s it! I hope you like the model and have enjoyed reading all the little stories and struggles behind it! If you wish, you can give it a vote for it on the Bricklink Designer Program Series 9. Please leave your comments, I’d love to read and answer them.
50 likes
13 comments on this article
Sea sold separately.
I like all the details and references, though. Well done!
I loved the previous one, Ishtar Gate, and voted for it. Pity it didn't get selected. We need more ancient structures in Lego form :-)
Excellent work! I love the look of this. Nice size as well. I would definitely buy it if it gets through.
This looks awesome.
I love it when in BDP there are also some innovative intricate and small proposals! well done, I gave it the thumb up
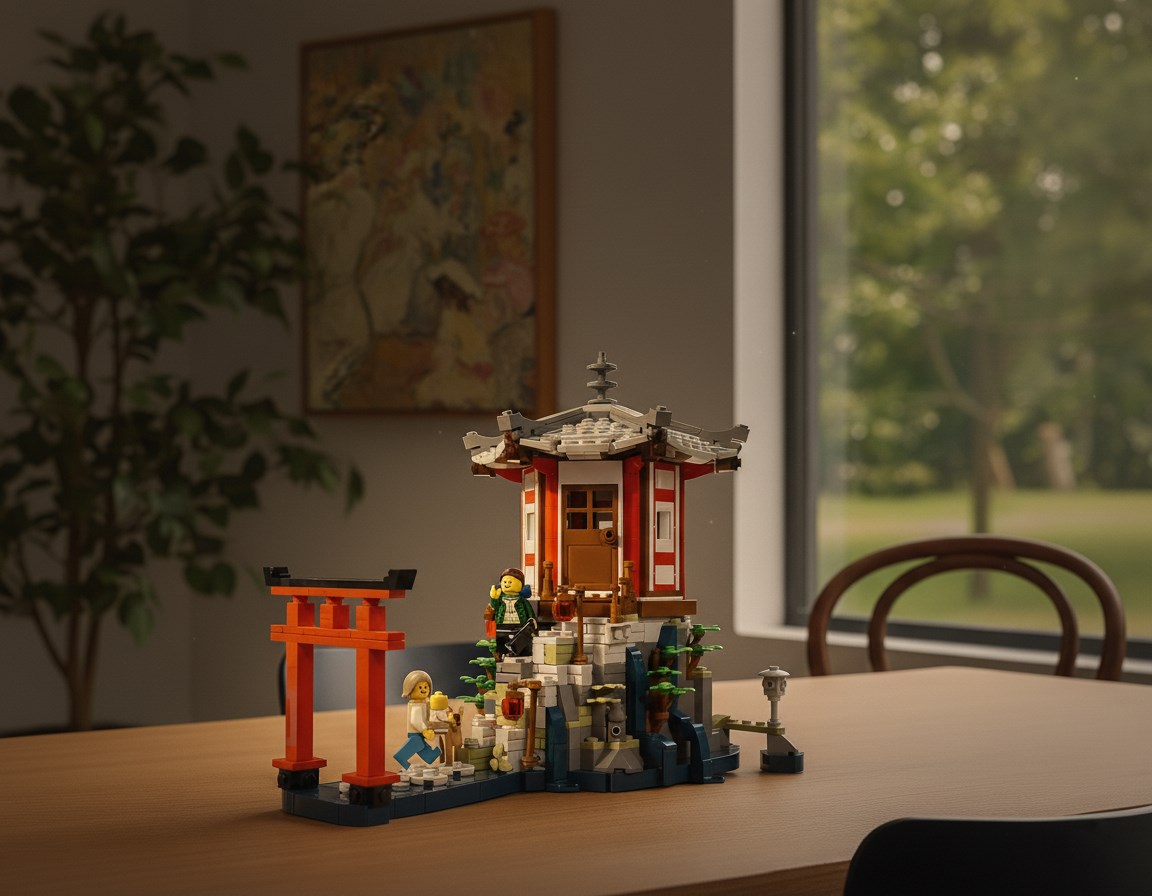
Is that last picture AI? it looks kinda weird and ugly tbh, some of the pieces look malformed.
Beautiful design - I'd add a few extra studs worth of sea though to make it stand out and pop; right now it looks like it could be anywhere w/ dark blue being a stream, waterfall, lake etc. And I'd add a seagull too just to bring in that feeling of the sea more... but overall excellent design and I'd purchase it w/ the changes if it makes it!
The size makes it suitable to add to other similar themes.
@ClutchPowers7306 said:
"Is that last picture AI? it looks kinda weird and ugly tbh, some of the pieces look malformed. "
Almost certainly.
@fmiskolc said:
"Beautiful design - I'd add a few extra studs worth of sea though to make it stand out and pop; right now it looks like it could be anywhere w/ dark blue being a stream, waterfall, lake etc. And I'd add a seagull too just to bring in that feeling of the sea more... but overall excellent design and I'd purchase it w/ the changes if it makes it!"
Agreed. I feel it would benefit from a little contextual environs. That being said, great work, thank you.
I remember the Ishtar Gate. That was a neat set and I learned a lot from the article.
@ClutchPowers7306 said:
"Is that last picture AI? it looks kinda weird and ugly tbh, some of the pieces look malformed. "
To clarify I mean the ai picture looks ugly, the build on it’s own is great.
Clearly a Labour of love!
And so much more to it than first meets the eye!
Well done, and good luck!