How to make a cheap, but effective, light-box to help improve your LEGO photography
Posted by FlagsNZ,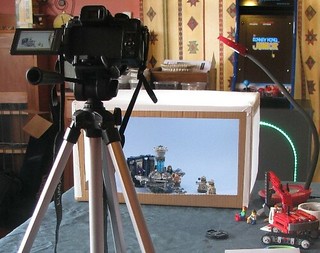
Writing reviews at Brickset over the last few years has given me great pleasure. For me, part of the journey has been learning how to take better photographic images of my sets. I have researched how to improve the lighting that I use for my photography. As a result, I have found instructions for making an inexpensive light-box.
Maybe you take photographs of your LEGO for placing in reviews, or perhaps you list your LEGO on eBay or similar auction sites and need good quality images to improve your chances of making a sale.
Read on if you would like to see how easy it is to make an inexpensive light-box that will help improve the quality of the images that you take of your LEGO or small models.
What a light-box does
A light-box places a diffusing fabric between the light source and the item being photographed. The diffusion of light softens and improves the image being taken. It reduces the sharp shadows that may appear and makes the images look more natural.
There are several tutorial videos on YouTube that show how to build a similar inexpensive light-box. On YouTube these tutorials are listed under product photography.
Materials
You will need the following items:
- A large cardboard box
- A light coloured card to be placed inside the box
- Crepe or tissue paper
- White coloured duct tape
- A sharp craft knife
- A ruler
- A pencil

I used a new storage box sized 8. The box measured 51cm wide x 38cm deep x 30cm high (20 x 15 x 12 in).
The card measured 45cm x 61 cm (18 x 24 in).
Building the light-box
Step 1
Stick down the base of the box.

Step 2
The four top flaps need to have a rectangle cut out from each flap.
Using the ruler, mark out the areas on the flaps that will be removed from the lid of the box.
Lay the ruler along the fold and two sides of each flap and mark out a U shape on each flap (see image below).
I laid the ruler along the fold and simply marked out the width of the ruler; the ruler was 3cm (1 ¼ in) wide.
Carefully cut out the four rectangles from the four flaps (as shown below).

Step 3
Carefully fold the U shaped flaps down as you would for a normal box lid.
Using duct tape, stick down the remains of the four flaps so that the top of the box is rigid.
Carefully wrap the tape under the inner edges.

Step 4
The top of the box is now open to allow light to enter.
The front, left and right sides of the box will need to be removed to allow extra light to enter the light-box.
Mark out and carefully remove the three rectangles from the front and two sides of the box.
I used the width of the ruler as a guide to mark out a 3cm (1 ¼ in) frame for the three sides that were opened up (see image below).

Step 5
Stick down the base flaps inside the box.
Step 6
Carefully bend the coloured card into the box. Use duct tape to stick the card in place. The curved card will give your box an infinity background. I have chosen a light pastel blue colour for the card so as to have a neutral background.
I needed to trim the length of the coloured card by about 4 cm (2 in) so as to get a nice curve towards the back of the box.

Step 7
The top and two sides of the box will be covered with crepe or tissue paper. Cut out three pieces of crepe or tissue paper that are slightly larger than the three box openings. Stick these three pieces of paper using duct tape over the three openings of the box.

The completed light-box
The light-box works by diffusing light that enters the box. The crepe paper scatters the light giving the model being photographed a softer appearance.
The box, card and paper used to make the light-box cost NZD $7.50 (£3.60 / $5.20). You could easily use an existing large box rather than purchasing a new one.
The duct tape cost $14 but most of the roll was left over. The cost of this light-box is therefore less than the price of a City starter set. The light-box took about 30 minutes to build.
Before and after images
Here are some images taken inside the light-box. The before images were taken before the crepe paper was applied; the after images were taken when the crepe paper was in place to diffuse the light.
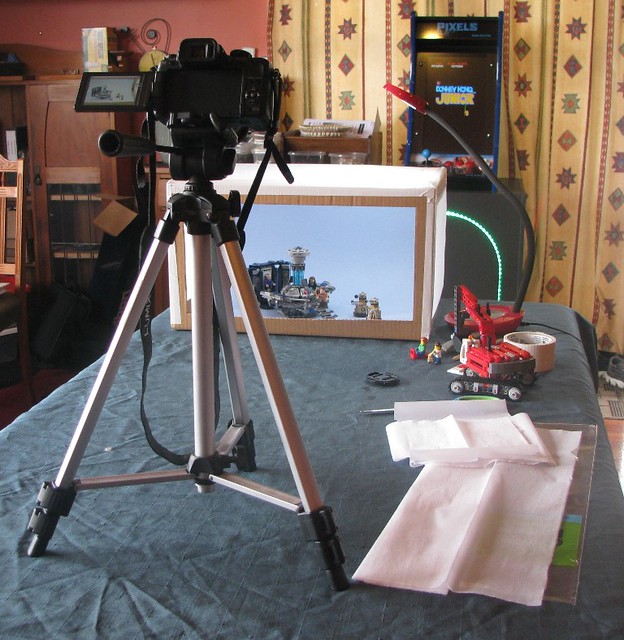
The images were taken in my living room in mid-afternoon with the room lights on and my halogen desk lamp directly above the scene exactly as shown in the image above. There is natural light entering the room from some windows to the left of the picture.
The light-box and camera were set at each end of my dining table as shown.
Apart from re-focussing the camera, no other adjustments were made. The camera remained fixed in place on the tripod and the light-box stayed at the end of the table.
Before

After

Before

After

Before

After

Compare the before and after images. See how the shadows have softened and the glare has been removed.
I accept that the Dr Who before image is slightly out of focus; however, look at the sharpness of the shadows, particularly around the Daleks and the glare from their domed heads and the minifigure hair.
Conclusion
I do not purport to be a photographic expert. I have learnt my photographic skills since posting reviews here at Brickset. I have used trial and error, asked friends for advice and looked at many tutorials on YouTube.
If you like taking images of your LEGO, or any other small model or product, and have wanted to make your images clearer and more professional looking, have a go at making a light-box. Have fun experimenting with lighting; I am sure that your images will improve as a result.
Mounting your camera on a tripod will help keep the camera steady, but if you don't have one try sitting your camera on a stack of hard-covered books instead.
The box itself is quite delicate and will need to be stored carefully.
Perhaps you would like to post some reviews here at Brickset with your own images. You can read my guide to posting reviews which includes information on how to upload images and then add them to your reviews.
63 likes
31 comments on this article
Now is THIS a joke? :P
Great tutorial!
When was feeling a little homesick, I'd occasionally buy a box of Tayto crisps online. The box makes a perfect lightbox too :-)
But you can scrounge an empty crisp box from most shops. It doesn't have to be Tayto.
I'd advise you increase your exposure on your shots based on the examples above. They're a wee bit dark.
^^I don't trust anything today...
Is this Part 3 of April Fools by Brickset? In addition, are the previous comments here likewise April Fools jokes? If "In Brickset We Cannot Trust", are we all doomed? :P
Why is the white colored duct tape needed? Couldn't regular duct tape or even clear packing tape be suitable?
Thanks for this article. it is very helpful
You can swap out the backing paper for a lighter art paper (between 60 and 80gsm) and backlight as well. Might need to rack down your exposure to not blow out the edges and then offset the backlight with diagonal illumination or side-on.
If objectivity isn't necessary, experiment with different types of lights as well. Hot tungsten bulbs, neutral/cold LED or even ambient light. Different colour bricks will benefit from different light.
If you're looking for clean black background, invest in some black velvet. I've recently bought a velvet backdrop for my work and it makes a massive difference in clarity.
Great tutorial, thanks for sharing! I used to use a box like this, but then I switched over to an inexpensive light-box I found on eBay. It has the same functions and everything, but what I particularly like about it that it is fully foldable and storable. My cardboard light-box was just like you said; fragile and difficult to store, and taking up too much space. So I would say that if you plan to take photos regularly a real light-box is a good investment. They only cost like $30-$50.
Great article and very useful- i'll be trying my own on my next day off.
Shame a lot of the comments so far have only been regarding the date this was posted rather than the excellent content. More pieces like this please Brickset :)
Great article
"If you don't have a tripod try sitting your camera on a stack of hard-covered books instead."
Or for more flexibility: build a tripod from Technic parts ;-)
For cheap lights visit that other Scandinavian icon: Ikea.
Cool, and with different backgrounds we could make scenes for MOC without going outside or to an artic landscape for example.
I'd recommend you use a brighter light. That little light you're using up there doesn't achieve what a light box is supposed to achieve. Sure, it softens shadows, but you could just tape a piece of paper to your lamp for that if you wanted. What a lightbox is /supposed/ to do is make a solid white infinity backdrop. The backdrop is too shaded and doesn't really work out. Although, it's relatively good on the Technic shot (not quite there in my opinion).
Good concept, though. I've also heard that chopping up old pillowcases or T-shirts instead of the paper works well for diffusing the light as well.
^ Yes, I have heard of using white cotton sheets instead of the tissue paper.
I have made a larger drop down infinity back-drop made from a stiff roller blind that I use now for photographing the larger sets. It has been used in the step by step images at the beginning of this tutorial.
I wanted to describe a technique using low cost materials with items found around the home without needing to invest in specialist equipment. I also didn't want to get too technical on camera techniques. There may be a follow up tutorial covering these items.
Here in NZ, a day ahead of the rest of the world, we have had lots of media jokes of April Fools before the rest of the world wakes up. I did not consider the date before posting this tutorial, but I can see how some people have reached their interpretations. :-)
Now this is a good article. Not only is the topic good and useful to the community, because photos will make or break a sale--or even a review on this site, but it's also well-written, with nice flow and style. Succinct but descriptive, not repetitive or choppy. My inner-teacher is very thrilled, and my artist side is happy too, because people never realize just how easy it can be to up your photo game!
For my last shots I used a similar box, but just lined the sides with paper. I just set my camera to a timer and used my cellphone light reflected off the ceiling of the box. Got some great results, too!
Very nice, like the arcade cabinet in the background too!
You know, you guys shouldn't post serious articles on April 1...
Informative, but I don't really take pictures for my reviews. Might be useful later, though, so thanks!
^^ My partner Christine won the game last year at a Pixels pop-up store. She got the high score on Donkey Kong.
It has 60 games loaded onto it. That is her hobby.
http://gameplaynz.co.nz/Pixels/
Nice article! I don't quite have the ambition to make a light box (eventually I will buy one, I suppose), but for me a decent alternative to an infinity background is to get some of the tri-fold poster board you can get at office supply stores. I use cool LED lighting behind me with natural light from the sides. While not professional results, they're good enough for me to be happy with them.
I like to use a tablet with a white image. It's very useful and it makes a good work:
https://www.flickr.com/photos/91426193 @N02/24606893450/in/dateposted-public/
^^theBrickBlogger, do you have a link to the light box you purchased?
Great article. I've been thinking about doing something like this so thanks. I just want to take proper pictures of my MOCs because you can't leave it all built up ;)
Thin white polyester or cotton sheets are as cheap as paper and far more durable.
Another tip is, if you like what you've made, you can later cut some lengths of any old scrap wood dowel, beading or plastic tubing and stick them inside to strengthen the edges of the box.
For lighting, halogen bulbs are 'whiter' than most desk lamps (which tend to yellow) or LEDs (which tend to blue) though they can produce heat. What I use (because I can't afford a cluster of remote flashes) is several lamp stands with halogen bulbs, plugged into one multi-way power adaptor with its own on-off switch, so I can turn them all on just for the shot then off again. A mains power remote control is fairly cheap and makes this even easier - and is handy for Christmas decorations too!
I just recently made a light box. It came out really nice. Thanks for the tutorial, even if it's a joke, haha.
Sunlight really is the best lighting for the box.
Wow! This is very helpful. Just what I have been looking for. Thanks for posting. Long Live Brickset!
Can I really be the first to post some love for the color calibration strip? Really?! Absolutely essential!
Thanks for posting!
An alternative to this, which I just thought of, is you could get a milk crate and cut out all of the bracing on each side, and cover it in thin diffusing paper or plastic. Lay it on its side, install a nice base and the top becomes your front opening.
It's a much more permanent and sturdy solution!
@AlphaBravo I think that's meant to be a ruler / straight-edge. But yeah, that could also double as a color calibration tool.
Thank you so much for sharing :) your article is really useful! I liked it a lot
I really hope that this will help all of us improve our reviews of sets with some pictures.....I will certainly try this sometime soon at home on my Imperial Troop Transporter!