Throwback Thursday - Auckland Airport celebrates 60 Years
Posted by FlagsNZ,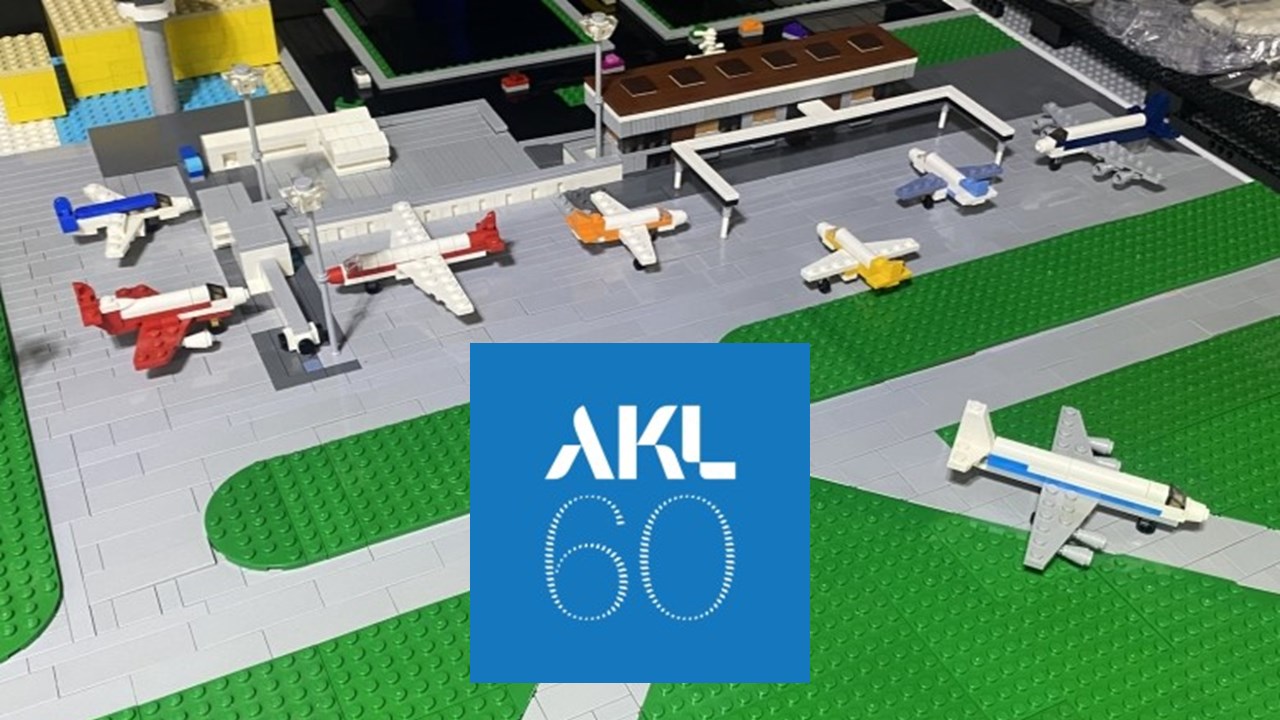
Auckland International Airport held a three-day grand air pageant over Auckland Anniversary weekend, in January 1966. This marked the opening celebrations for Auckland's new international airport.
A few weeks ago, the airport celebrated sixty years of operation. As part of those celebrations, they commissioned an Auckland-based LEGO fan to build two scale dioramas of the airport: one model to represent the original layout and the other model to show how the airport will look in a few years when domestic and international terminals have been upgraded and improvements are complete.
Read on as I interview Jon-Paul Hansen, who has created a cottage business of designing and building scale LEGO models for paying commercial clients.
Background
David: I am with Jon-Paul Hansen (jp-30) from All Blocks LEGO User Group. I am interested in your Auckland Airport 60th anniversary LEGO diorama that I saw on the news recently. Can you talk to me about how Auckland Airport got in touch with you and how that evolved into this project that you created?
Jon-Paul; I got messaged by Sarah Mosley who had been the second-place getter in Season 1 of LEGO Masters NZ and who also represented New Zealand with her building partner, Emily Fryer, in the Australian LEGO Masters Take On The World that came out in the middle of last year.
Sarah had been approached by Auckland Airport because she has a high profile within the LEGO builder community in New Zealand. Emily, her build partner, was working on a museum exhibit with Jake Roos, who won Season 1 of LEGO Masters NZ with his build partner Glenn Knight, and so they were busy working on this LEGO exhibition, which has recently opened in Christchurch, called Bricks of Olympus. Building LEGO scale models isn't really Emily or Sarah's area of expertise or even interest.
They both knew that I had done a LEGO commission for PGG Wrightson for Fieldays last year in Hamilton, and I also knew them from filming LEGO Masters. I wasn't a contestant, but I worked behind the scenes with Robin Sather, The Brick Master for the New Zealand series. I helped build some of the set pieces and test out the challenges and just build bits and pieces that would enhance the look and feel of each episode. So, I knew Sarah from that show, and she'd seen my other LEGO commissions. Sarah recommended me to Auckland Airport. They called me up and took it from there.
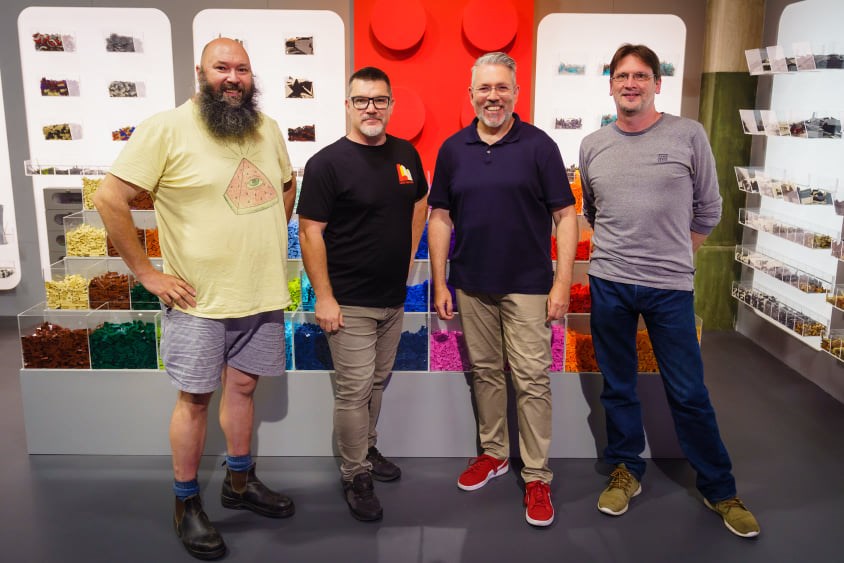
The Behind the Scenes Team at LEGO Masters NZ: (from left to right) Colin Doyle, Mark Hackett, Brickmaster Robin Sather, and Jon-Paul Hansen.
Auckland Airport LEGO diorama
DW: When I have seen the airport diorama, it is relatively flat, so for a terrain diorama, that must make it reasonably straightforward because it is all on a level layout of baseplates, and so you are constructing the runways and buildings that surround the airport.
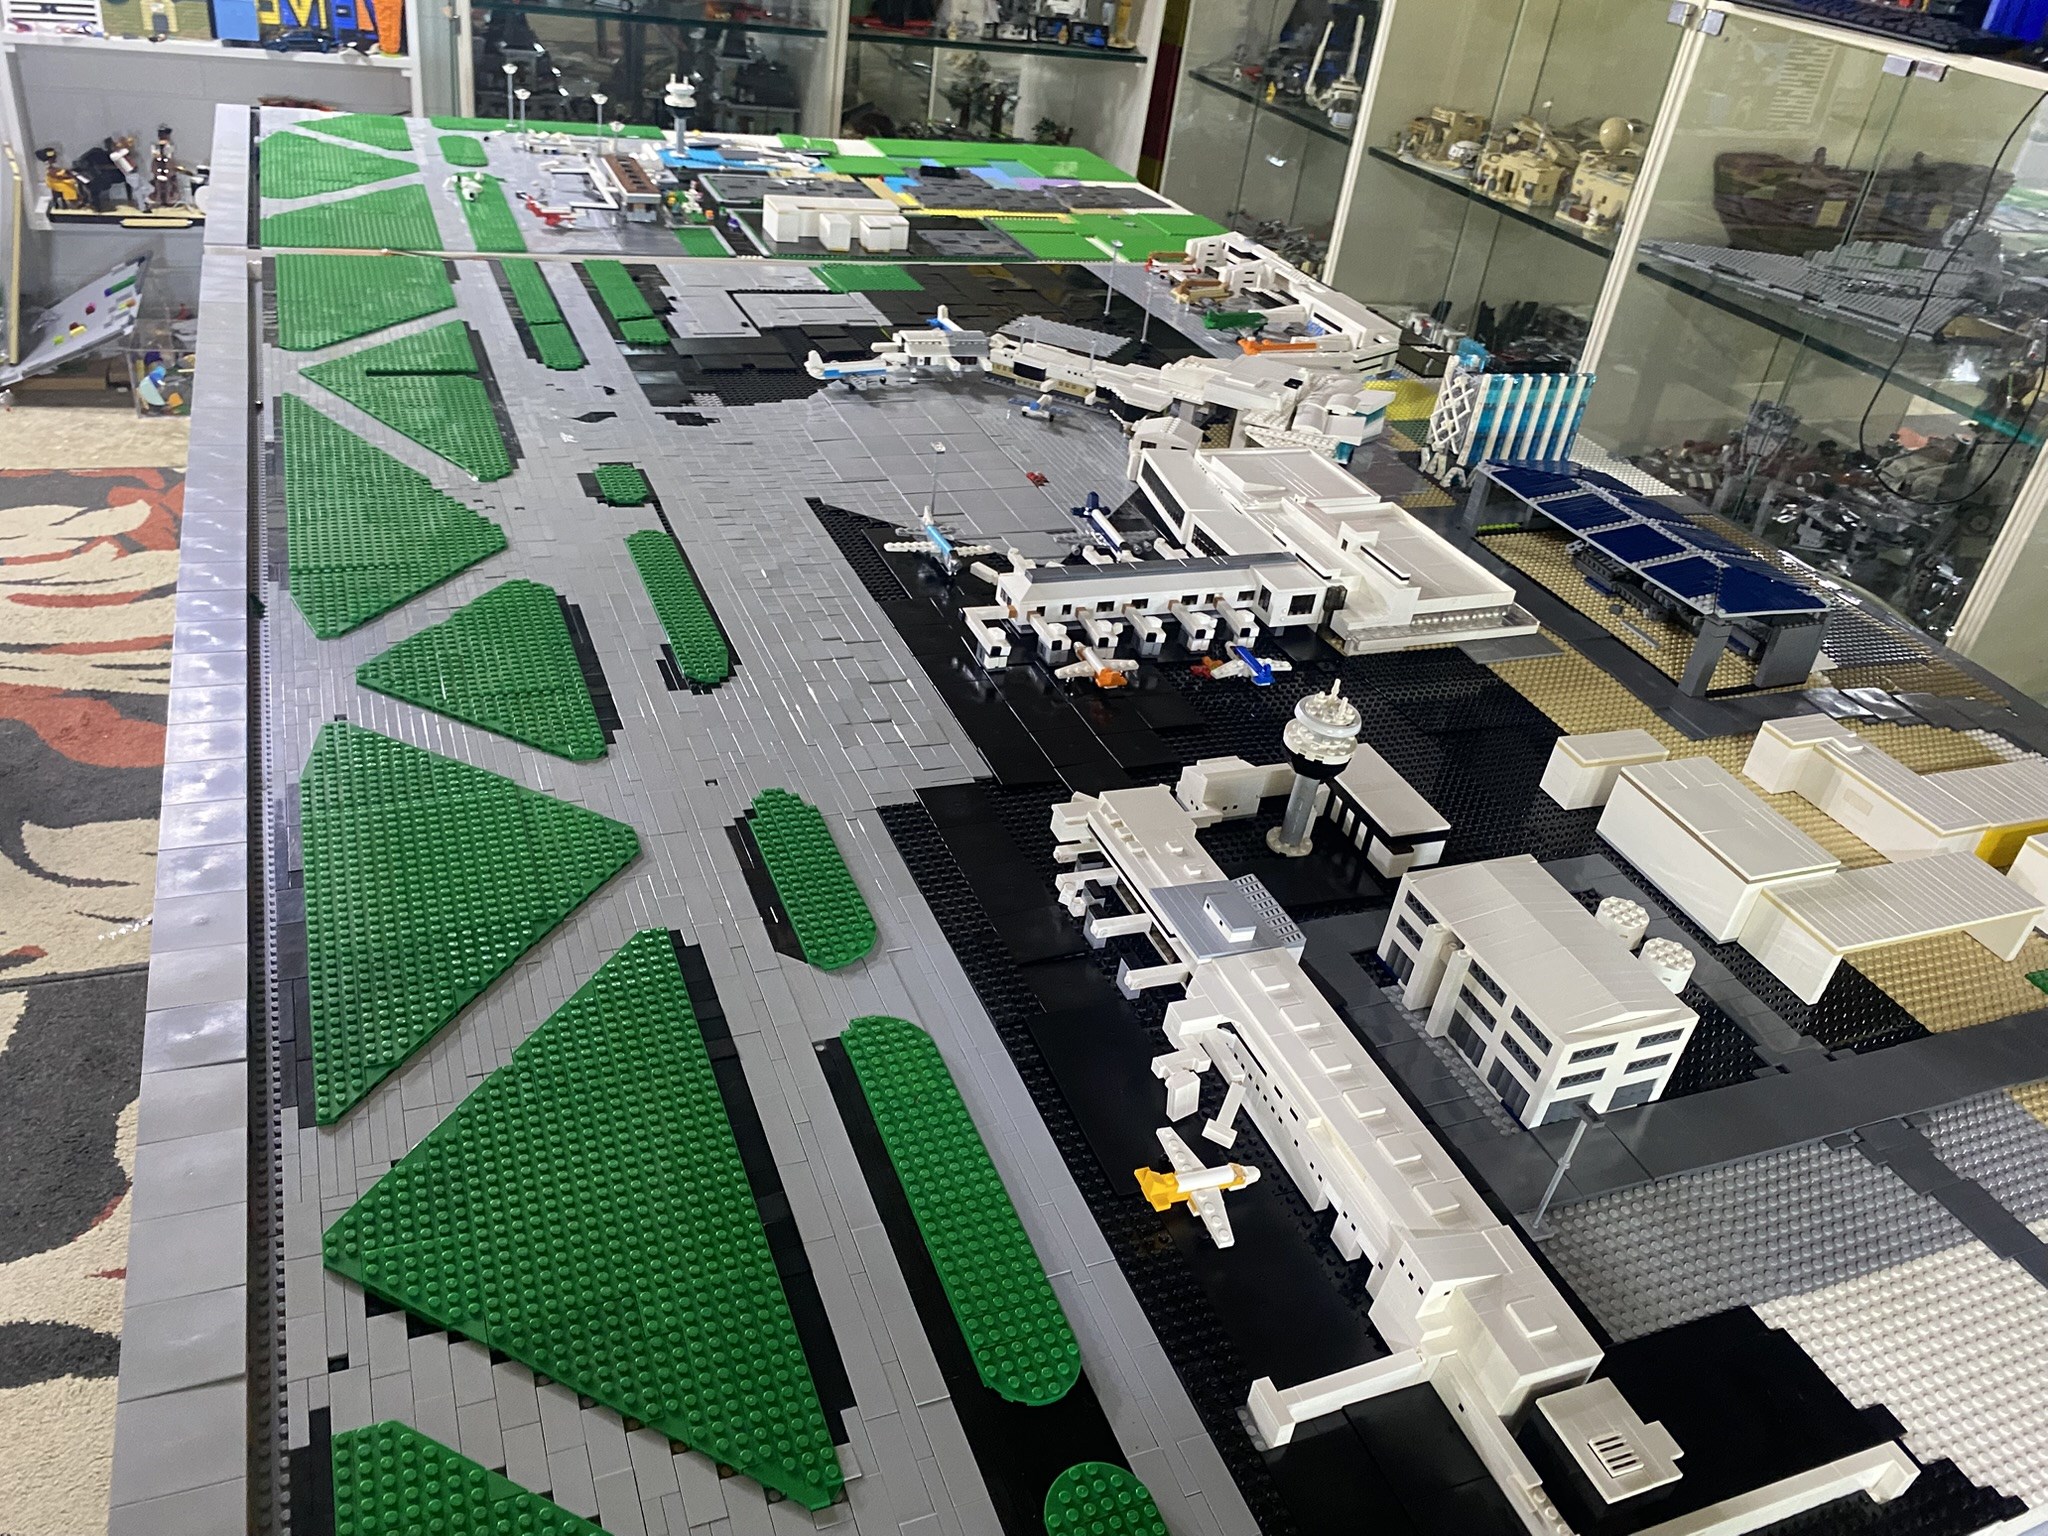
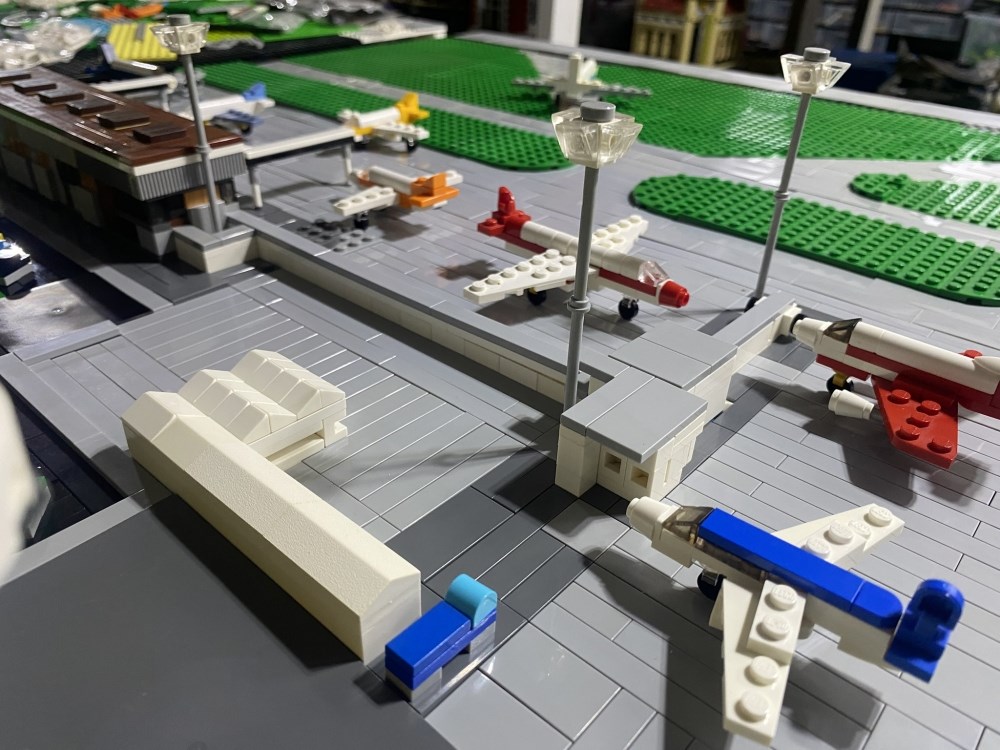
JP: Absolutely. Yes, that is true. There is no terrain to speak of. Everything's dead flat at the airport, from the tarmac and the runways, back to all the low buildings and terminals.
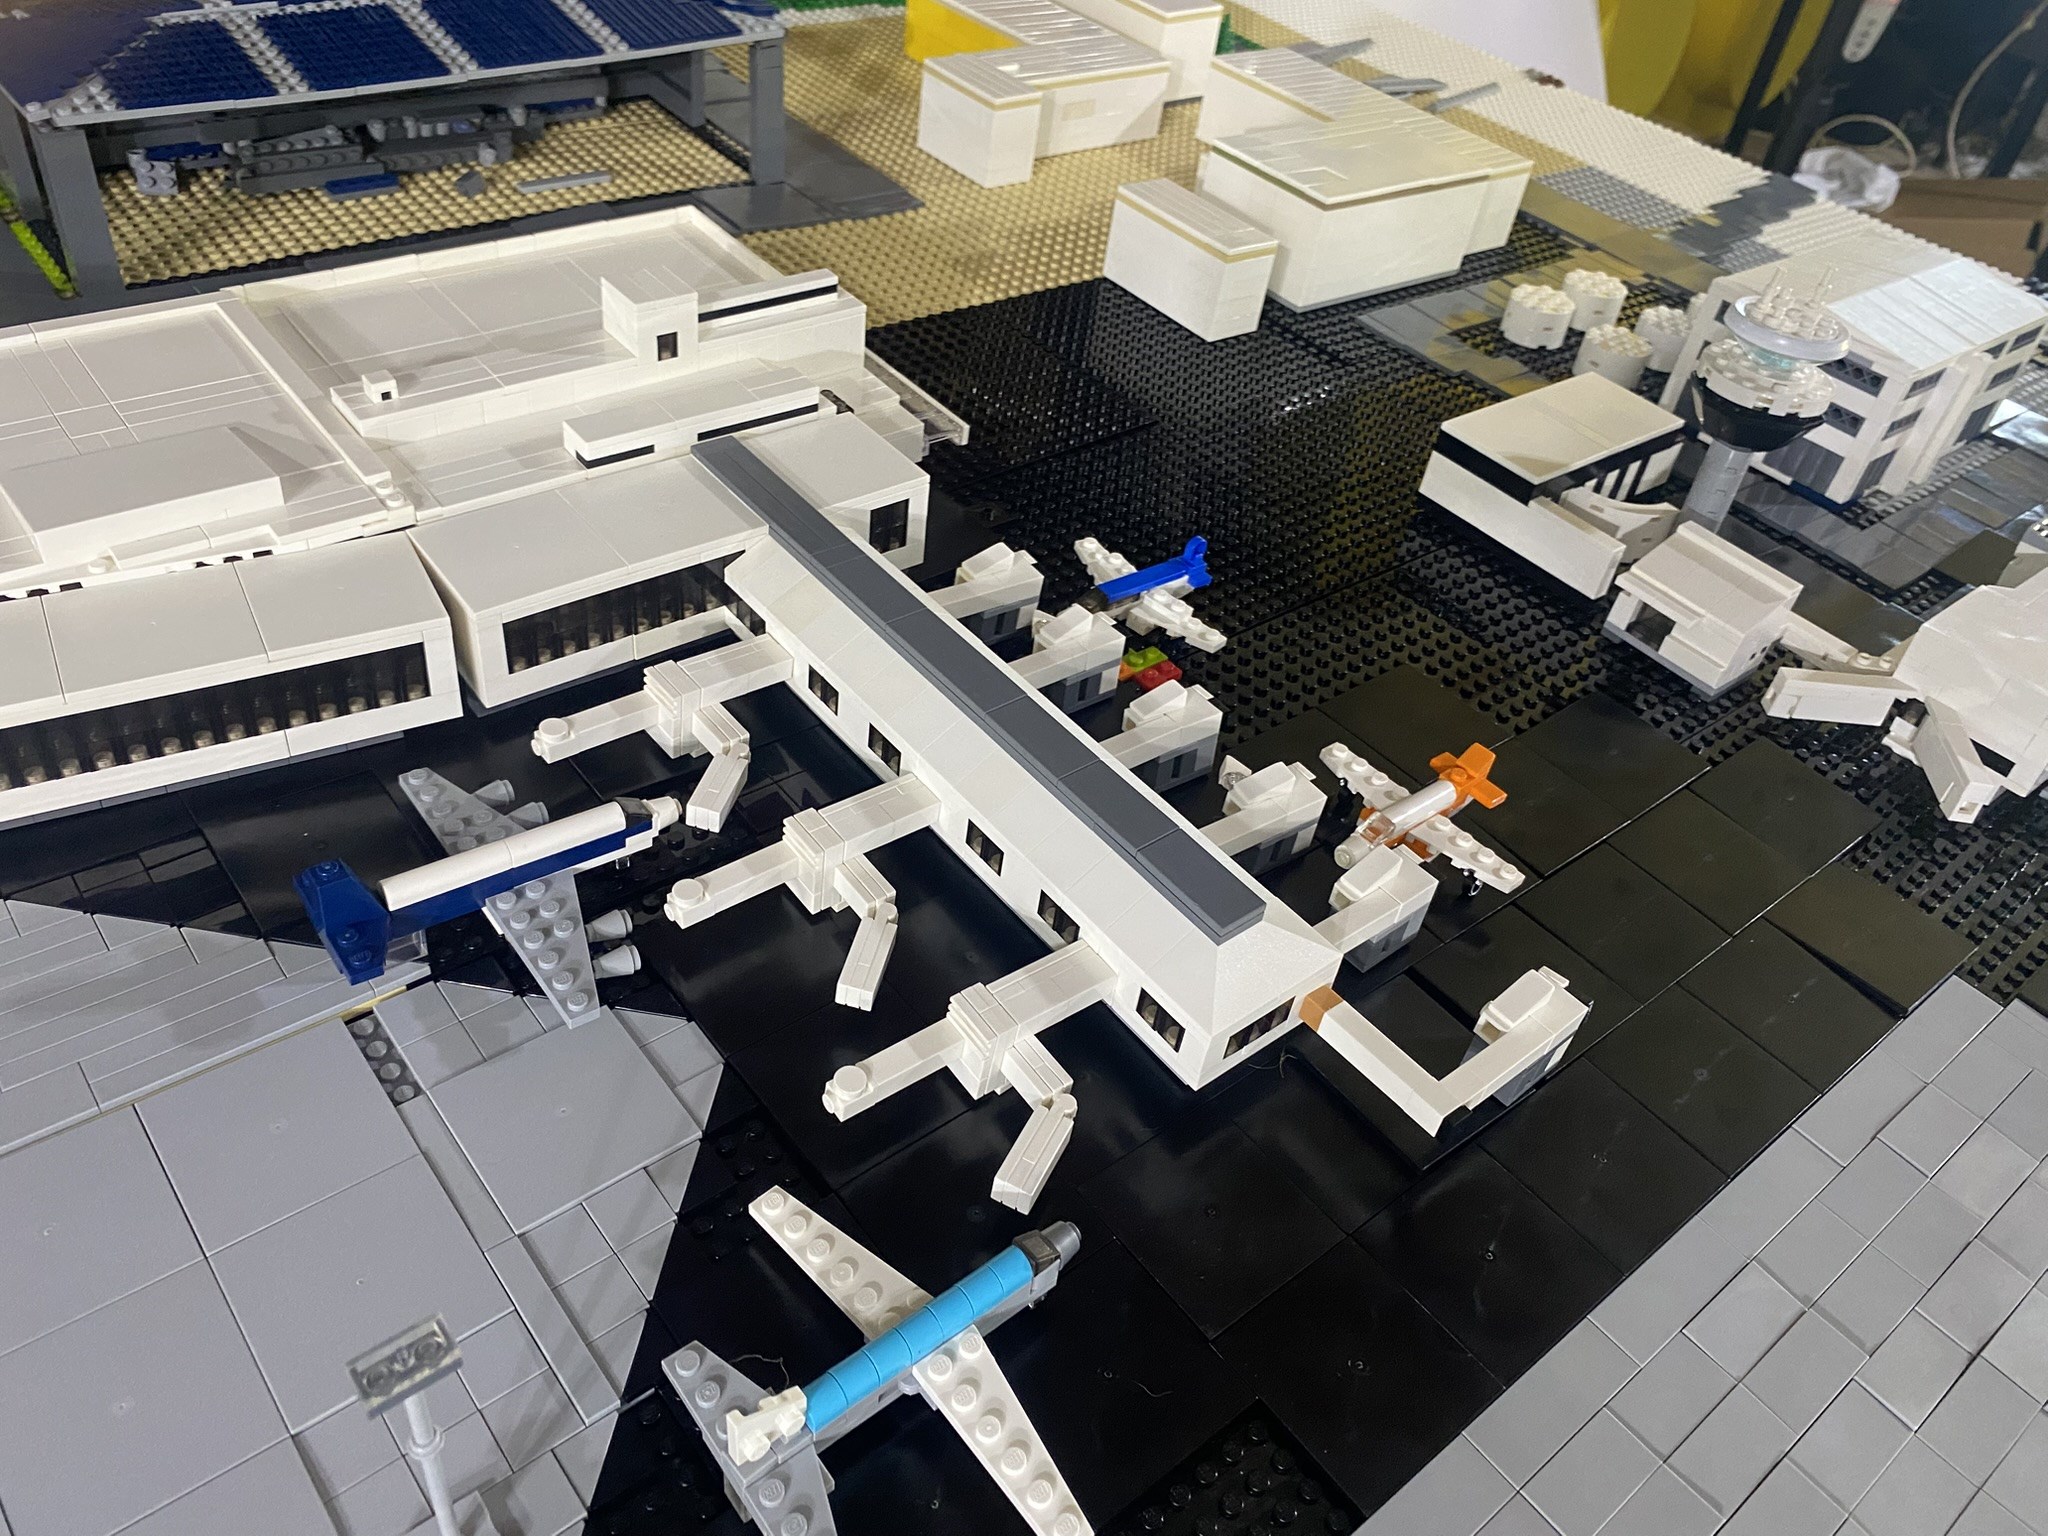
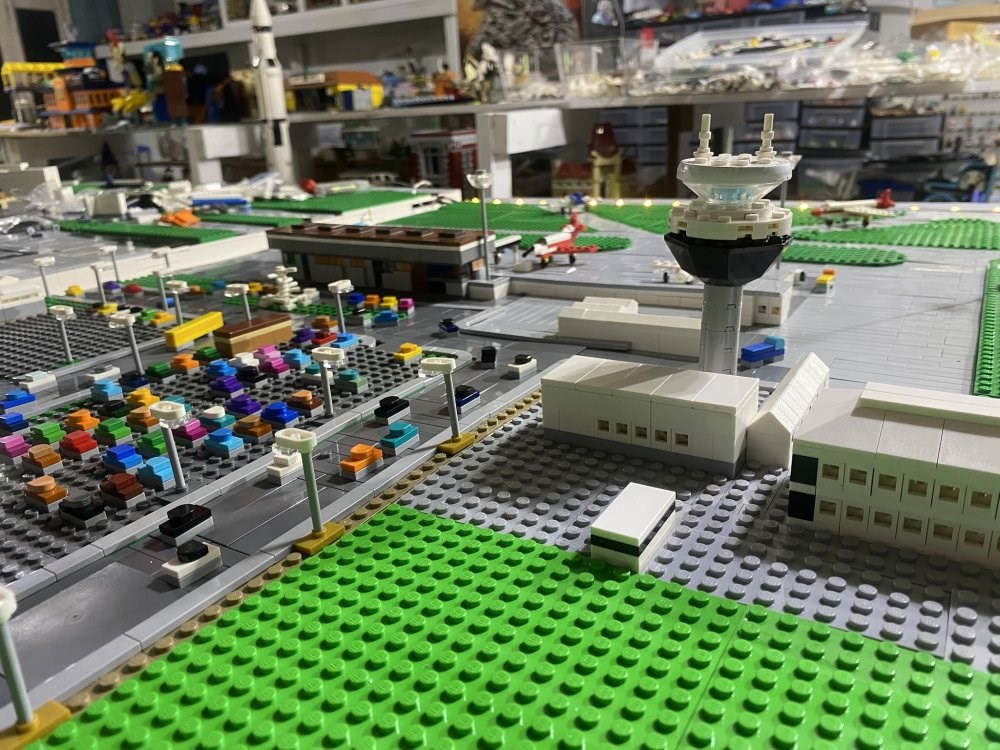
After working on LEGO Masters, Robin Sather's advice, to us and to the contestants, was to get good height in your builds, so people will be attracted to it and get curious by glancing [at the model] from across the room. This build doesn't have that luxury because the airport is flat and all the buildings are very low. The tallest building in the whole precinct is the Pullman Hotel. The hotel is even higher than the air traffic control tower for the airport. That presented a challenge, but we tried to make it more visually appealing by putting in some [runway] lighting and giving it some pops of colour by using different coloured cars and buses and airplanes in the diorama.
DW: What was the biggest challenge in making the diorama?
JP: One of the big challenges I faced was that when I ordered LEGO parts direct from the LEGO website, they claimed that the turnaround would be fifteen working-days, but over Christmas and between Poland and New Zealand, the turnaround was a lot longer.
I had to wait until the 10th of January to get a lot of the bricks that I needed for the flat surface areas – the tiles and the green bricks. I used placeholders for those areas for quite some time. The build was due to be delivered on the 18th of January, so I had about a week to finalise the build, once the parts turned up.
For some reason or the other, LEGO does not track those Bricks and Pieces orders. I knew it had shipped, but I didn't have any inkling as to how far on the journey the package was until it turned up on my doorstep.
DW: Obviously you had a fixed deadline date for the 60th anniversary [of the airport’s opening] to turn around and complete the model.
JP: Absolutely, yes. Quite a tight deadline. I had to deliver it to the airport and set it up the week prior to the actual unveiling.
Brand Stand, the company who built the plinth that the diorama sits on, happened to have available trucks, and so the logistics were simplified, because they offered to come up to my house and pick it up [the model] and transport it to the airport. My house to the airport is about an hour's drive on a good day! Brand Stand had a covered flatbed, truck and some mattresses, and they secured the model and took it in to the airport when it was completed.
.jpeg)
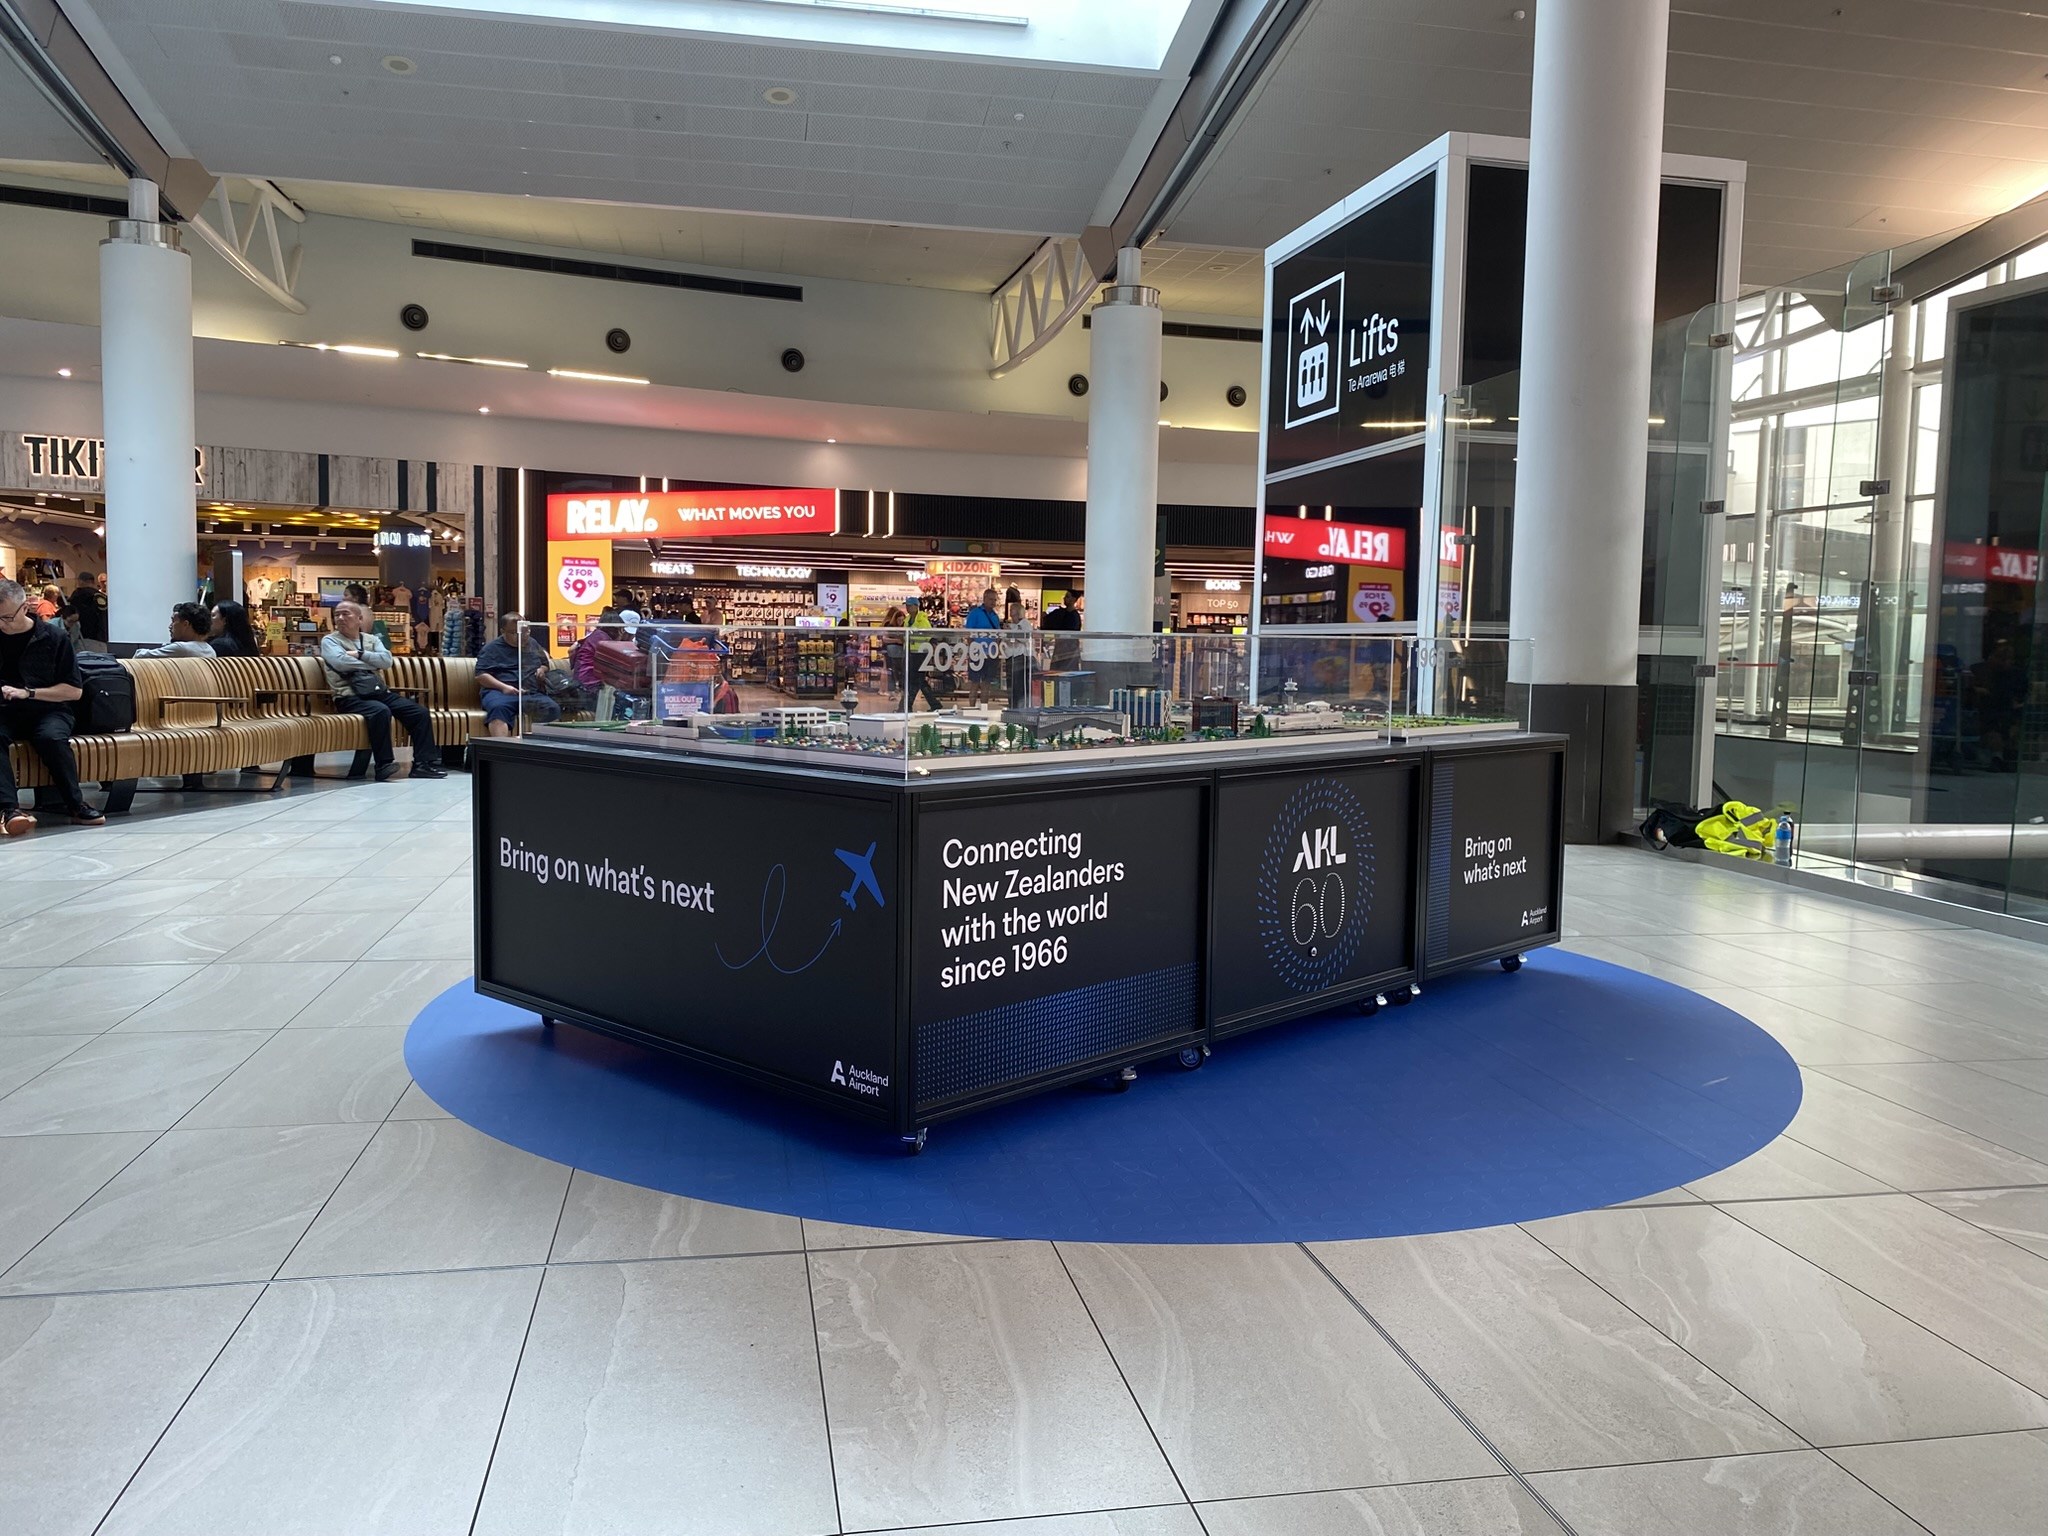
I transported the smaller section. The diorama comes in two sections: the 1966 version of the airport when it first opened, and a 2029 version of the airport – how it will look in about four or five years’ time when the current upgrades and integration of the domestic and international terminals is complete.
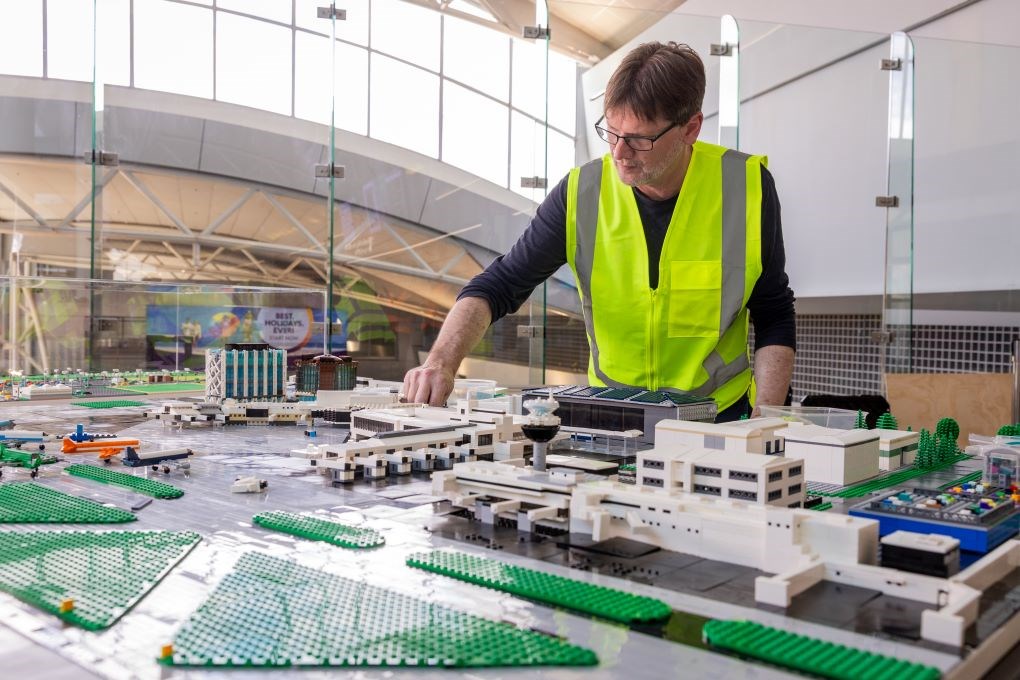
Image source: The Moodie Davitt Report - Images of the Day: Auckland Airport honours 60 years with forward-looking Lego display
DW: What did you enjoy the most about the build? What excited you the most?
JP: What excited me the most was having an opportunity to take part in a large-scale celebration and anniversary, and knowing that there would be hundreds of thousands of people who would walk past the build over the course of the year or however long it will remain in situ. Hopefully, my work will bring a smile to people's faces.
Earlier commission work
DW: Have you done any other similar display pieces like this airport?
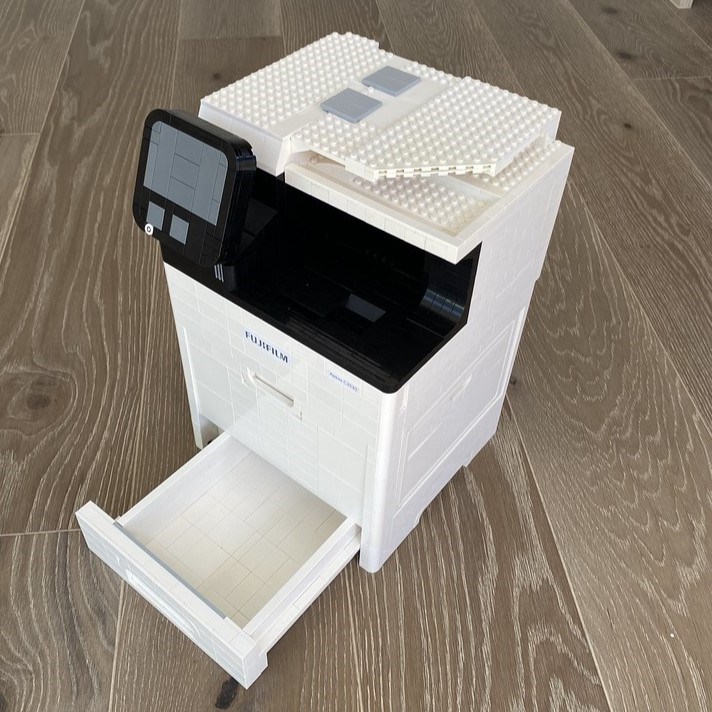
JP: I've done some commercial LEGO commissions before. The first major commercial model I made was for Fujifilm a couple of years ago, where I built a 50% replica of one of their new printers that was coming out, to be part of their marketing launch for that product.
Since then, I've done a reasonably large model for PGG Wrightson, an agricultural company in New Zealand who specialises in farming supplies. I built a minifigure scale model of one of their stores, and some farming scenes outside of it for Fieldays, New Zealand's big North Island agricultural show that is held over winter in Hamilton each year, and I've done a few other smaller private commissions before, but certainly nothing of this scale for myself.


LEGO Masters New Zealand
JP: I did work on the large centrepiece for LEGO Masters New Zealand for the opening episode, where there was an architectural mash-up of famous New Zealand buildings. Another builder, Mark, and I worked on that together. We were given a bit of free rein by Robin the Brick Master, because he was busy organising the show and getting everything ready for the first episode of that first season.
We were basically left to make MOCs, and Robin would come in on a daily basis, or sometimes more often, and say, “That's great,” or, “That needs to be bigger.” More often than not, he would come in and say, “That needs to be bigger, 50% bigger” but for this build we had a footprint set out and worked out with him a baseline of where all the things would go so we were able to scale the height from the footprint of the foundations which made things fairly easy.
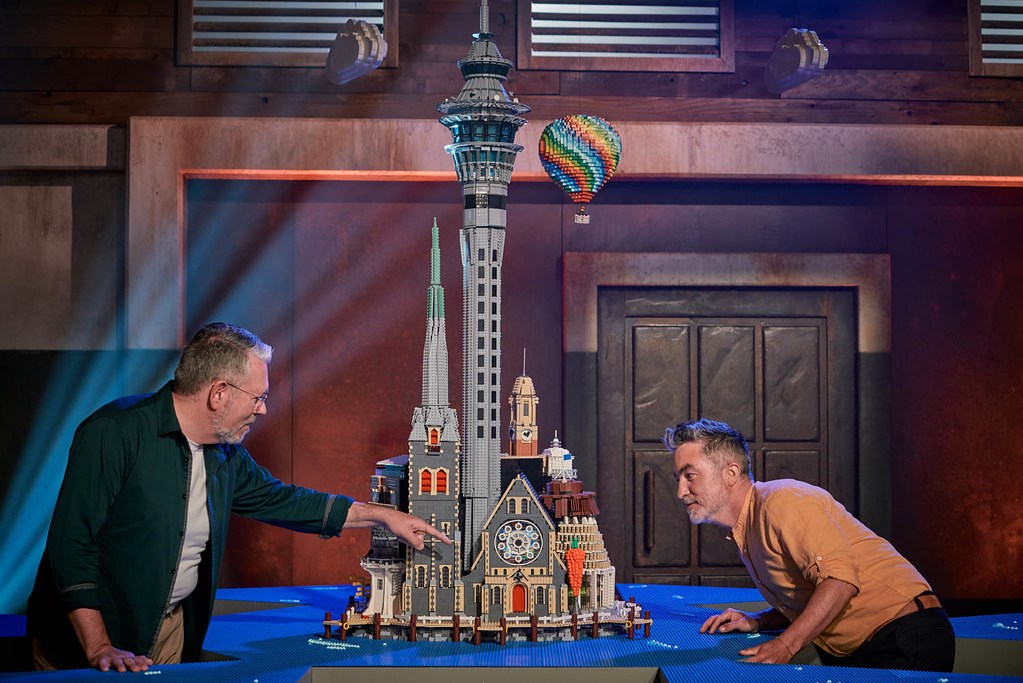
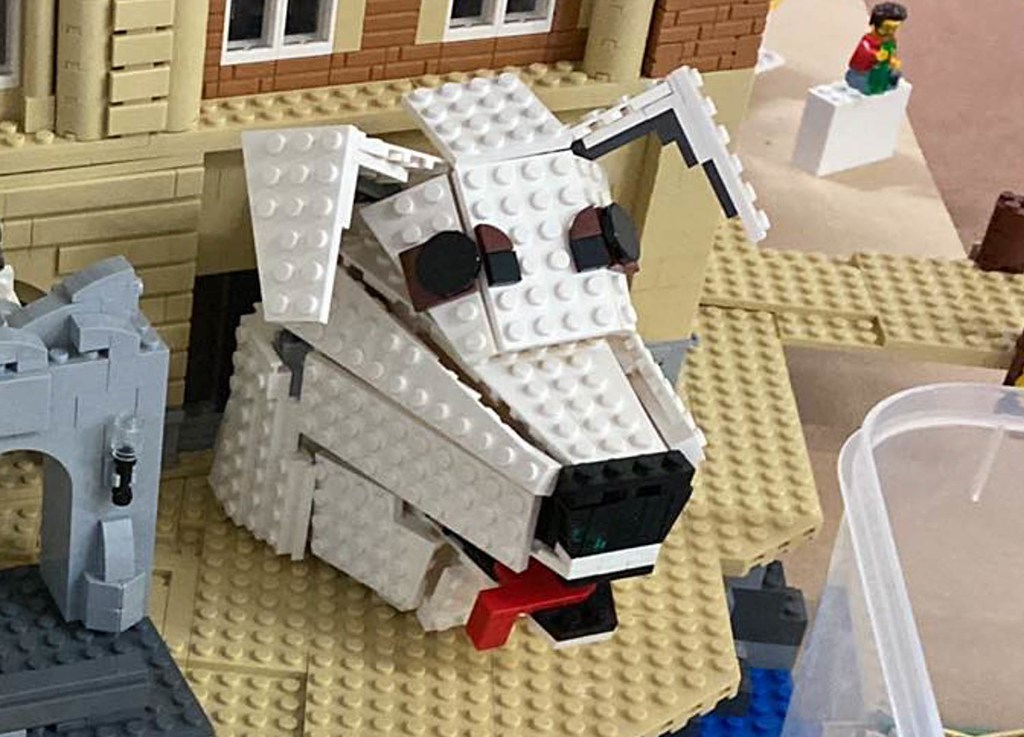
I built the Auckland Sky Tower, Invercargill water tower, the Tirau dog and Ohakune carrot, Beehive parliament building and then Cape Reinga lighthouse and Mark built the balance of the New Zealand architectural highlights for that opening episode.
DW: Do you enjoy doing this commission work and is this an avenue that you want to expand on?
JP: Absolutely! I really enjoy being able to fund my hobby. It makes my wife a little happier, too, to know that I am not just spending disposable income on LEGO, but I'm able to self-fund and even put a bit more aside to help with the regular LEGO builds. I am very happy to be able to turn a hobby into a little sideline business for some extra cash here and there.
I very much enjoy doing the commission work. It gives me time away from my day job, where I work on website content for a fairly large New Zealand company. Getting away from a screen is really important to me.
So I'm not likely to spend much time doing digital work for my [LEGO] commissions. I am a tactile builder, and I build by trial and error. I will build when I get an idea in my head. I will find several parts, build it up, put it down; I will then look at it and think about how I could build it better. I will take it apart and rebuild it until I get it to a point that I like it.
I really enjoy that hands-on building process with something physical and tangible. At the end of the project that I can say, “Hey, I made this,” and it sits there in public where people can enjoy it.
Whereas the stuff created for the day-job website is fine, but it is on the screen, and it's not physical, and it is in front of lots of viewers, but I don't get the same personal satisfaction. Plus, the website content is collaborative and put together by a lot of stakeholders, not just me alone.
I get more satisfaction building something physical than I do by making something in the digital sphere.
The design process
DW: Can you talk me through the design process? If you don't design it digitally on a LEGO software application, can you talk me through the process where you are trying to create something that is a scale model?
In this instance, you have a footprint that you must try and duplicate from plans of the landscape, and convert that into a LEGO model. Not only the runway and airport access roads, car parks and stuff, but there are also all the buildings associated with the airport.
JP: For the first scale model commission I did, which was the printer, I decided to make it at 50% actual size, so I could keep it manageable in the time frame I had available. I had the dimensions of the printer. I just measured it up and made a footprint, and then I could scale up the height accordingly. It ended up with the printer being quite boxy as per the source material. It had an opening lid, slide out paper tray and a control panel. That was reasonably easy.
For the airport model, though, the size of the model was determined by the airport staff. We figured out the dimensions ahead of time. I used standard LEGO baseplates as the grid size indicator. The smaller 1966 airport build is two by four LEGO 48 × 48 baseplates (77 × 154 cm, 30.3 × 60.6 inches) and the larger 2029 airport model is four by five LEGO 48 × 48 baseplates (154 × 192 cm, 60.6 × 75.6 inches).
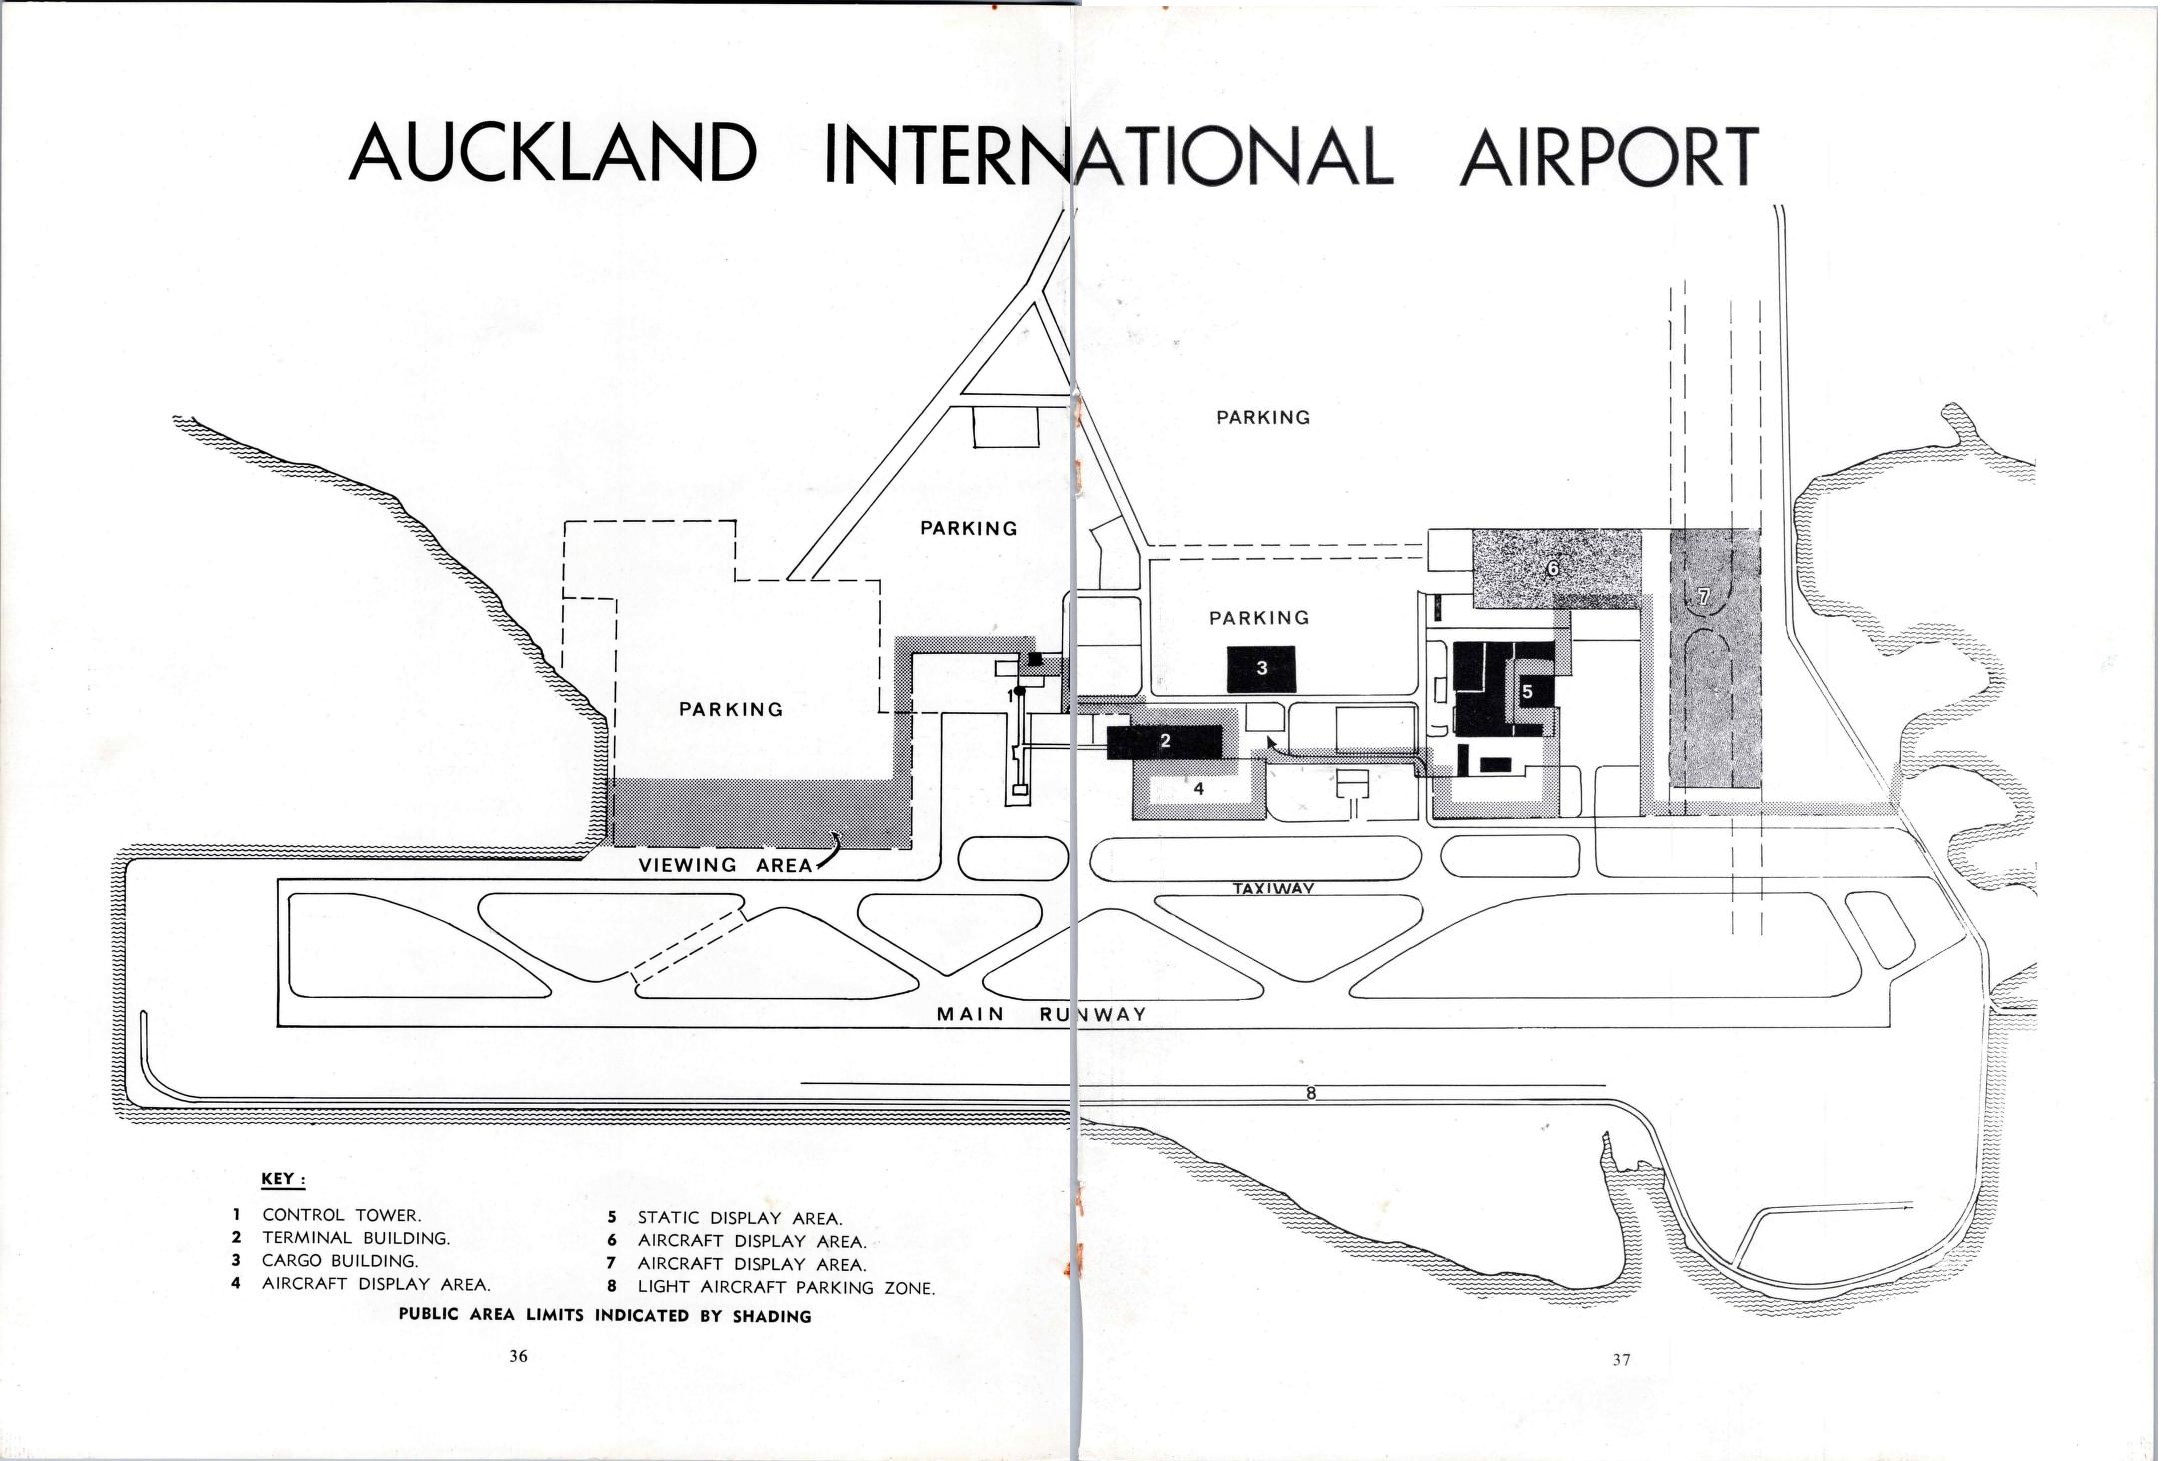
Below is a plan of the original Auckland International Airport in 1966.
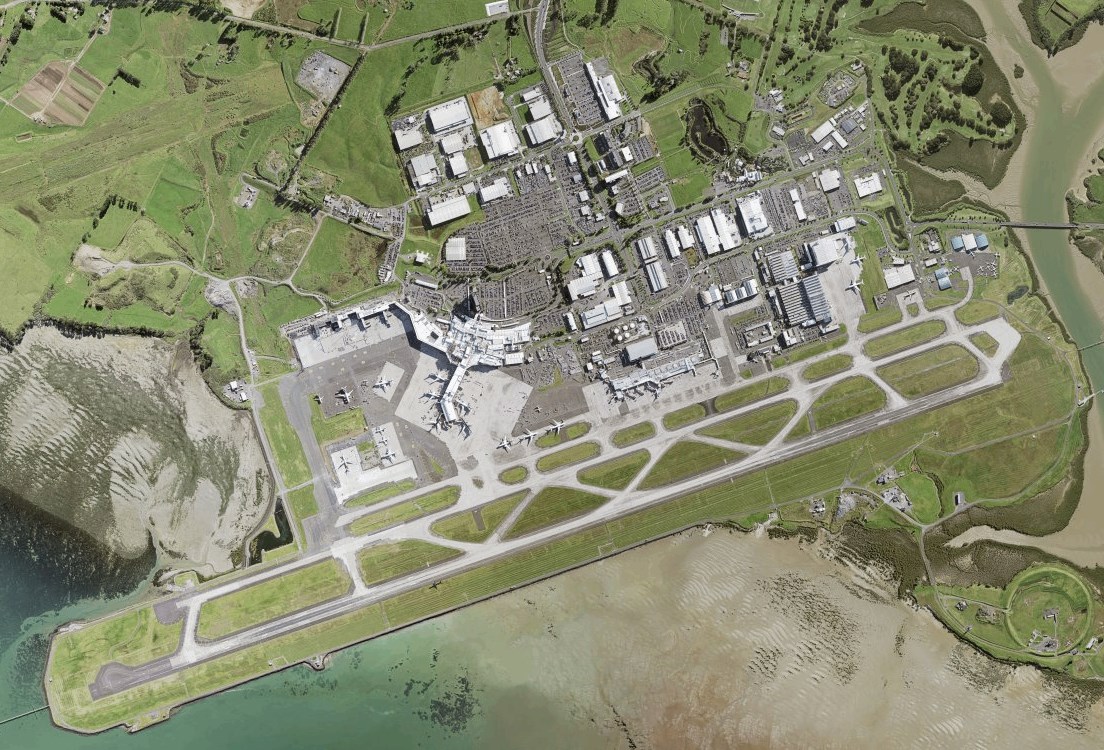
Below is an aerial photo of Auckland International Airport captured in 2017.
Laying that out [showed that it] was almost the same size of a regular table tennis table. I talked to the airport about that, because they were thinking in round figures and exact meters. I recommended that it would be better to stick to the LEGO scale of their stud system found on their regular baseplates.
We came up with the size we were going to use, and then from that, I had some aerial photos of the airport, and because the 48 × 48 baseplate is a grid, anyway, I did get on the computer for a bit of this [design work]. I got a copy of an overhead map, and then I scaled it to the 48 × 48 baseplates of the four by five model and sent an image back to the airport team recommending that this is what I think the scale should be.
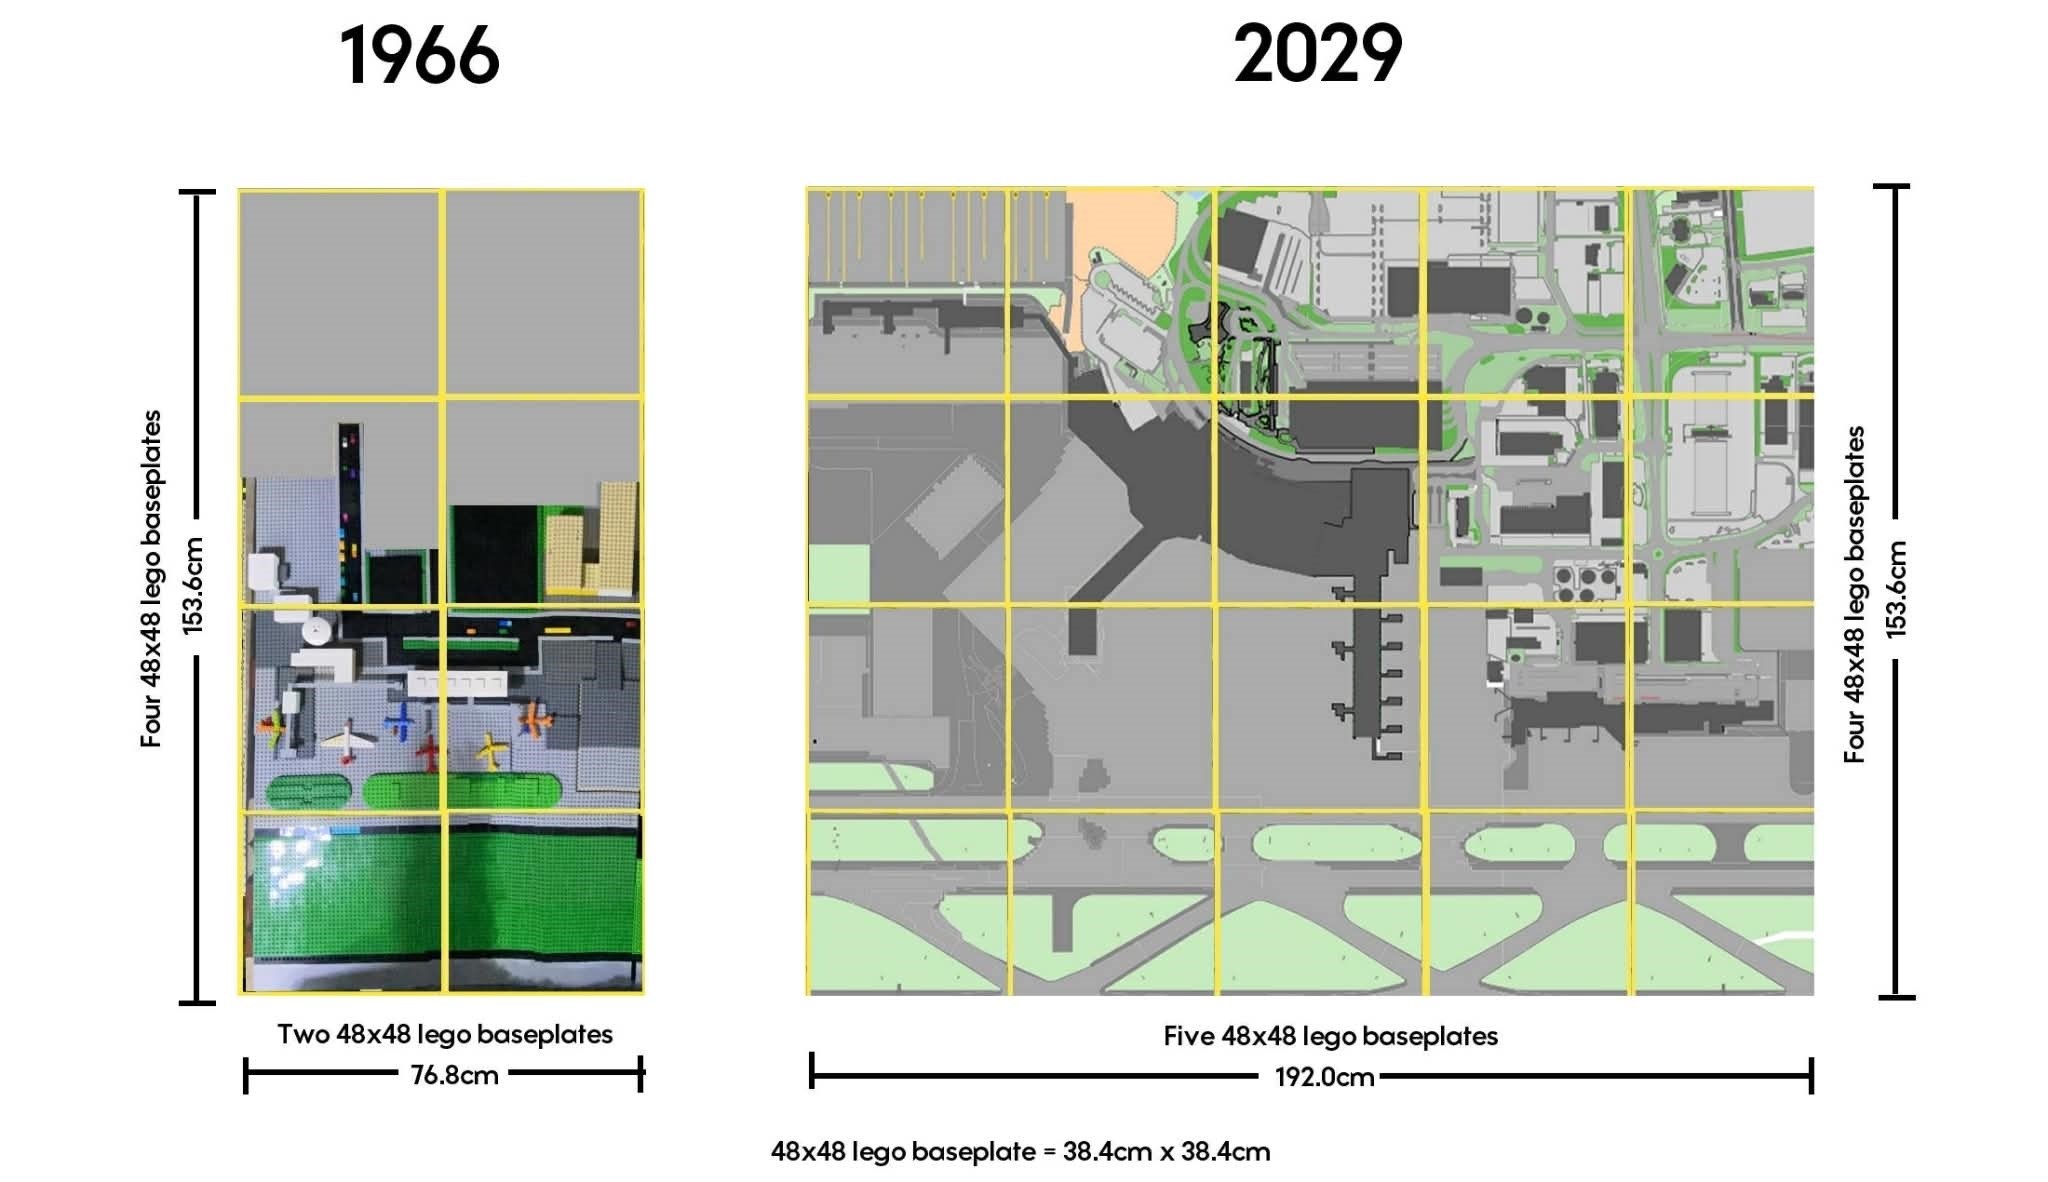
The airport team wanted to adjust the scale slightly, so less of the surrounding harbour and more of the runway was included in the original 1966 airport model, and they suggested that the buildings go from end to end on the 2029 airport model, which meant that it was scaled up a little bit too (both the 1966 and 2029 models are at the same scale).
I let them know that, consequently, we would only get half the runway width in, and they would lose a bit of extra space at the ends where the harbour is. So, the harbour was removed, and the model ended up just land-based.
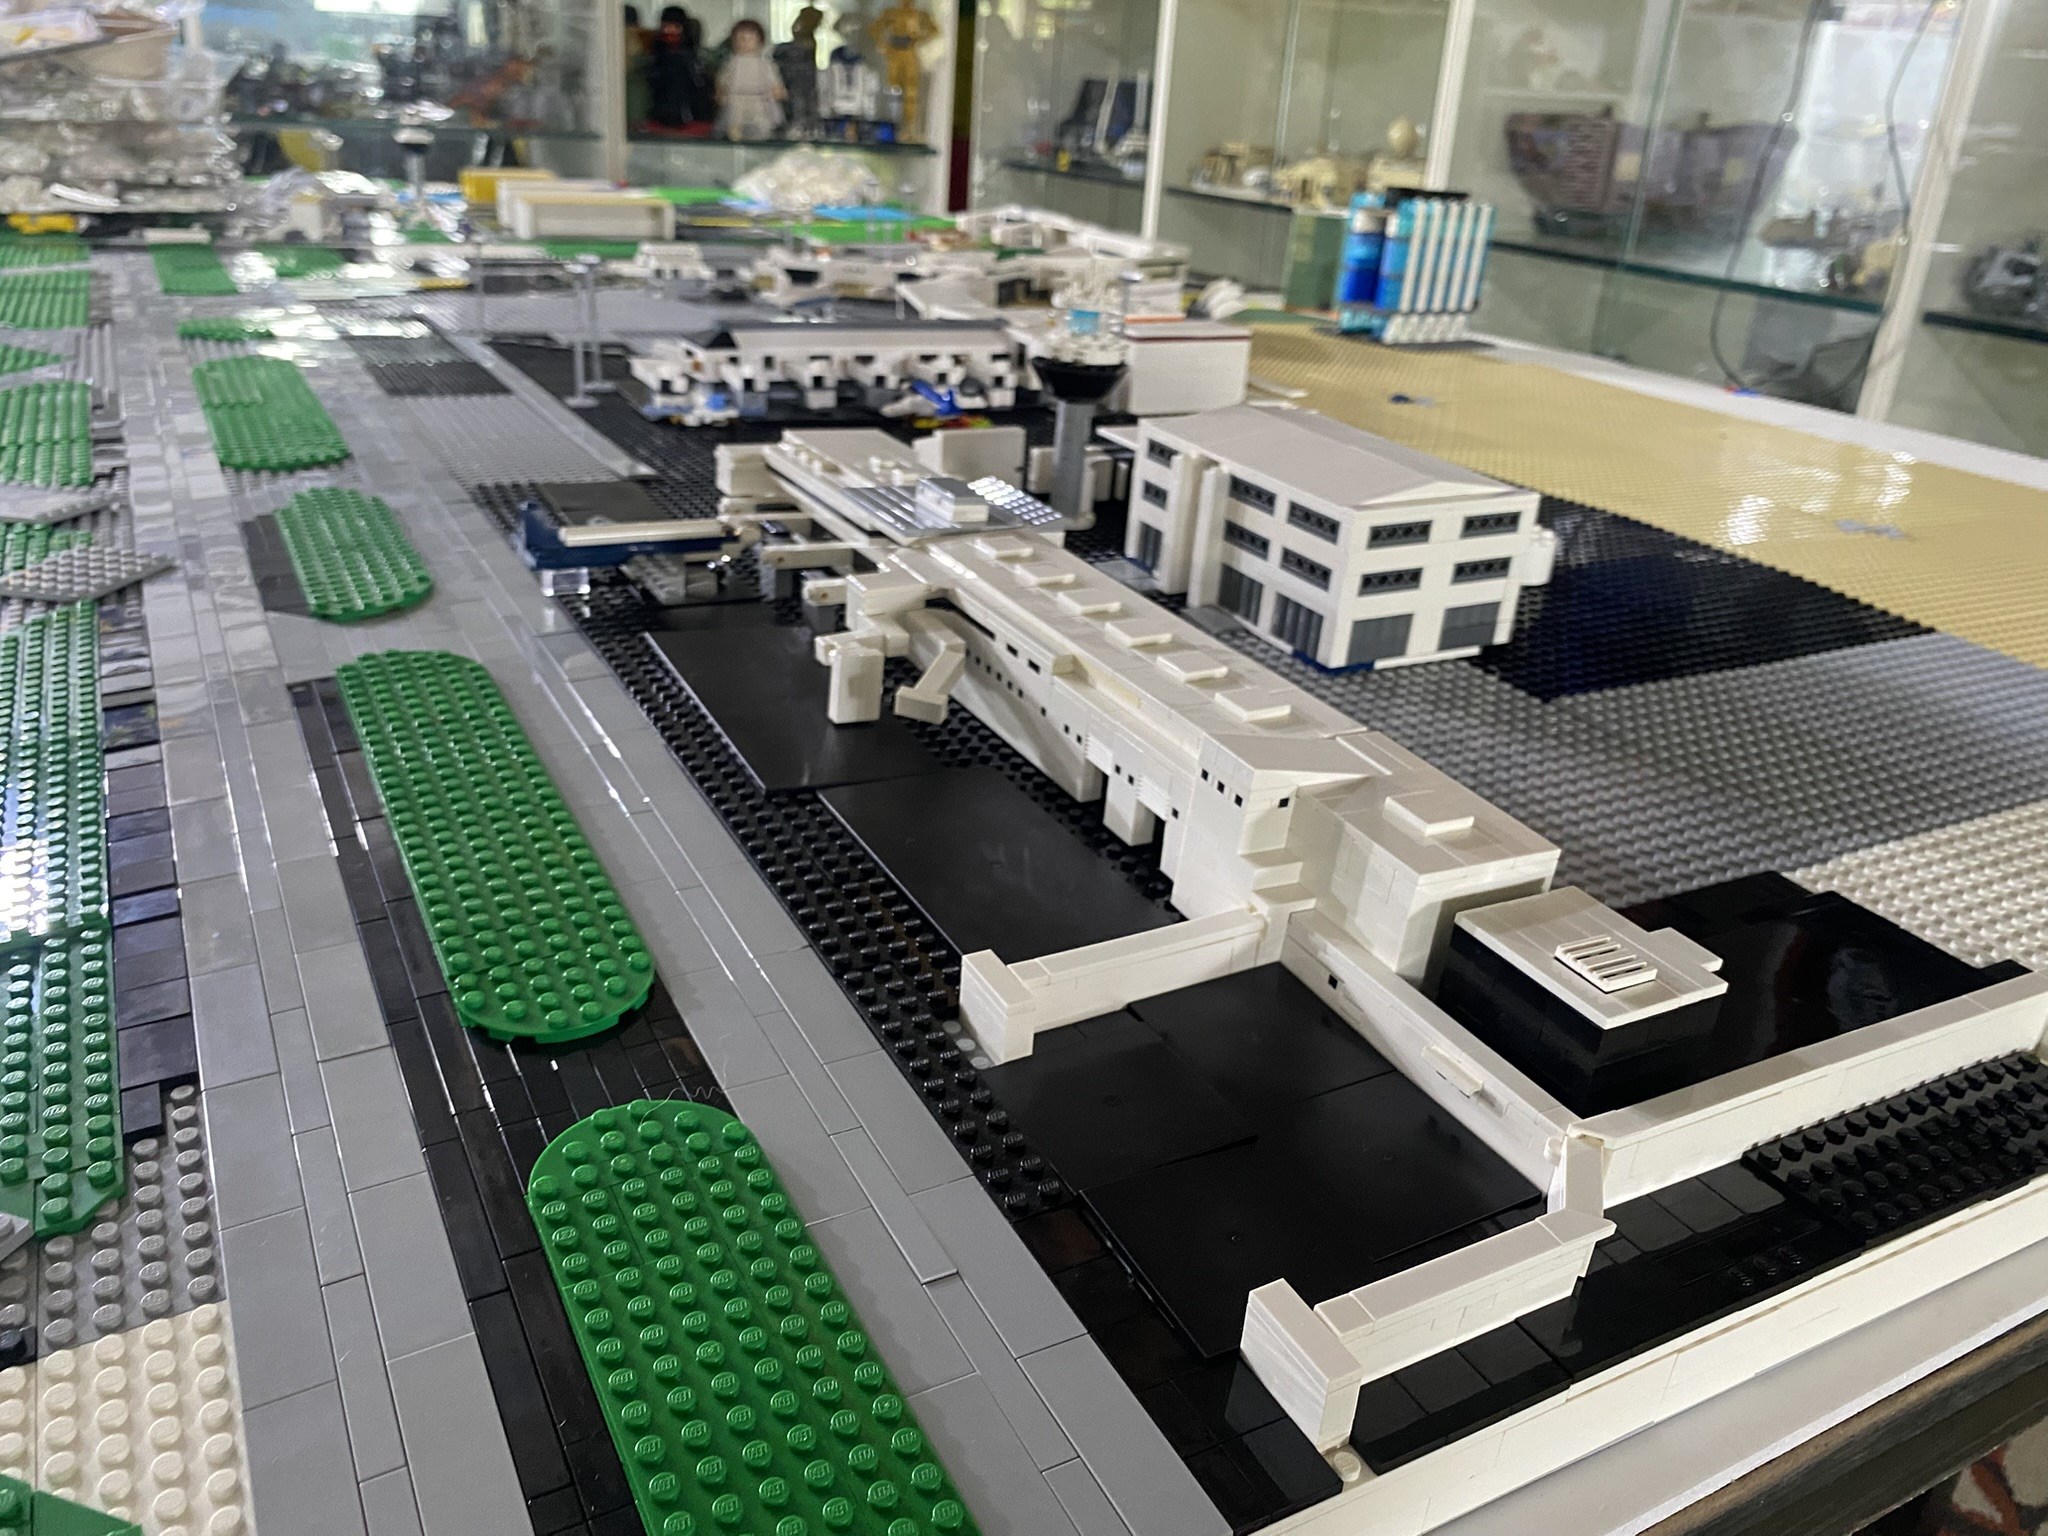
At that point, the size and scale were agreed. I expanded my map, so that the buildings went from far left to far right. I laid out the baseplates and some preliminary regular plates on top: green and grey to mimic where the runways and the grass would be. Using plates, the odd brick and some tiles, I put out a top-down silhouette of where I thought everything would go using the grid as my guide.
I sent some overhead photos back to the airport team saying, “Here's how that would look.” The scale we discussed, and they agreed with the sizing. Using that footprint of the foundations of the buildings, I was able to scale the heights accordingly.
DW: Do you know the mathematical scale of this model? 1: 5000 or 1: 500?
JP: I think it ended up being around 1: 750 (1 stud = 6.0m or 19' 8"). I have got two overhead maps. We found that the airplanes are a little bit oversized compared to the cars (both are one stud wide) and the airport terminal.
LEGO scales never align exactly. You just have to take a bit of artistic license here.
LEGO Ideas: Mahna Mahna (Do Doo De-Do-Do)
DW: Another string to your bow is that recently, your Muppets LEGO Ideas project, the Mahna Mahna (Do Doo De-Do-Do) project, reached 10,000 supporters. Is it going to be included in the next LEGO Ideas announcement?
JP: Yes. I think the current review may be announced in June.
DW: How many other LEGO Ideas projects will also be included in that announcement?
JP: Seventy-four other projects have reached 10,000 supporters in the previous three- or four-month intake. It made the review period that closed off in early January. So yes, my project is in with seventy-four other great LEGO Ideas projects.
DW: Can you talk to me about your project?
JP: Being a child of the 1970s, I grew up with The Muppet Show and Jim Henson. He was a big influence during my childhood. His other movies outside The Muppets, The Dark Crystal and Labyrinth, which I loved. The Muppets have always been a real passion of mine, and my normal MOC building themes are based pop culture nostalgia. I do a fair bit [of MOCs] from The Muppet Show, obviously! I've done the CGI characters from the Dire Straits video for Money for Nothing. And I have done MOCs from old TV shows like Automan, Magnum PI and Logan's Run.
DW: Can you describe the background to the Mahna Mahna project?
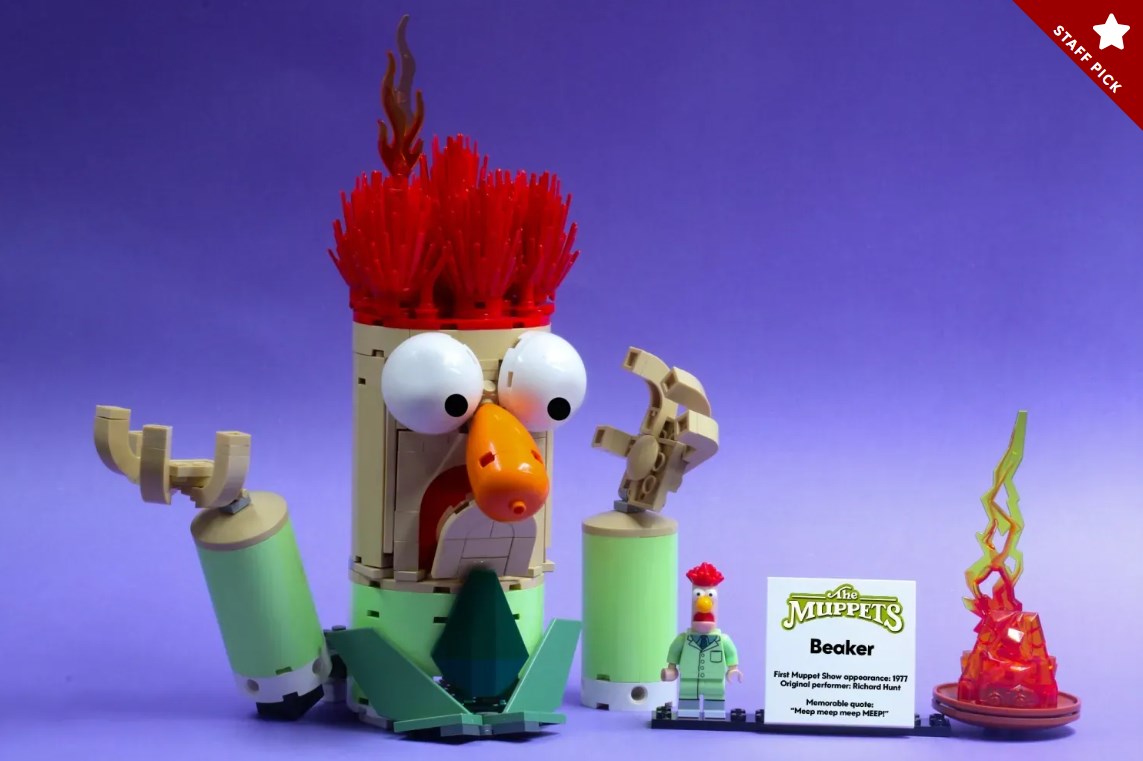
JP: I originally made a Muppet MOC after seeing the 4 × 4 hemisphere part, the element that looks like half a ping pong ball. When that part was released, I thought it would be ideal for Muppet eyes, so I started to build an Animal Muppet at that scale, with the eyes using that part. I built a Gonzo, and I also tried to build a Kermit and then Beaker as well; all with that half ping pong ball eye element, they worked out well for the most part.
I couldn't get the shaping on Kermit to a point that I liked it. I have made three or four Kermit characters over the last few years, and none of them have survived. I have scrapped them all and had to start again. I have not managed to get Kermit’s pointed top of the head right, without making it too blocky or looking too pixelated.
Anyway, I have made a couple of good Muppets at that scale, Gonzo being one of them and Beaker is the other. Beaker is currently active on LEGO Ideas. It currently has nearly 6000 supporters and about ten months to reach that 10,000-supporter threshold.
One of the Muppets MOCs I did do, I scaled right back to a much smaller scale is Mahna Mahna, which was one of the earlier skits on The Muppet Show where there's a little monster who looks a bit like Animal, but his name is Mahna Mahna. He sings a jazzy scat song, which originated as a weird soundtrack song that came out in a Swedish film.
Jim Henson had heard the song and loved it. He used it several times in Sesame Street and on The Ed Sullivan Show. The most famous version was when it appeared in an early season of The Muppet Show, where it's Mahna Mahna himself singing with two backup singers, that are called Snowths (originally Snouths as a portmanteau of snout and mouth). In the skit, Kermit, the Frog gets dragged in, reluctantly, to answer a telephone at the end of the number. It is a very funny performance, and quite formative for any Muppet fan.
I made the MOC at a smaller scale and put it on LEGO Ideas. It got a lot of traction on a lot of third-party sites and ended up hitting the 10,000-supporter mark after about a year or so. And it is currently in the review phase.

DW: I am really looking forward to that review, and I am hoping that your project gets accepted.
JP: That would be lovely. As I said, it is at a smaller scale with a smaller brick count than most LEGO Ideas projects. It is a well-known skit. The Muppet Show has had a reboot a few weeks ago with Sabrina Carpenter as a special guest. It was a one-off TV special in the style of the old original Muppet theatre show. So, it has got a little bit going for it.
My fear is, of course, that LEGO has an active license which is about to switch on for The Muppets. LEGO had a Muppet license a few years ago for the Collectable Minifigures series. When a license has not expired, but is considered no longer active, then you can submit that theme into LEGO Ideas.
When I first submitted Muppets to LEGO Ideas, it was rejected because of an IP conflict. That was on the cusp of those Collectable Minifigures being announced, so I waited for a couple of years for all that to subside. I have my fingers crossed that this project does not get archived because of an IP conflict before the end of the review period.
Pricing commission work
DW: On your commission work. How do you price your work? Is it based on hours worked or an hourly rate, or is on a brick count? Is it the price of the parts plus percentage?
JP: There are different ways of doing it. For a smaller build, like for the Fujifilm printer, I knew that the campaign was going to only last for a year, so I said to those guys, “If you only want this for a year, then I will supply the parts, and then at the end of your campaign, I'll get the build back.”
They were using my design for the year. They paid me for my design and my build time, and they had the model for a year, and then I got it back at the end of that time period.
I could either take [the model] apart and use the parts again, or I can display it as part of my portfolio. That is one way I have done it, which is fine if you have got the parts, or the parts are common or not particularly expensive.
If it is a bigger commission, like PGG Wrightson display, they bought the bricks, or I bought the bricks on their behalf, and they own the display, and used it for a few days at the Fieldays event. Now it is on display at their head office in Christchurch, I believe.
Pricing is a bit of a dark art; the projects always end up taking longer than you think; the projects always end up taking more pieces than you think. So generally, you make a bit less money than you think you are going to make. What normally happens is that the company will buy the bricks, or I will buy the bricks on the company's behalf and then invoice them for that cost separately.
I use a lot of local resellers in New Zealand on Bricklink. There's a good 100 plus Bricklink stores in New Zealand and I have got about a dozen favourites that I use regularly. I use some of them a lot more than others because I tend to use stores that trade new bricks only. Shaggy's Bricks is one of those stores based in Auckland. They do a really good job. They help me out a lot, and they have a very fast turnaround. But there are lots of other stores that I use.
DW: Are you getting better at the costing of your projects?
JP: I would like to think so, but every model is different and the bigger they get the more complex it becomes. The bigger the models are, the percentage of getting [the pricing] wrong tends to blow out a bit more. The scale of the errors is more noticeable.
Having said that, I am not feeling like I have undersold myself in any way to any of my clients. I am happy with what I have got. My wife is happy with the money coming in. Though in hindsight, I reckon I could have probably made a few more dollars on some of the commissions. The more I build and develop a better reputation I will be able to make my quotes, hopefully, sharper.
DW: Last question. For someone who is interested in getting into commission-style work, for building LEGO models, what are some of the pitfalls?
JP: That's a good question. The pitfalls are:
- Underestimating the bricks that you need,
- Underestimating the cost of the bricks, and
- Underestimating the time that it will take.
Also, you've got to be aware that often the client will not quite know what they want until they see what you've built. They then realise that is not quite what they want. Often, the client will have an idea in their head, but they do not know what is possible to build with LEGO. Once they see what you have been working on, that is when they can start to give you constructive feedback.
DW: So, they can then get a chance to visualise what the model will look like, and then ask you to pivot it around slightly to see it from different angles.
JP: Absolutely.
DW: It sounds like it is almost like a first draft, second draft, third draft of a model that's evolving through time.
JP: Exactly. If I did things digitally, if that was my forte, then I could build the entire thing on Stud.io and give them a digital model, and they could say, “Yes, that's what we want.”
I could then build that piece for piece, and I know exactly what pieces I need to order. That method would be a more efficient way of doing things, but it is not what I enjoy. I do not want to be on a screen. I do not want to be building digitally. I'd rather build tactilely.
DW: How long have you been doing the commission work?
JP: I have completed a couple of small commissions for friends who wanted little models of their favourite rock bands. I made those models maybe four or five years ago. Then, after LEGO Masters NZ, it was when the Fujfilm printer commission came around, and that was kind of my first proper commercial commission, and so that would have been three and a half years ago.
DW: Do you expect to get more work from the exposure that this airport model is going to give you?
JP: I get the feeling that I might. I have got a couple of commissions potentially lined up. We've been in touch with each other to understand budgets, size and timelines. So, there are a couple of projects on the cards.
It is very much my secondary income. I do work forty hours a week. Having the time is probably the bigger challenge these days, because quite often these projects come around with quite tight deadlines, and knowing you must squeeze the build in during the weekends and after-hours.
I need a bit of time as well to get outside and do stuff around the house: the garden has been a bit neglected over summer. I have got to balance my day job with the LEGO building, and with my domestic duties and chores.
DW: On that note, thank you for your time.
JP: Thanks.
TV interviews
Jon-Paul has had quite a lot of media interest in his models of Auckland Airport. This link will take you to the TVNZ Breakfast show that aired the 60th anniversary of the official opening – 29 January 2026.
Jon-Paul was also interviewed by Seven Sharp, a TVNZ evening current affairs show. With this link, though, you will need to log in (sign up) to a TVNZ+ account.
If you are travelling through Auckland Airport
The scale models of Auckland International Airport, designed and built by Jon-Paul Hanson, can be seen in the public side of the international departure lounge.
When the integrated terminal construction starts in April this year, the models may be moved.
It is planned to have them on display somewhere at the airport for the rest of the year.
Check out more of Jon-Paul Hansen's work
You can check out more of Jon-Paul Hansen's work from these links:
The original opening celebrations at Auckland Airport in 1966
While the first flight to leave Auckland Airport was an Air New Zealand DC-8 in November 1965, bound for Sydney, the airport was officially opened with a grand air pageant held over Auckland Anniversary weekend, 29 to 31 January 1966.
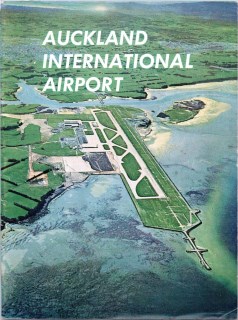
This link will take you to a 76-page Auckland International Airport opening ceremony: the official souvenir programme and booklet dated January 29, 1966.
Fun Fact: My mother and aunt (her sister) attended this opening event at Auckland Airport.
It was a gorgeous day and a great time was had by all.
This 11-minute video showcases the grand air pageant of 1966.
58 likes
10 comments on this article
Not what I was expecting from a Throwback Thursday, but as not only a Lego buff but an aviation buff, I quite enjoyed it. I had to chuckle at the bit about the cars being as wide as the airplanes, considering that the Lego cars and Lego airplanes of my youth were both four-wide.
Great work on both the as built, and updated airport. Lots of other nice builds as well.
This is the hardest kind of build. When you do a fantasy moc, scale is irrelevant, you just put what you want where you want and if it looks good, you are happy. With scale model, everything has to be where it should, it has to be scaled relative to other parts and it must look reasonably close to the original. Many times you have to be very creative with building techniques and/or part usage (NPUs). It still have to be structurally sound but with severe constraints.
I'm in the (very long term) process of building a MLP/LUT for the Saturn V Lego rocket and everything is scaled to the best precision I can get at the scale I work and what Lego produces down to the smallest details. I have been on the project for many years - I had to wait for many years for parts to be produced in the colours I needed (still waiting for a few more). Sometimes, new parts get designed and I realise this will improve the build, so I dismantle what I have and redo it with the new part. (Of course Lego designers can ask for the parts in the right colour or even request a new part when needed - I don't have that luxury so I just wait).
Well done, very difficult task as need to determine the scale of the planes as well as the airport. Too detailed and the airport becomes massive unless you abandon relative scale. However, make the planes too small and look too simple, you seemed have reached a nice balance. Would be interesting to see if any other airports contact you, e.g. Billund.
Amazing article. I will make it up to Auckland to see it at some point.
Well done. Lots of grey cells put to use on that one.
Thanks for the kind comments, and thanks David (FlagsNZ) for the opportunity to be interviewed for this article, great seeing it all put together with the photos, reference images, videos etc!
Another fun fact: Someone I work with was at the opening air show in 1966 as an eleven-year-old. His brother was pilot in a NAC (Forerunner to domestic Air NZ) DC-3 at the show. We had a great conversation this morning about this.
https://en.wikipedia.org/wiki/New_Zealand_National_Airways_Corporation
@jp_30 said:
"Thanks for the kind comments, and thanks David (FlagsNZ) for the opportunity to be interviewed for this article, great seeing it all put together with the photos, reference images, videos etc! "
You're welcome
There is (or was) a LEGO model in the domestic terminal at Melbourne Airport that they were using to show off some upgrades or something as well. Really cool looking model...