Mecabricks: the Part Manager
Posted by BrickJonas,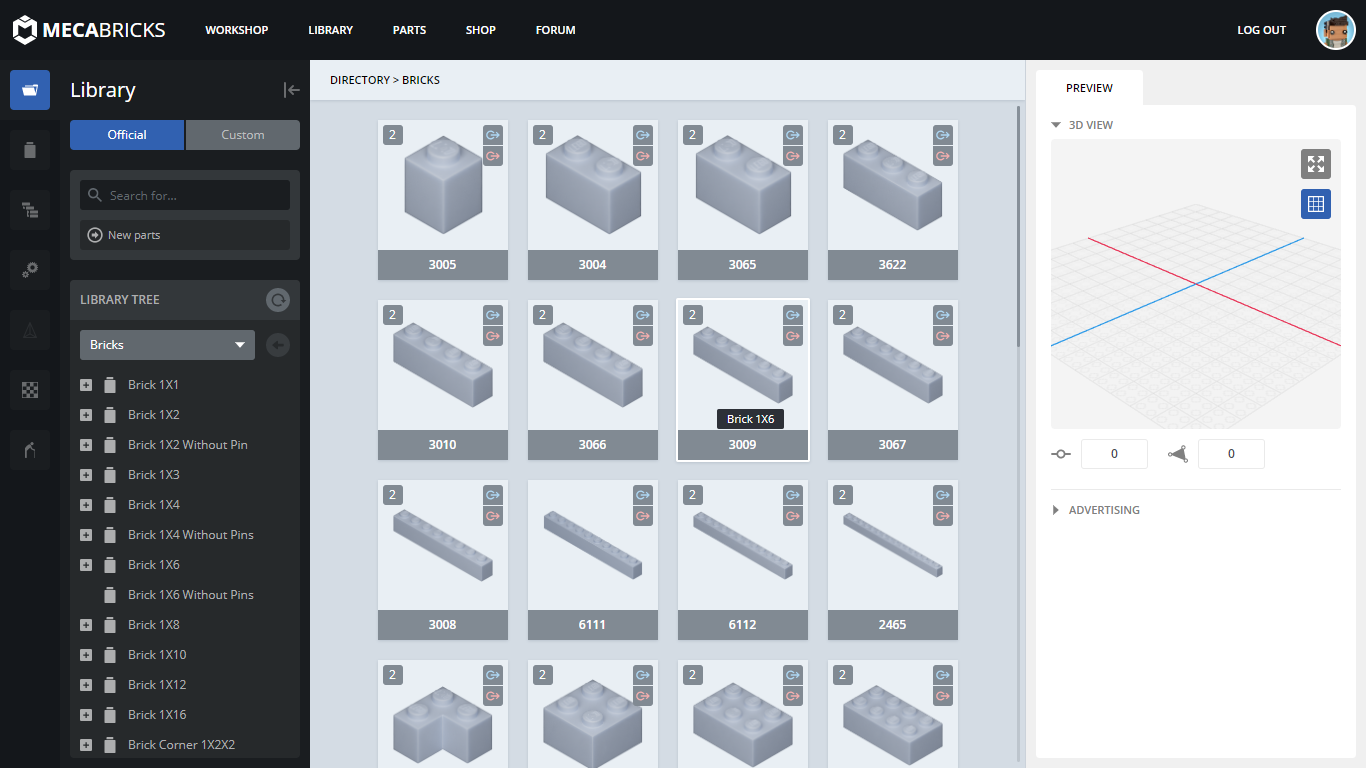
In my last article, I showed you how can you make amazing renders on the Mecabricks render farm, but some more serious MOC builders often make custom decorated pieces or stickers for their creations, and I'm sure you won't be surprised if I tell you that... well, of course you can do that kind of stuff on Mecabricks too!
On top of that, it isn't even complicated, and you don't need any special skills, you just need to understand how the Mecabricks part system works.
The Part Manager
Nicolas completely redesigned the whole part system and part manager last year and early this year, and now everyone have access to this amazing part manager.
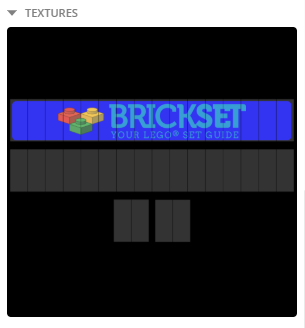
You can access 6 different sections here: the Library, where you can see all the pieces available on Mecabricks, the Parts section, where you can also see the details of official and custom decorated parts, the Directories, where you can add and remove directories from your library tree, the Configurations page, where you can search for specific part configurations, the Textures page, where you can see all of your uploaded decorations, and delete the ones which you don't need, and the last icon on the left side menu will bring up the old part manager if you'd like to use that for any reason.
What will we do today?
Well, I figured I could show you quickly how can you make custom decorated pieces, and how can you set up dual moulded parts. We will make four custom decorated pieces today:
- 1x8 bright blue brick with Brickset logo in white
- 1x8 white brick with a white sticker with Brickset logo in blue
- 1x8 black brick with the Brickset logo (only text) in gold (it's Brickset's 20th anniversary, so we need something special, right?... ;) )
- Bright blue torso with dual moulded (bright blue & bright yellow) arms
As you can see, we'll learn how to make a simple decorated piece, a piece with a sticker, decorated part with metallic/ink decoration, and also more complicated pieces, which include dual molded parts (the torso will have dual moulded arms)!
Let's start working on our custom bricks!
Let's start by adding a new directory for our Brickset themed parts. Go to the Directories page (3rd icon from the top on the left side), type in the name of your directory, and click on the Create button.
1x8 Bright blue brick with white Brickset logo
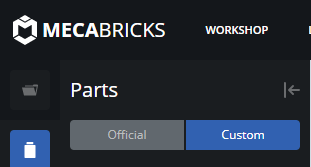
Now we should search for the part number of the brick which we want to decorate. I usually just go in the Workshop and find the brick, and check its ID. In this case, we'll use the part number 3008 (1x8 brick). Open the Parts section (2nd icon on the left side), and switch to the "Custom" page.
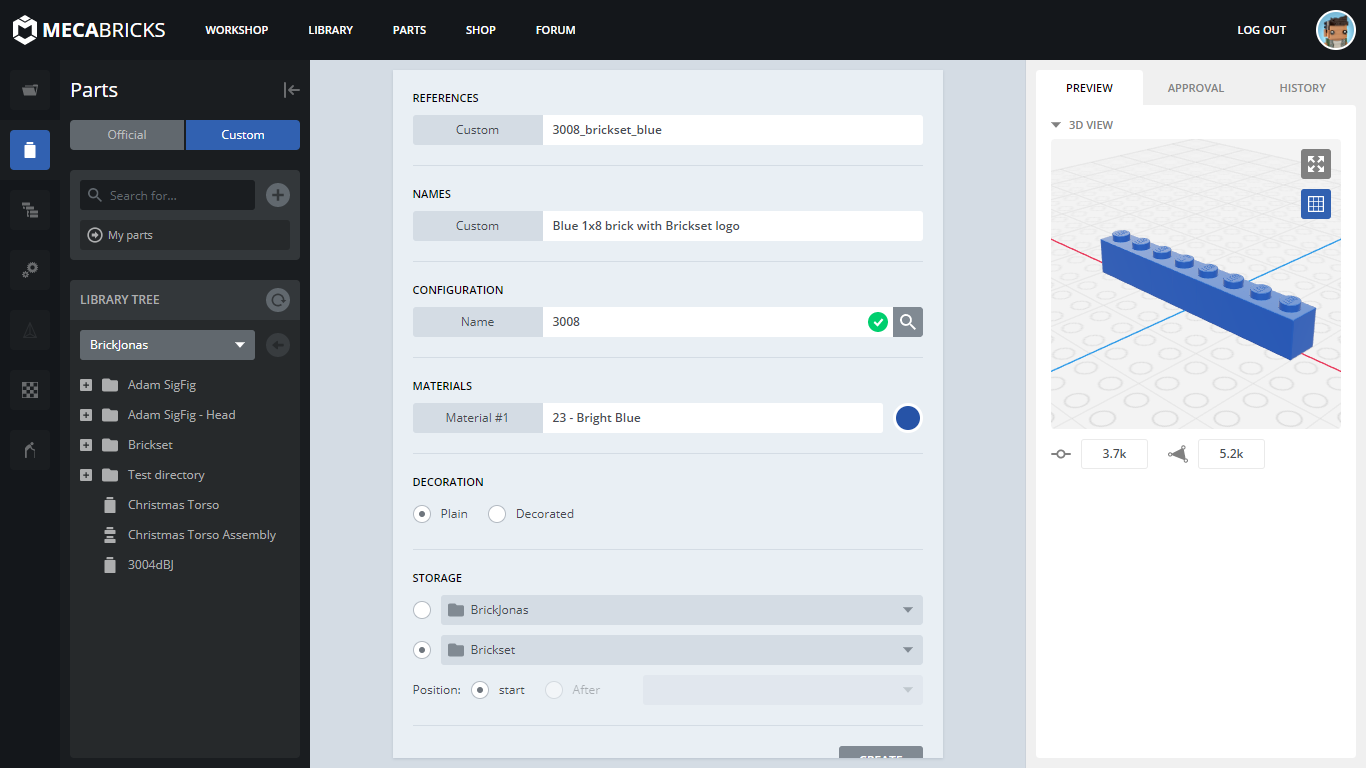
Now you can see a form, where you can define a reference and a name for your decorated part, and also pick a configuration. I'll just type 3008_brickset_blue in the reference text field, and give it a name, let's say Blue 1x8 brick with Brickset logo. The configuration is where we'll need to search for the configuration which we want to customize. Type the part number, 3008 here, then click on the search icon next to it.
Nice, it found the right brick for us. A 3D preview appeared on the right side, and a couple of new sections showed up in the form too. You can pick the material for your brick (you can use all type of materials here, even metallic, transparent, glitter, etc.). For this brick, I'll pick a Bright Blue solid material.
In the next section, you can tell if this part should be decorated or not. Select the "Decorated" radio button. Well, this is where the fun begins! In the 3D world, we can make UV maps, which are basically images which contain the 2D versions of the 3D parts (well this wasn't a professional explanation, but I believe you'll understand it this way), and we can use these PNG images as a guide when making decorations. You'll see the UV map for this particular brick on the right sidebar:
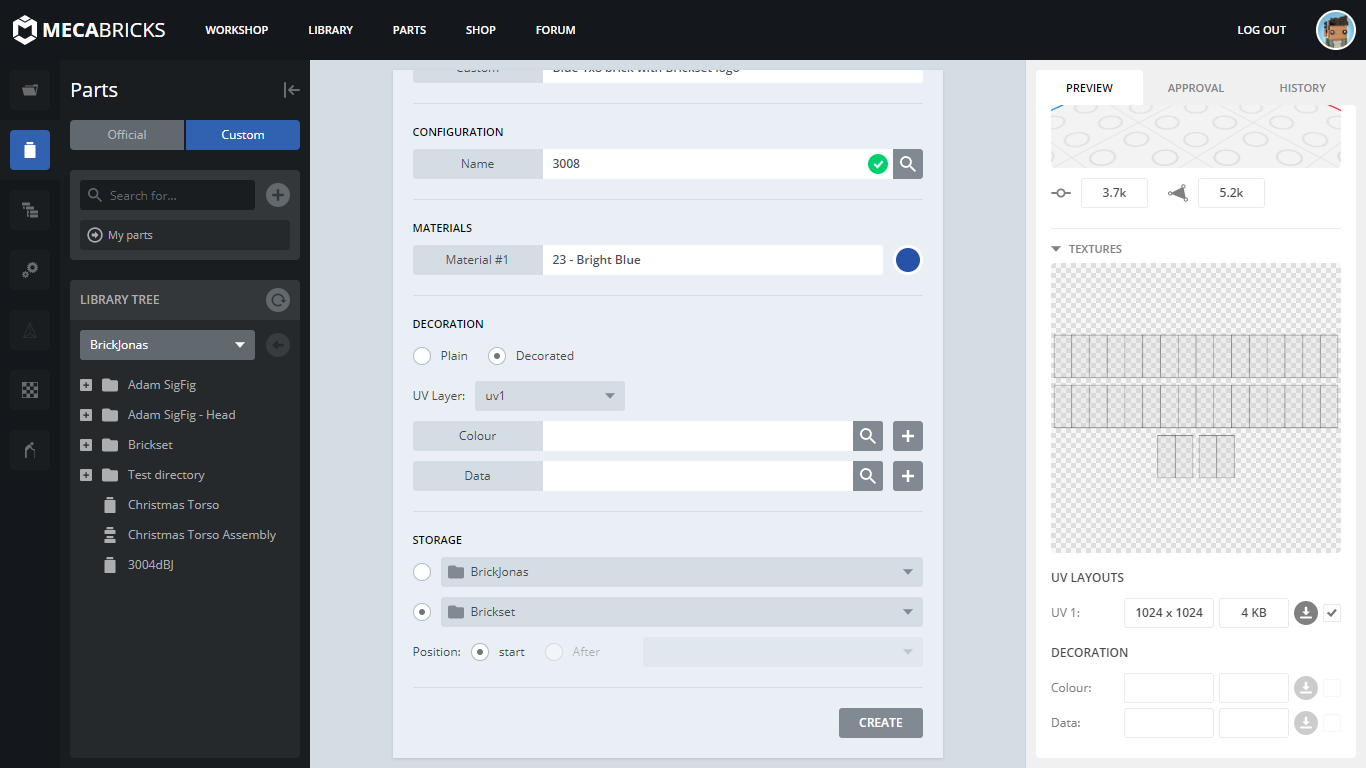
You can also see a "UV Layer" drop-down. Some pieces have a couple of different UV maps which you can use, so you can pick the one that will work the best for you. This time, we have only one UV map, and that'll be enough for us. Let's download it by clicking on the small download icon on the right side!
Now we'll need a photo editor or designer program. It's up to you which one will you use. There are many free and paid alternatives. I usually use Photoshop or Gravit designer, but now I decided I'll try GIMP.
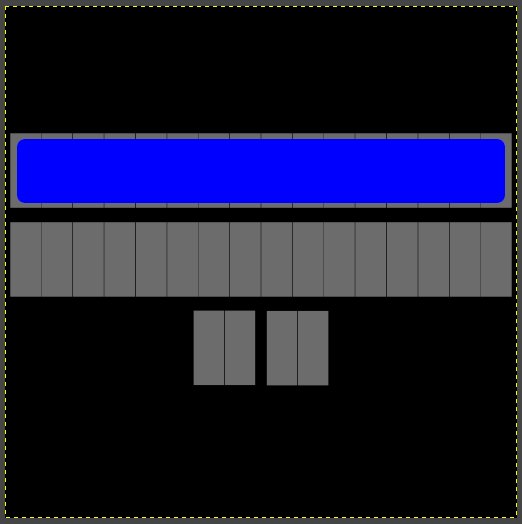
Open your UV map in the photo editor, and add your decoration to it. I'll place it on one of the sides of the 1x8 brick. For this brick, I just imported the Brickset logo with transparent background in the image editor, and made two version of it: one with white text, and one with the original blue one. I wouldn't go into details here, because this article isn't about photo editing. So, we basically finished our first decoration. Remember to hide the UV map, and save your image in .PNG format with transparent background.
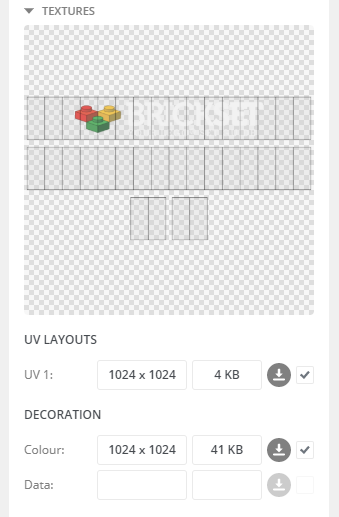
Now we're ready to upload our decoration to the Mecabricks Part Manager! You'll need to upload it as a "Colour" decoration, by clicking on the "+" icon:

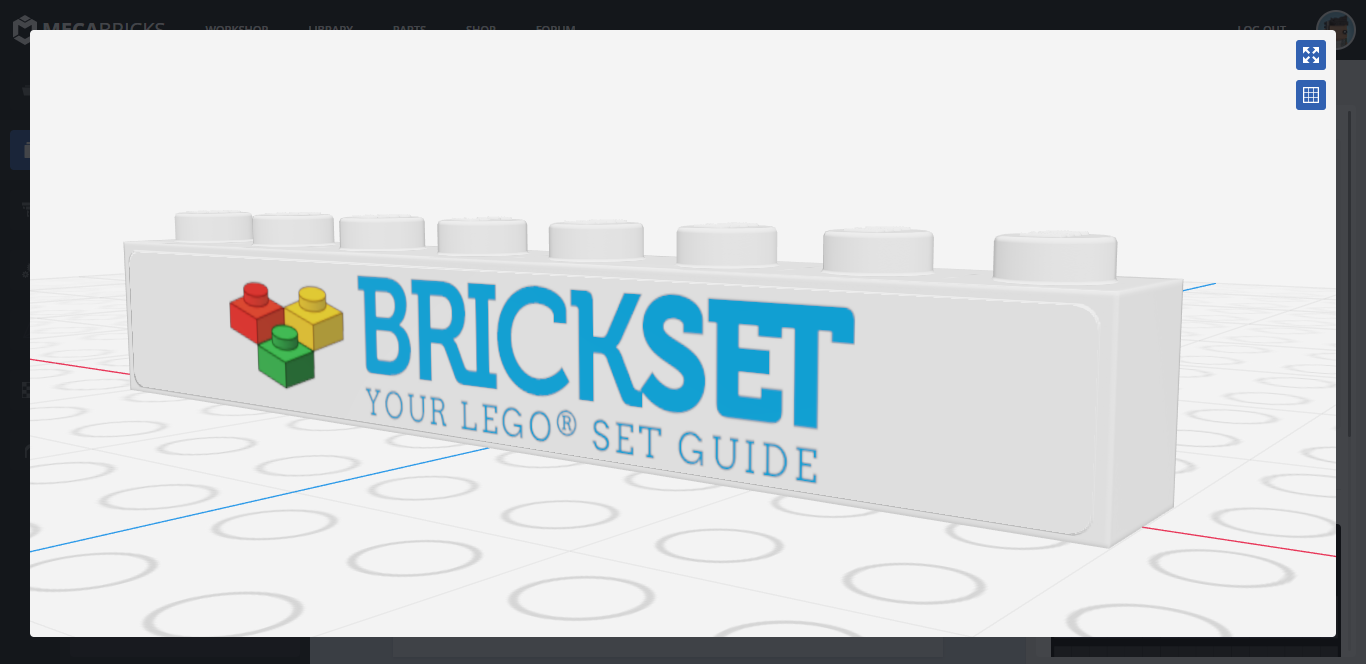
It'll also show up on the 3D and decoration preview too:
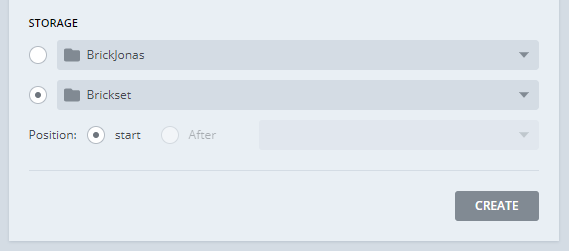
If you're satisfied with the results, pick a directory where you'd like to save the part, and click on the "Create" button at the bottom of the page.
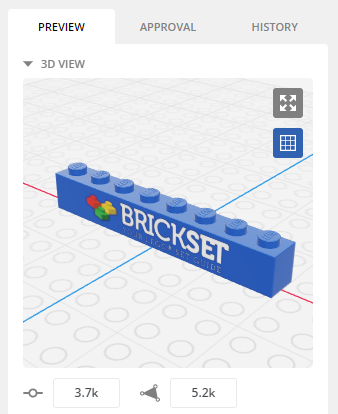
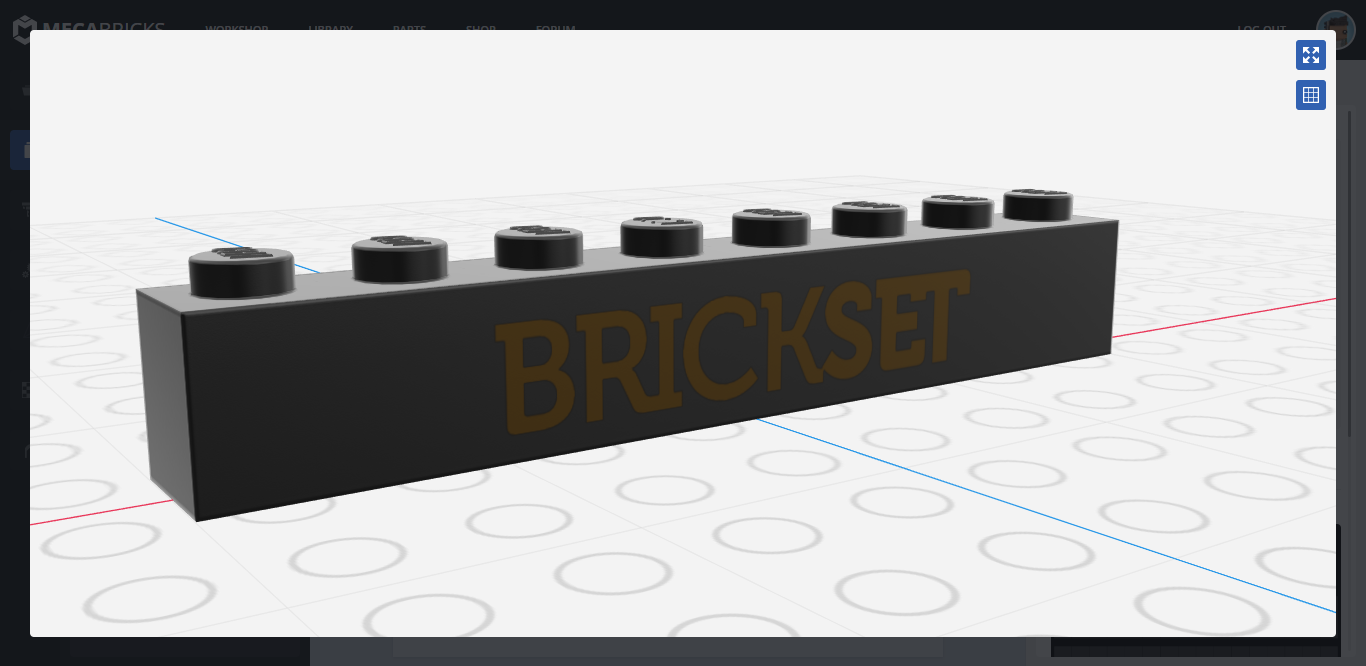
If the Part Manager successfully saved your new brick, a new section will show up above the 3D preview! You can render an icon for your part, which will show up for example in the Workshop! You don't need to set up anything, you can just click on the Render button, and wait a couple of seconds!
![]()
Congratulations! You just made your first custom decorated piece on Mecabricks! You can now go to the Workshop, and select your own directory in the brick palette (it'll be at the end of the list, as "Custom Parts"):

Okay, let's make the other custom parts too!
1x8 White brick with Brickset sticker
This time, our workflow will be pretty much the same. We'll just need a different reference and name for our brick, and after we upload our decorations, we'll make one more image, which will contain the decoration data!
The data texture basically tells the part manager how should it process our custom piece. It stores data in only 3 channels, which means that you'll only need to use 3 specific colours (and their combinations) when making a data texture:
- Red (#ff0000): Metal ink for printed areas or for stickers (Materials 334, 335, 336, 337, 344 and 345)
- Green (#00ff00): Chrome ink for stickers
- Blue (#0000ff): Sticker shape
So if you'd like to put a circle shape sticker on your brick, you'll draw a blue circle on the data texture. If you want to add a metal ink text to your brick, you'll use red as the text colour. If you want a sticker, which includes a metal ink decoration, you'll combine these two colours, which means that the sticker shape will be blue (#0000ff), and the text will be a pink-ish colour - the combination of red and blue channels (#ff00ff).
I recommend you to read Nicolas' article about the data textures on the Mecabricks Forum. He also gives you some tips on how can you reduce file size for data textures, which is important, because you have limited storage on Mecabricks. ;)
It might sound a little bit strange or complicated for the first time, but you'll see that it's pretty logical and simple. So, let's make a data layer for our brick! I'll just draw a blue rectangle with slightly rounded edges on the UV map, and also add a solid black (#000000) background:
Now we just need to hide the UV map and export, then upload this image to Mecabricks Part Manager, but this time to the "Data" field in the Decoration section. It'll of course show up in the preview window too:
It looks pretty bad when you see all these layers, but you can see in the 3D view, that the part manager actually noticed that you uploaded a data layer, and applied a sticker on the brick!
Now you can save your piece, and render a preview icon for it if you wish.
1x8 Black brick with the Brickset logo
Of course the workflow is in 90% the same as for the first two bricks, but this time we'll have a nice metallic gold ink on our brick. For the colour texture, we'll just need the Brickset text in gold. But how do we know exactly which colour should we use? Well, we should use the official colour chart to pick the right colour for our decoration! It'll be the #BB9442 colour.
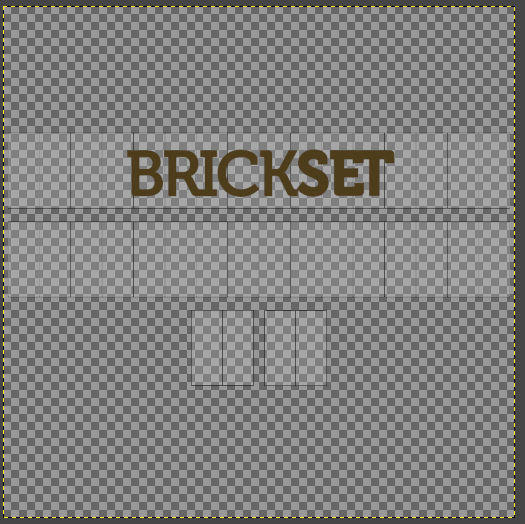
For the data texture, we'll need the exact same image, just with black background instead of transparent, and with red (#ff0000) text (remember, that means that the text will be "written" with gold ink on the brick):
Let's upload these textures to the Part Manager, and check the results! You won't really see anything special in the 3D preview, but trust me, you'll see the nice gold ink if you render a photo of the brick on the render farm!
Okay, let's make something more complicated - a torso with the brickset logo and dual moulded arms!
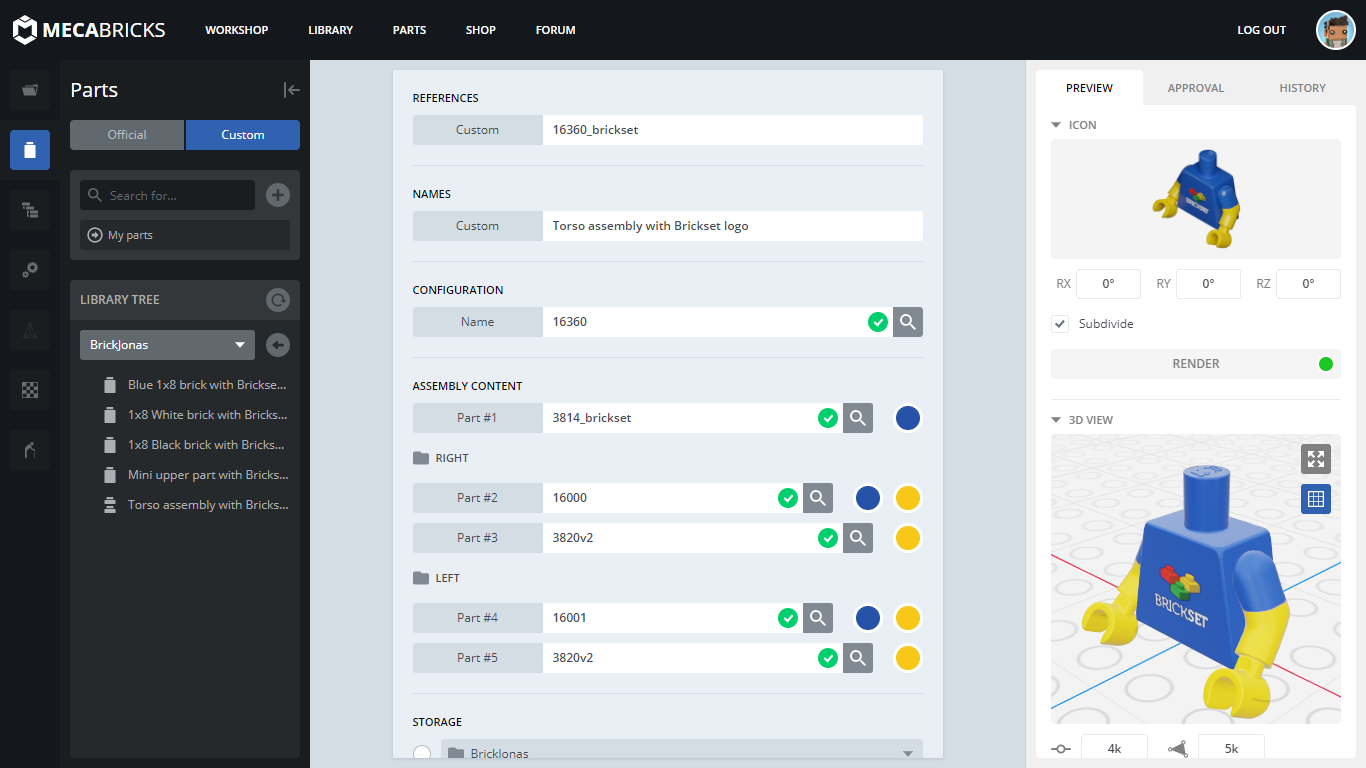
Torso assembly - with Brickset logo & dual moulded arms
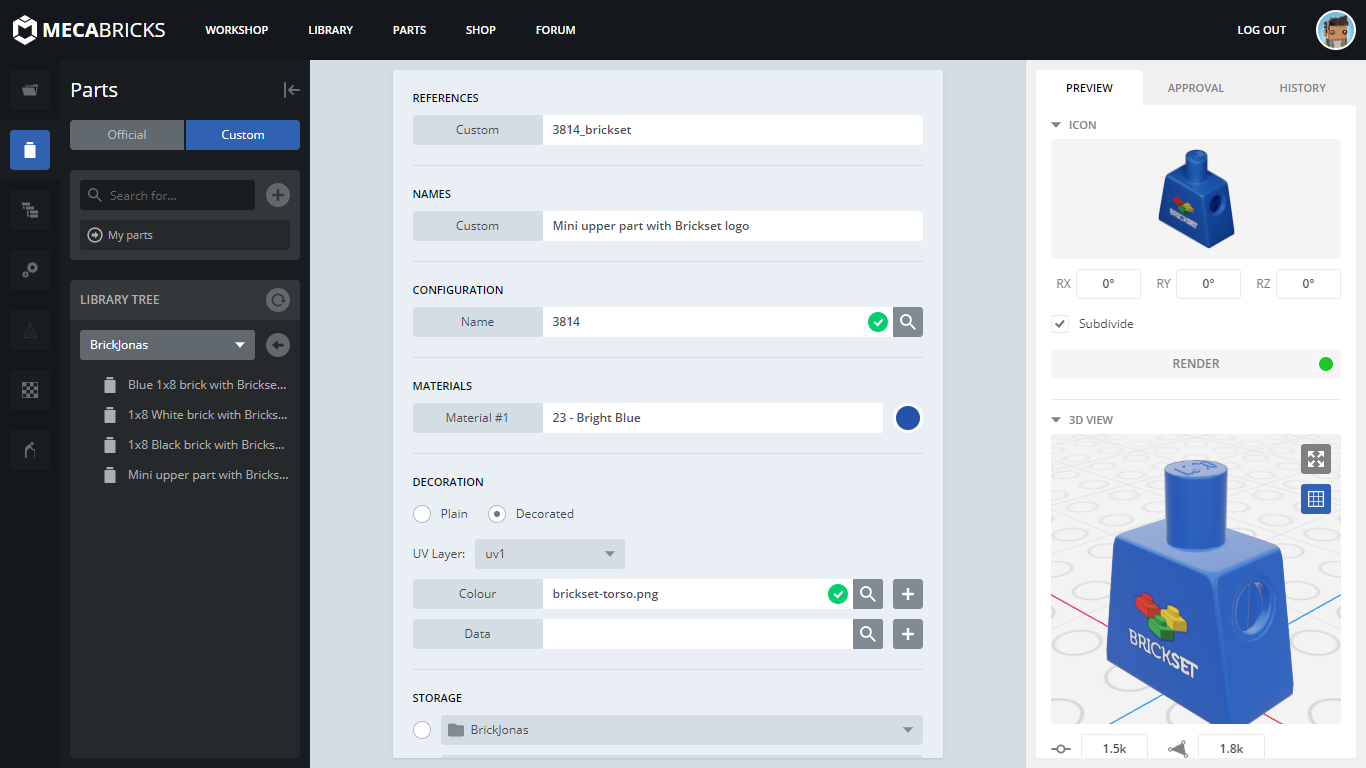
When making a part which consists of multiple separated pieces, we should actually decorate those separated pieces first (if needed), and then make the assembled piece. So, in this case the part number for the torso is 3814, and 16360 for the assembly. Let's start with the torso: the workflow is the same for this piece as for the 1x8 bricks. You search for the 3814 configuration, pick its colour, download the UV map, make the decoration on a transparent background, and upload it to the Parts Manager, then save it.
The next step is to make one more custom piece, but use the 16360 part number for the configuration, so you can edit a whole torso assembly - a torso with arms and hands.
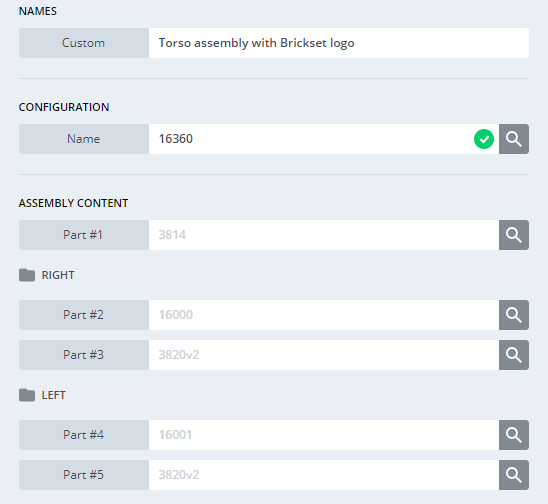
As you can see, there are some placeholders in these text fields, and you can actually use those suggested part numbers for everything but the torso itself. For that, you'll need to use the reference name which you gave for the custom torso, in my case, it's 3814_brickset. After you added all five parts, you'll notice that you can pick two different colours for the arms, and that's because they're dual moulded minifigure arms! I'll just pick a bright blue colour for the upper arms, and bright yellow for the lower part and for the hands. This is a fantastic feature on Mecabricks in my opinion, because you can easily use different colours for these pieces later (if you'd like to use reddish brown, medium flesh or light flesh for the lower arm and hands for example).
That's it, now you can make your own custom pieces on Mecabricks! Let's save this custom torso, and use it in the workshop! I added the other three custom pieces which I made during this tutorial and made a render of them on Mecabricks:
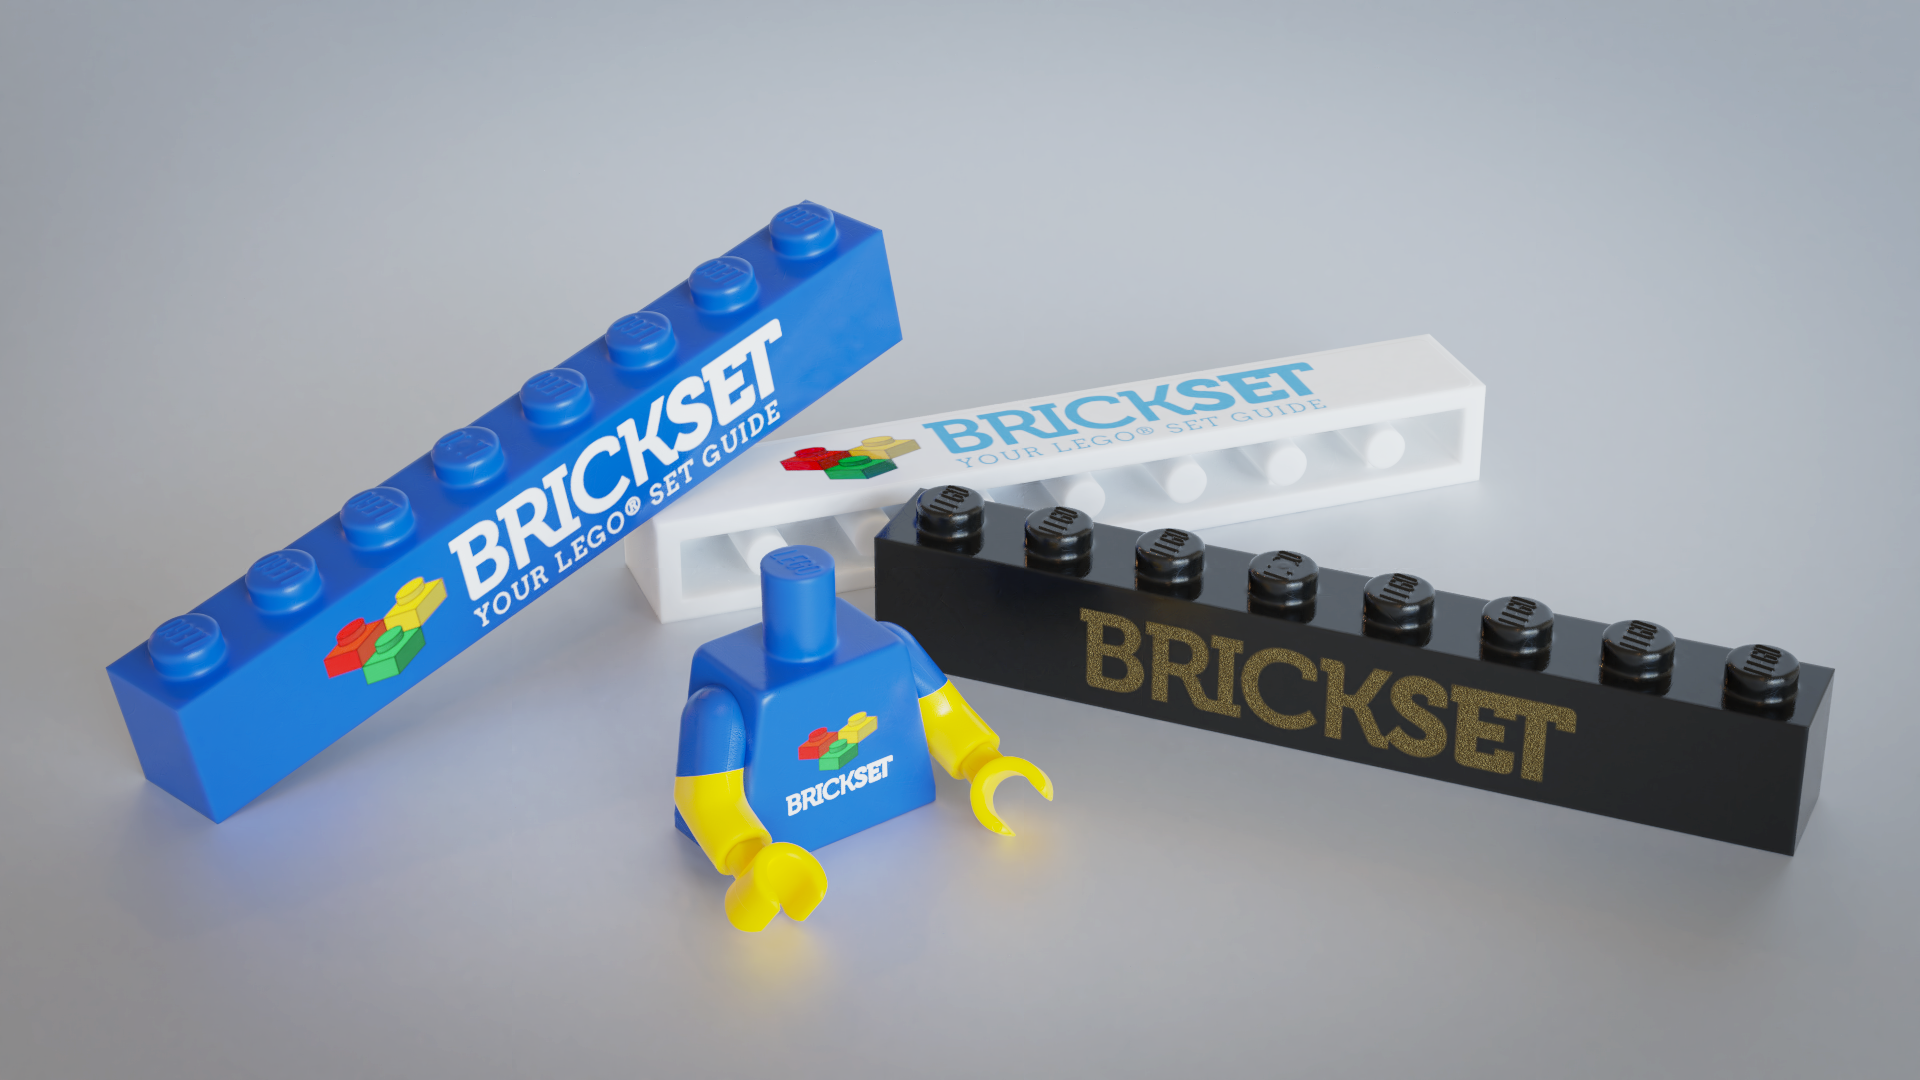
Let's see how would our torso look like on a real minifigure:

62 likes
16 comments on this article
Thank you! I was wondering how one would be able to go about creating custom prints on there, and you certainly delivered in that regard!!
I just started using Mecabricks yesterday, and I was hoping you'd publish another tutorial. Thank you, this sure helps a lot!
Ooh, I'm bookmarking this tutorial. I've been really struggling to figure out how to get custom decorations into my Mecabricks models, and you've made it amazingly clear. Thank you so much!
Thank you sooo much guys, I'm glad you like my tutorials, and I'm really happy I could help you! :)
Is it possible to make intructions for your models on mecca bricks?
Thanks
@kp2710 said:
"Is it possible to make intructions for your models on mecca bricks?
Thanks"
Not yet! - But the instruction maker is already in development, so we should see it in action soon! :)
I’m a bit clueless, sorry... but do you then print out the sticker sheet or is is just for designing MOC’s online?
@meesajarjar72 said:
"I’m a bit clueless, sorry... but do you then print out the sticker sheet or is is just for designing MOC’s online?"
This article is only about making decorations/stickers for virtual bricks, and use it on your digital creations and renders, sorry. :)
Looks so good but it needs to be able to be made for real!!! imagine being able to have custom bits printed off.
Thanks! I joined Mecabricks recently (about a month ago) and was wondering how to do this.
@BrickJonas said:
" @kp2710 said:
"Is it possible to make intructions for your models on mecca bricks?
Thanks"
Not yet! - But the instruction maker is already in development, so we should see it in action soon! :) "
Thank You
Those renders look like actual real-world bricks! Amazing. That software is extremely powerful...
I was interested in making my own custom set, so I downloaded the Lego Digital Designer. I think it's easy to use, I like the exporting options for parts and instructions.
What advantages does this program offer over the LDD?
@Zoniax said:
"I was interested in making my own custom set, so I downloaded the Lego Digital Designer. I think it's easy to use, I like the exporting options for parts and instructions.
What advantages does this program offer over the LDD?"
- It is not discontinued.
- You can add your own decorations
- You can make realistic images of your creation
- You can animate your models
I really like how you can even simulate stickers, not only prints!
Do you know if custom parts are being considered, i.e. the possibility to create say a 1x5 brick or a 2 long bar? That's possible in Stud.io, even though it's been rather buggy when I've tried it.
@MrClassic said:
"I really like how you can even simulate stickers, not only prints!
Do you know if custom parts are being considered, i.e. the possibility to create say a 1x5 brick or a 2 long bar? That's possible in Stud.io, even though it's been rather buggy when I've tried it."
I don't know about that, but I guess custom parts won't be available in Mecabricks.