Robot Inventor: the robots
Posted by Huw,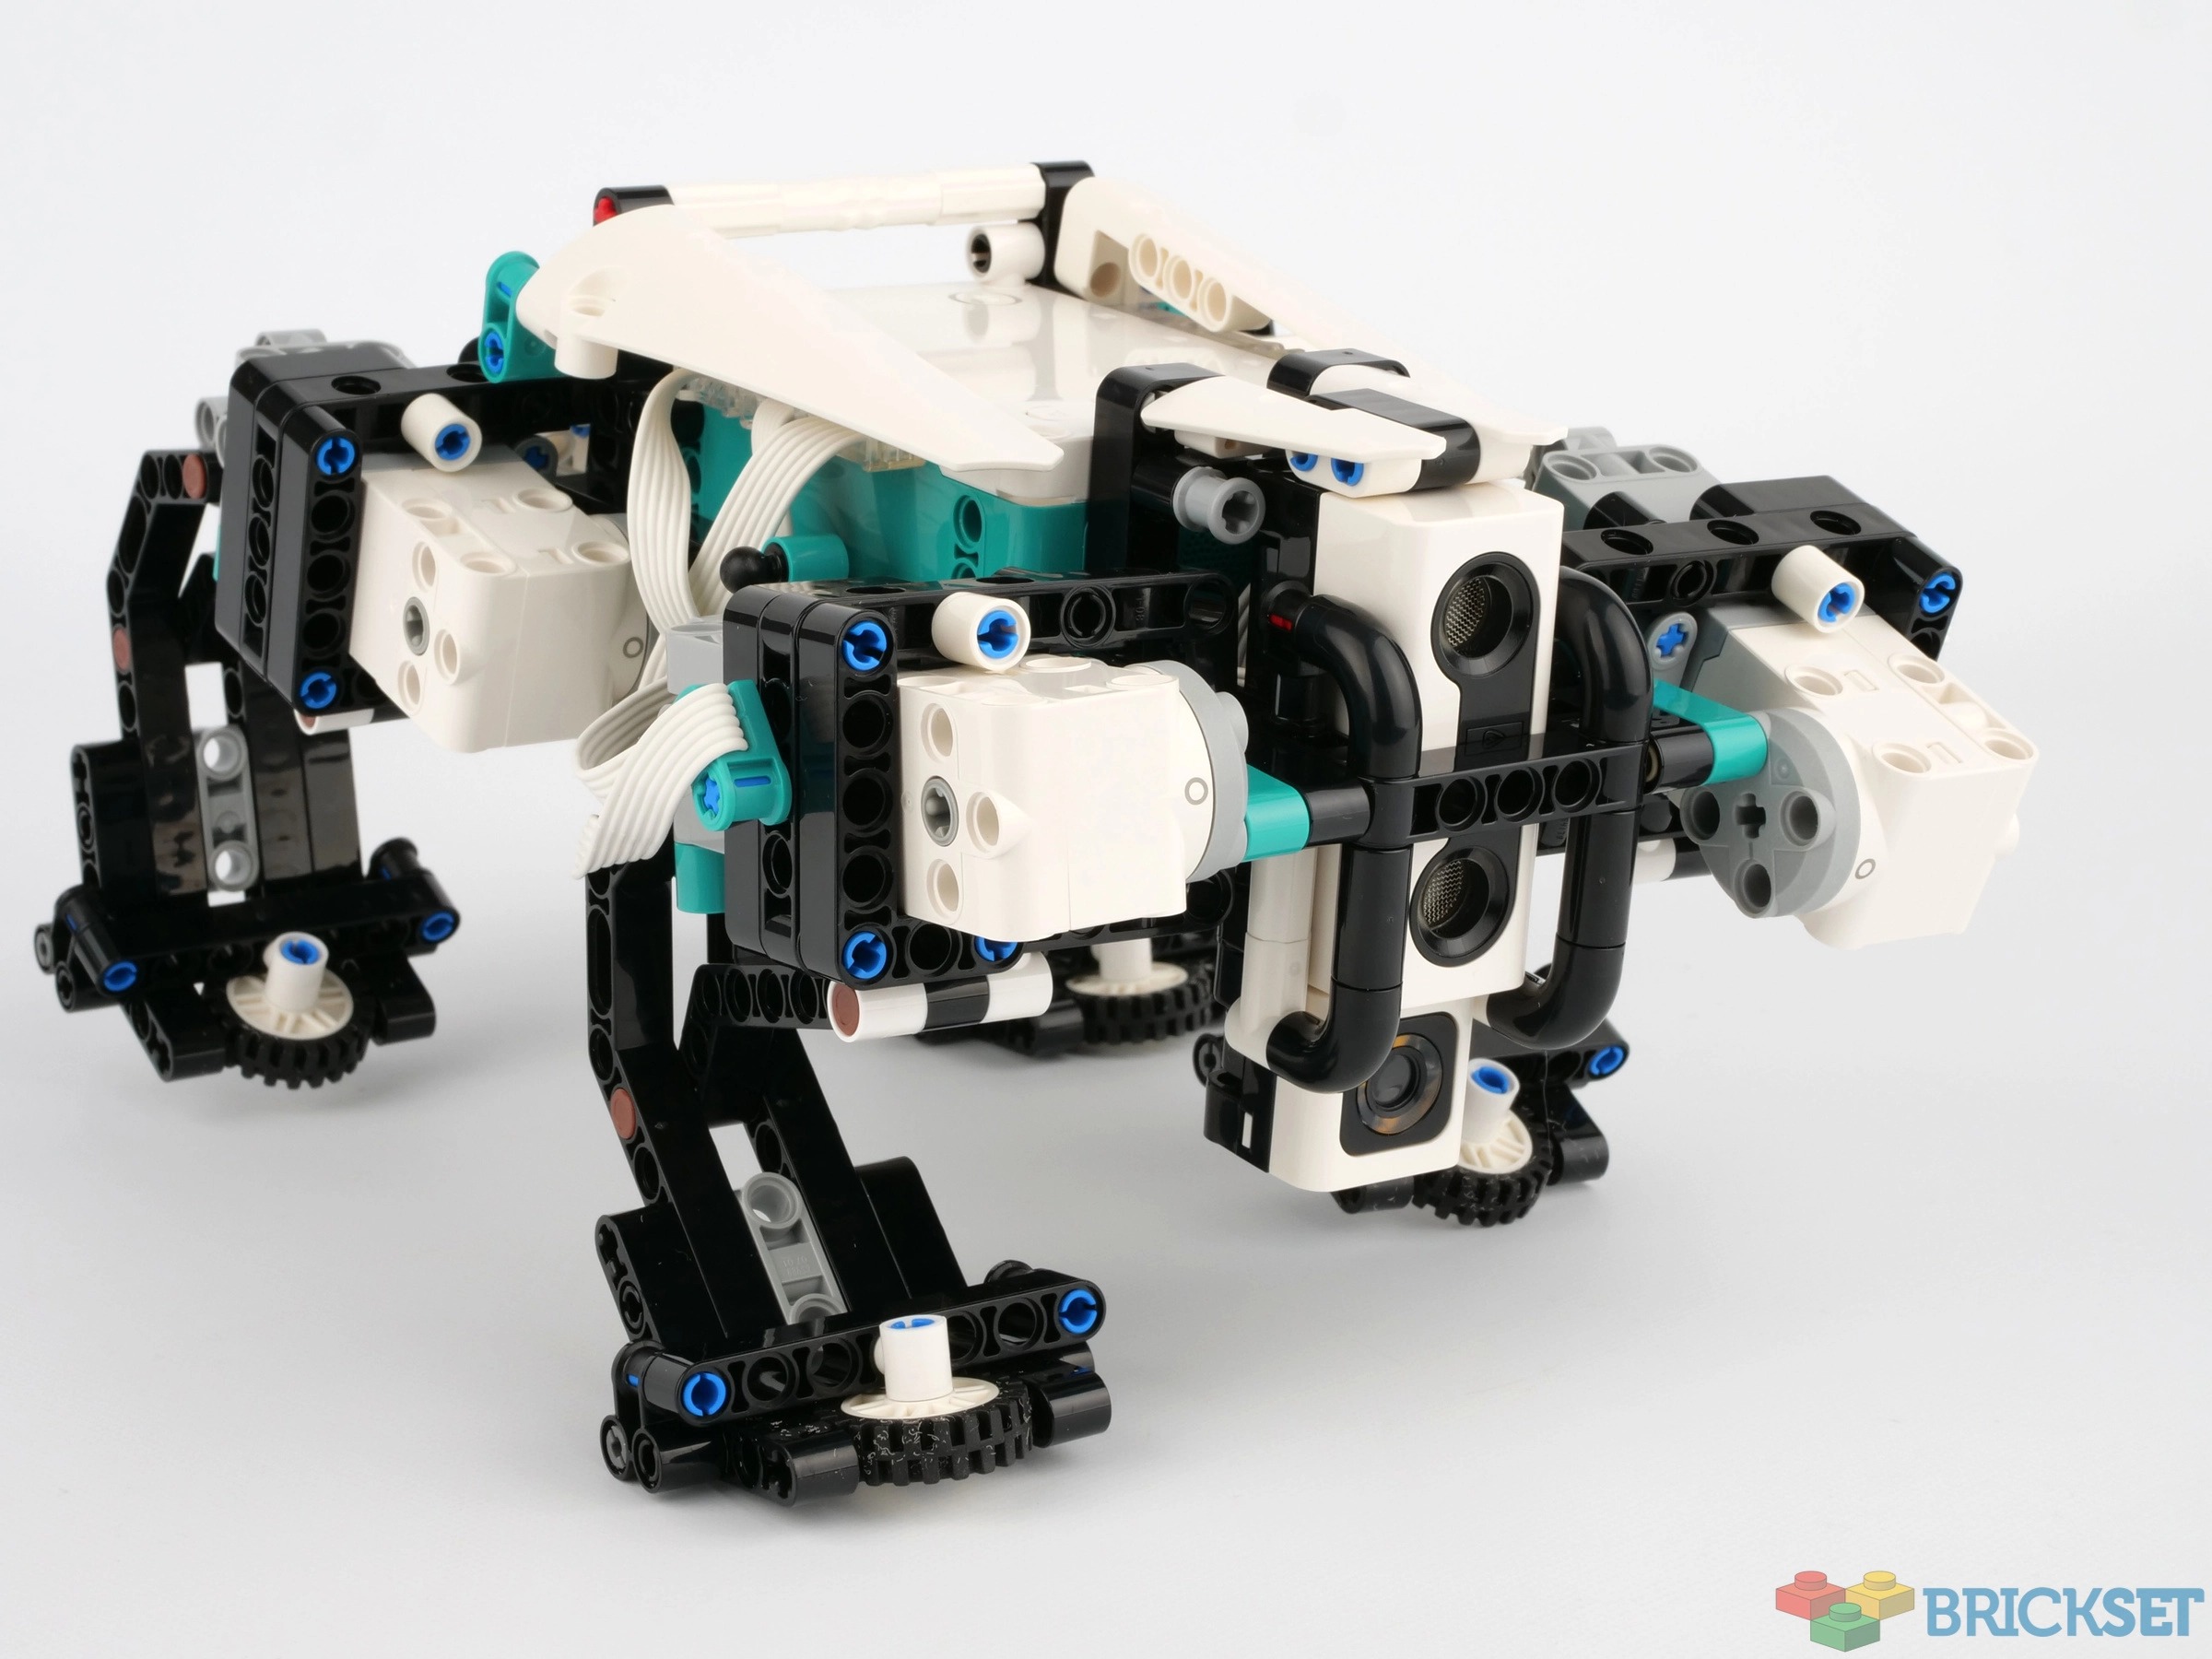
The latest version of Mindstorms, 51515 Robot Inventor, has been out for a few weeks and you may recall that I wrote about what's in the box when it was released.
I had intended to follow-up with articles about building and programming the robots but I've not found the time, due to spending too long fiddling about adding features to Brickset, I suspect!
So, I passed it on to Brickset member Skizz, aka Dave, who lives close by and who, in normal times, helps me run a kids' computer club for 7-11 year olds, at which we use EV3 and WeDo, as well as other non-LEGO platforms
He's built them all, and also programmed them using just his Android phone. Here are his thoughts:
Overview
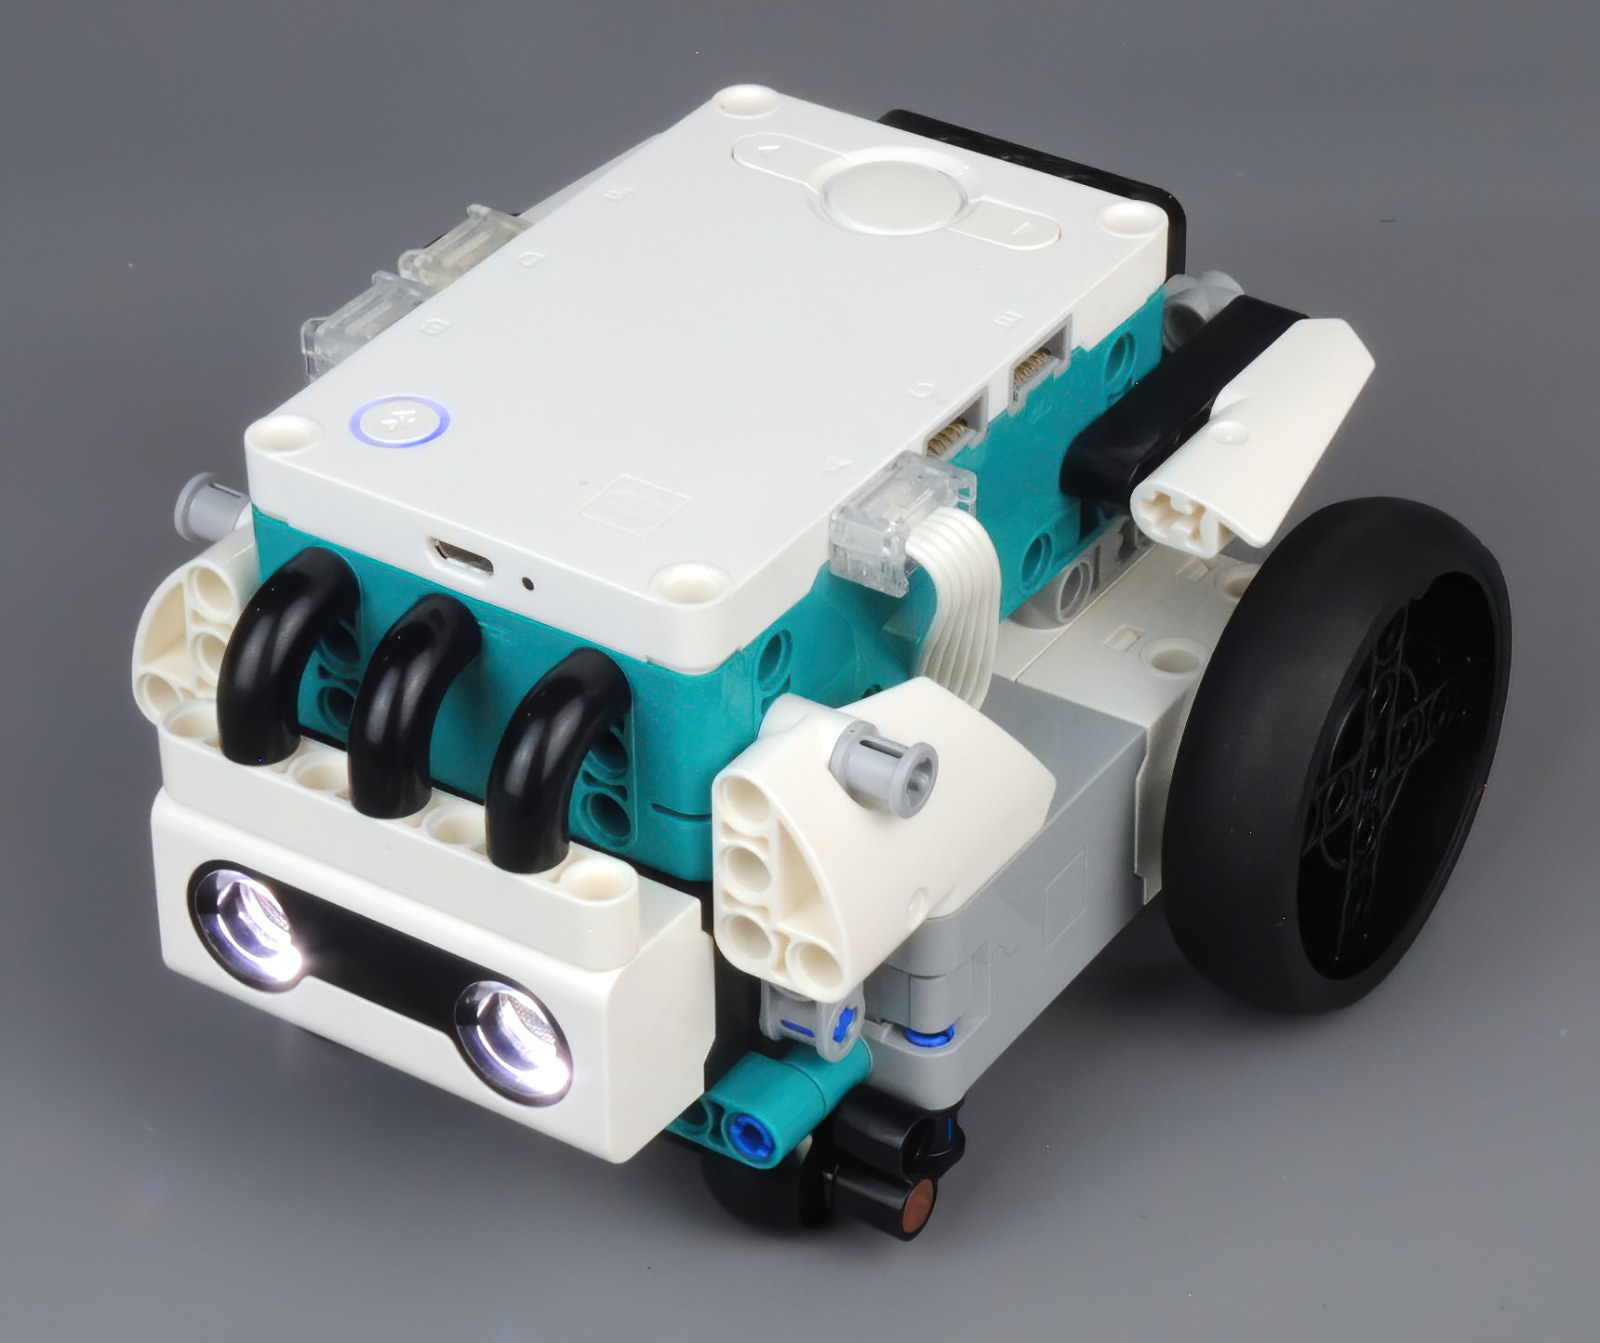
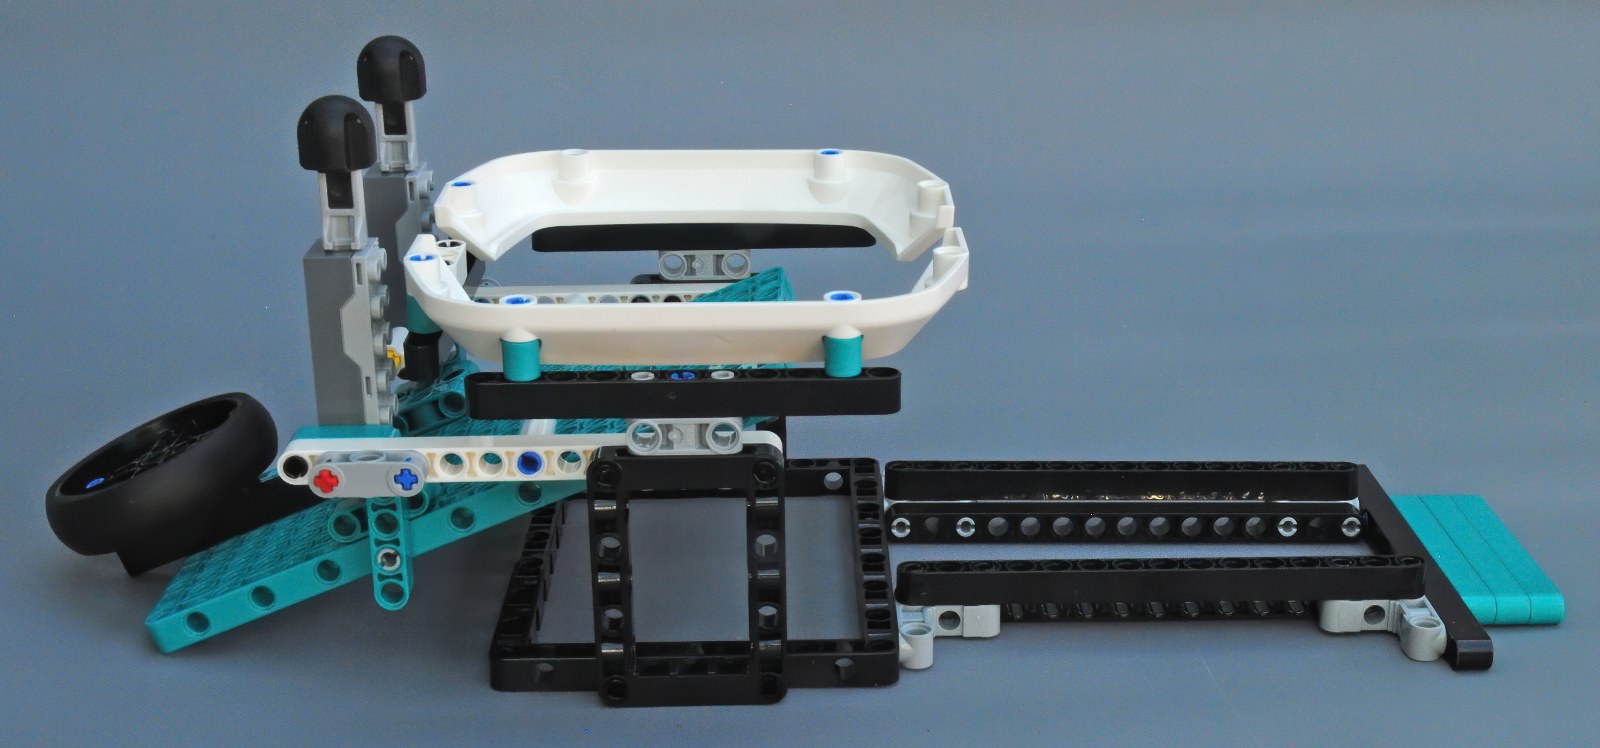
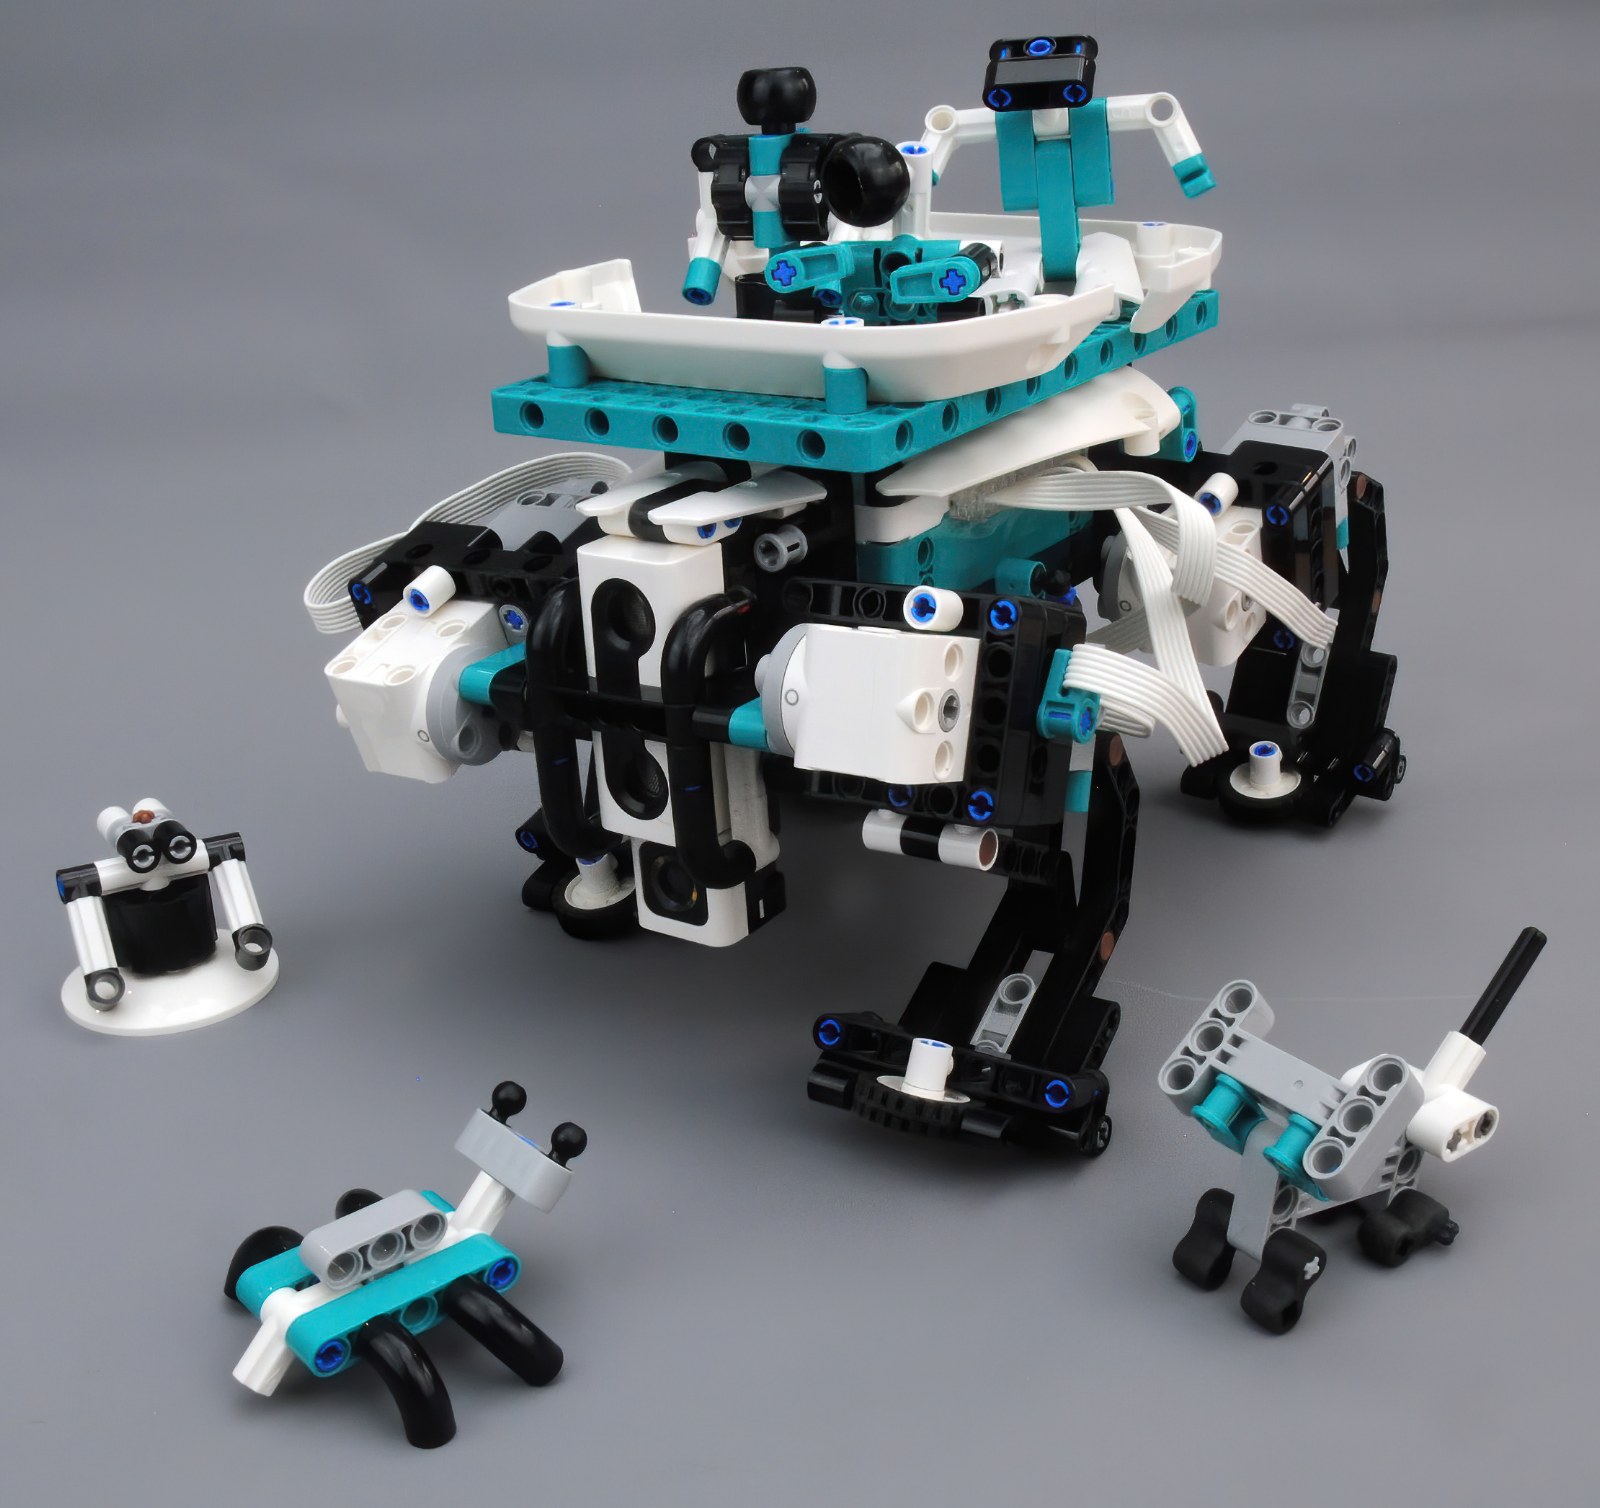
This is the latest in the Mindstorms range from LEGO and it's been a while since the last set was released. There have been a few improvements to the theme, mainly around the hub and new pieces that have been created in the past few years. It comes with nearly 1,000 pieces, 4 motors, a distance sensor and a colour sensor. One big improvement is the battery for the hub, rather than a set of AA's it now uses a rechargeable brick that slots into the hub.
The hub has six IO ports that all the motors and sensors that come with the set can be plugged into. The hub also has a 5x5 matrix display, a colour changing power button, a blue-tooth pairing button, a set of sensors that measure tilt and orientation and a couple of buttons. On the parts front there's the new large frames, a large technic panel, some connector beams and some cable clips, along with a good selection of beams, gears, panels and pins as well as a couple of shooter bricks.
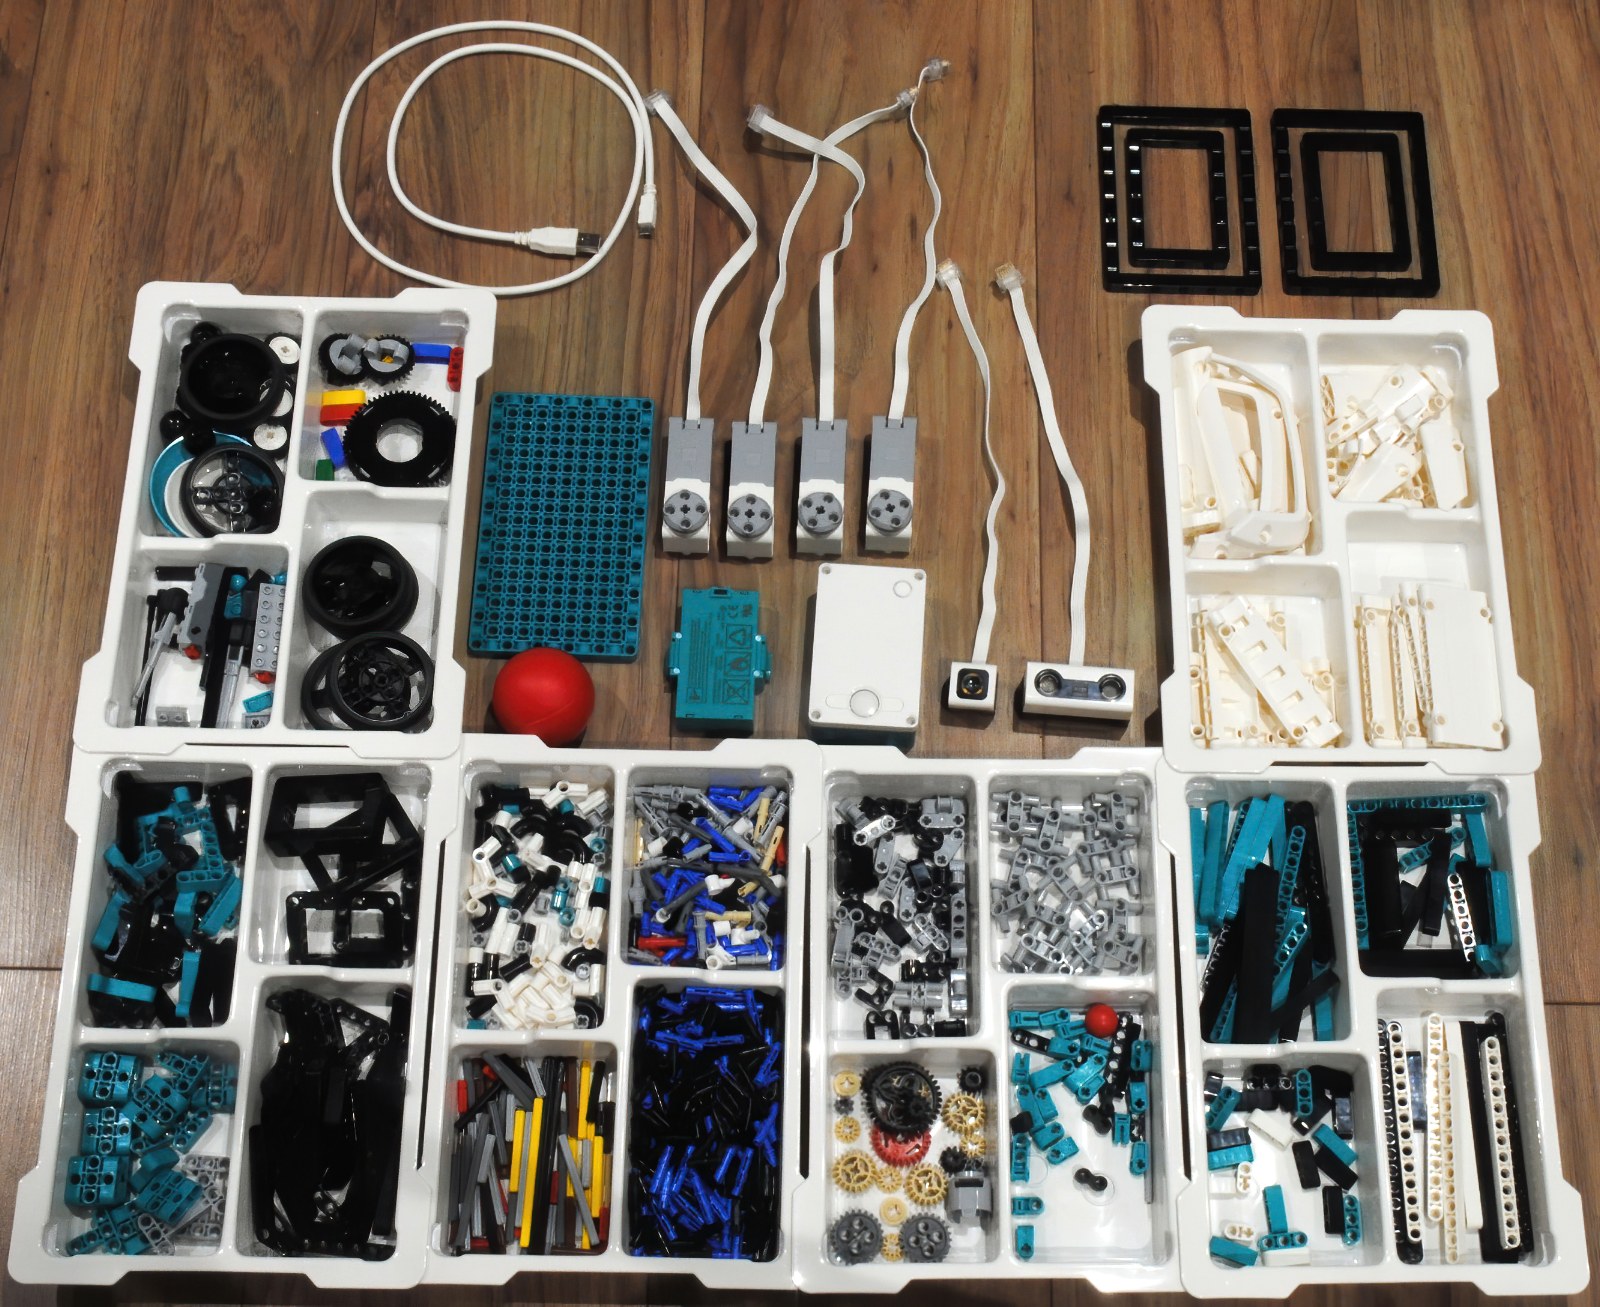
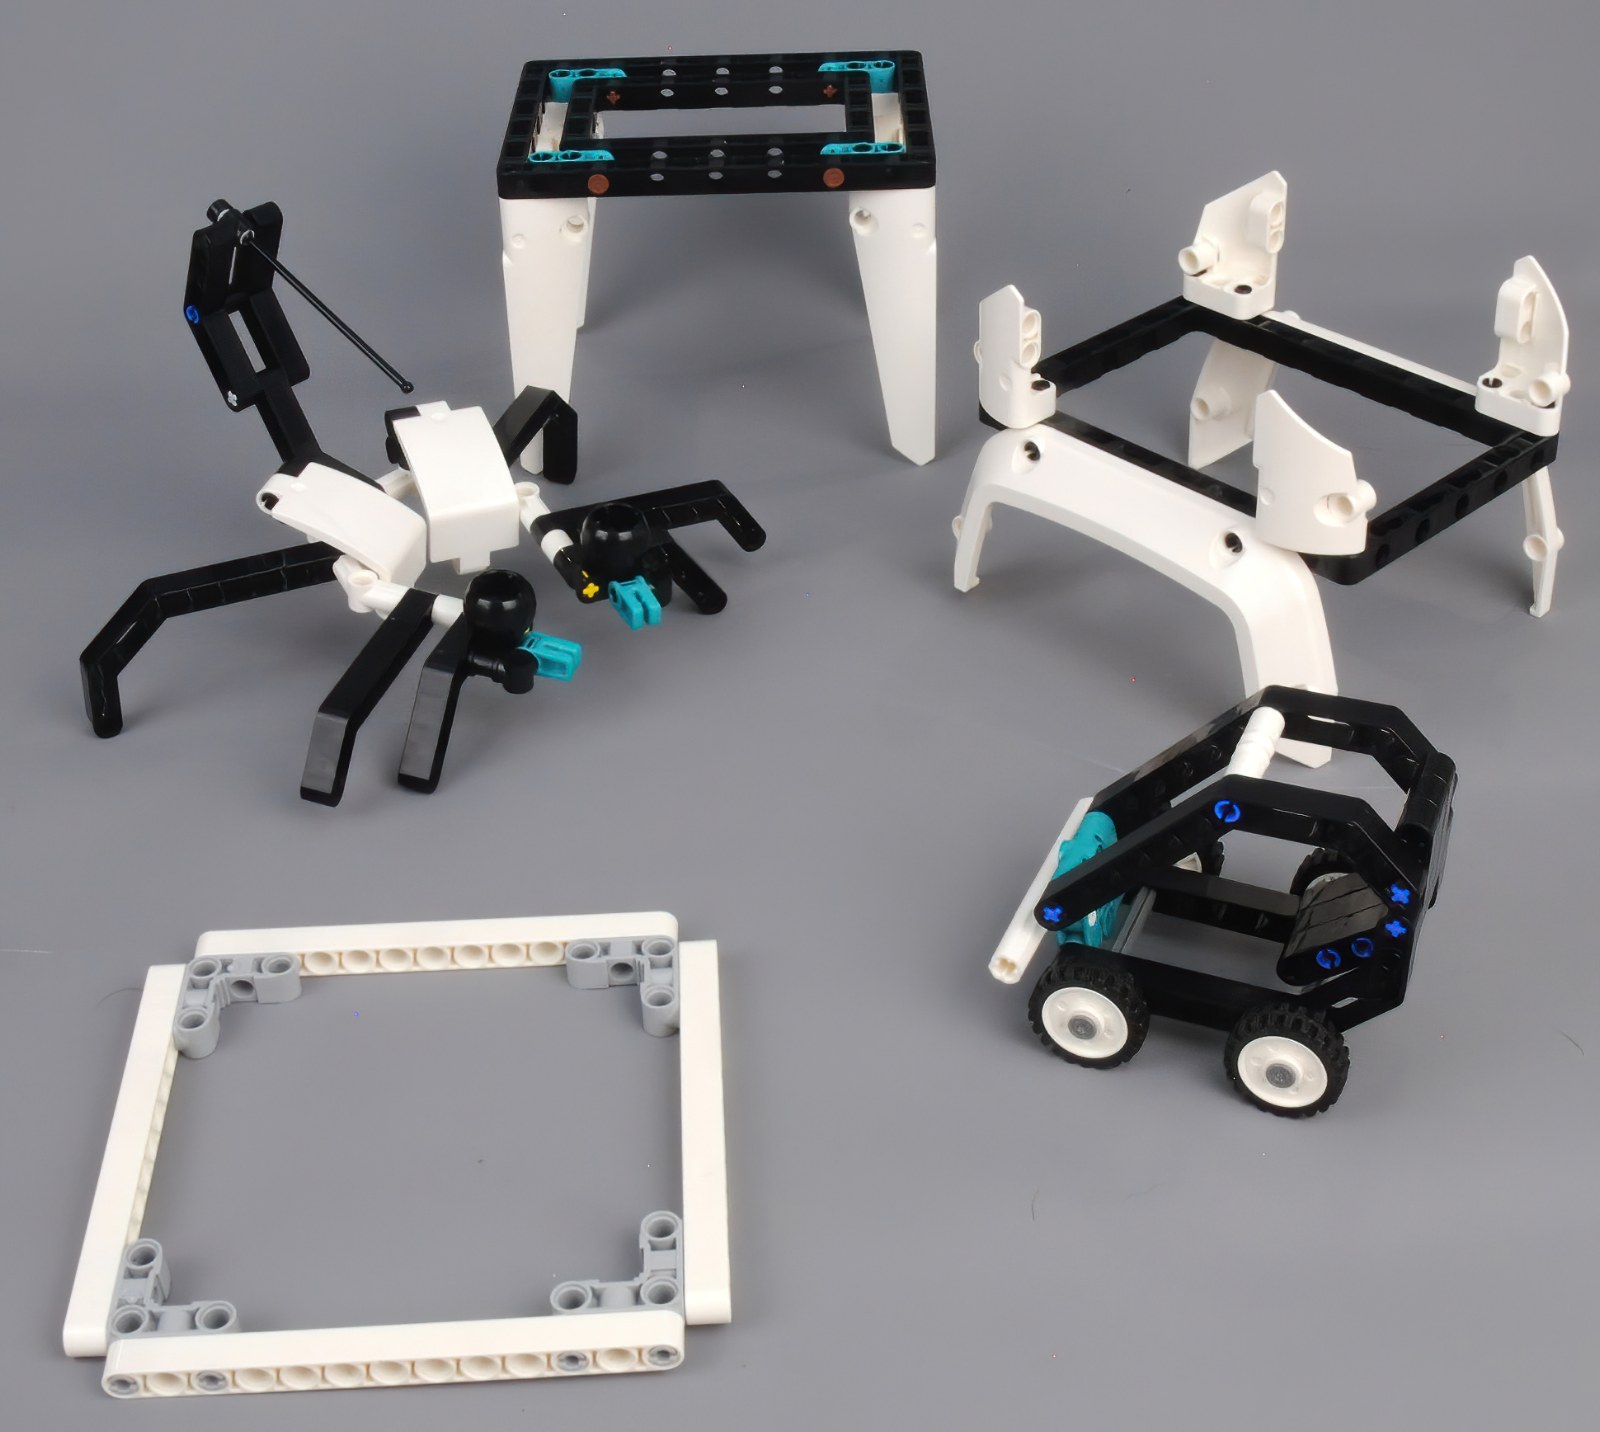
Along with all the bits and pieces there's also an app that provides building instructions and sample code to try. There are five models to build and experiment with. Each model has several stages to the build and come with code to test and modify as each stage of the build is finished. Once the build is completed, extra projects can be downloaded to add new features to each build.
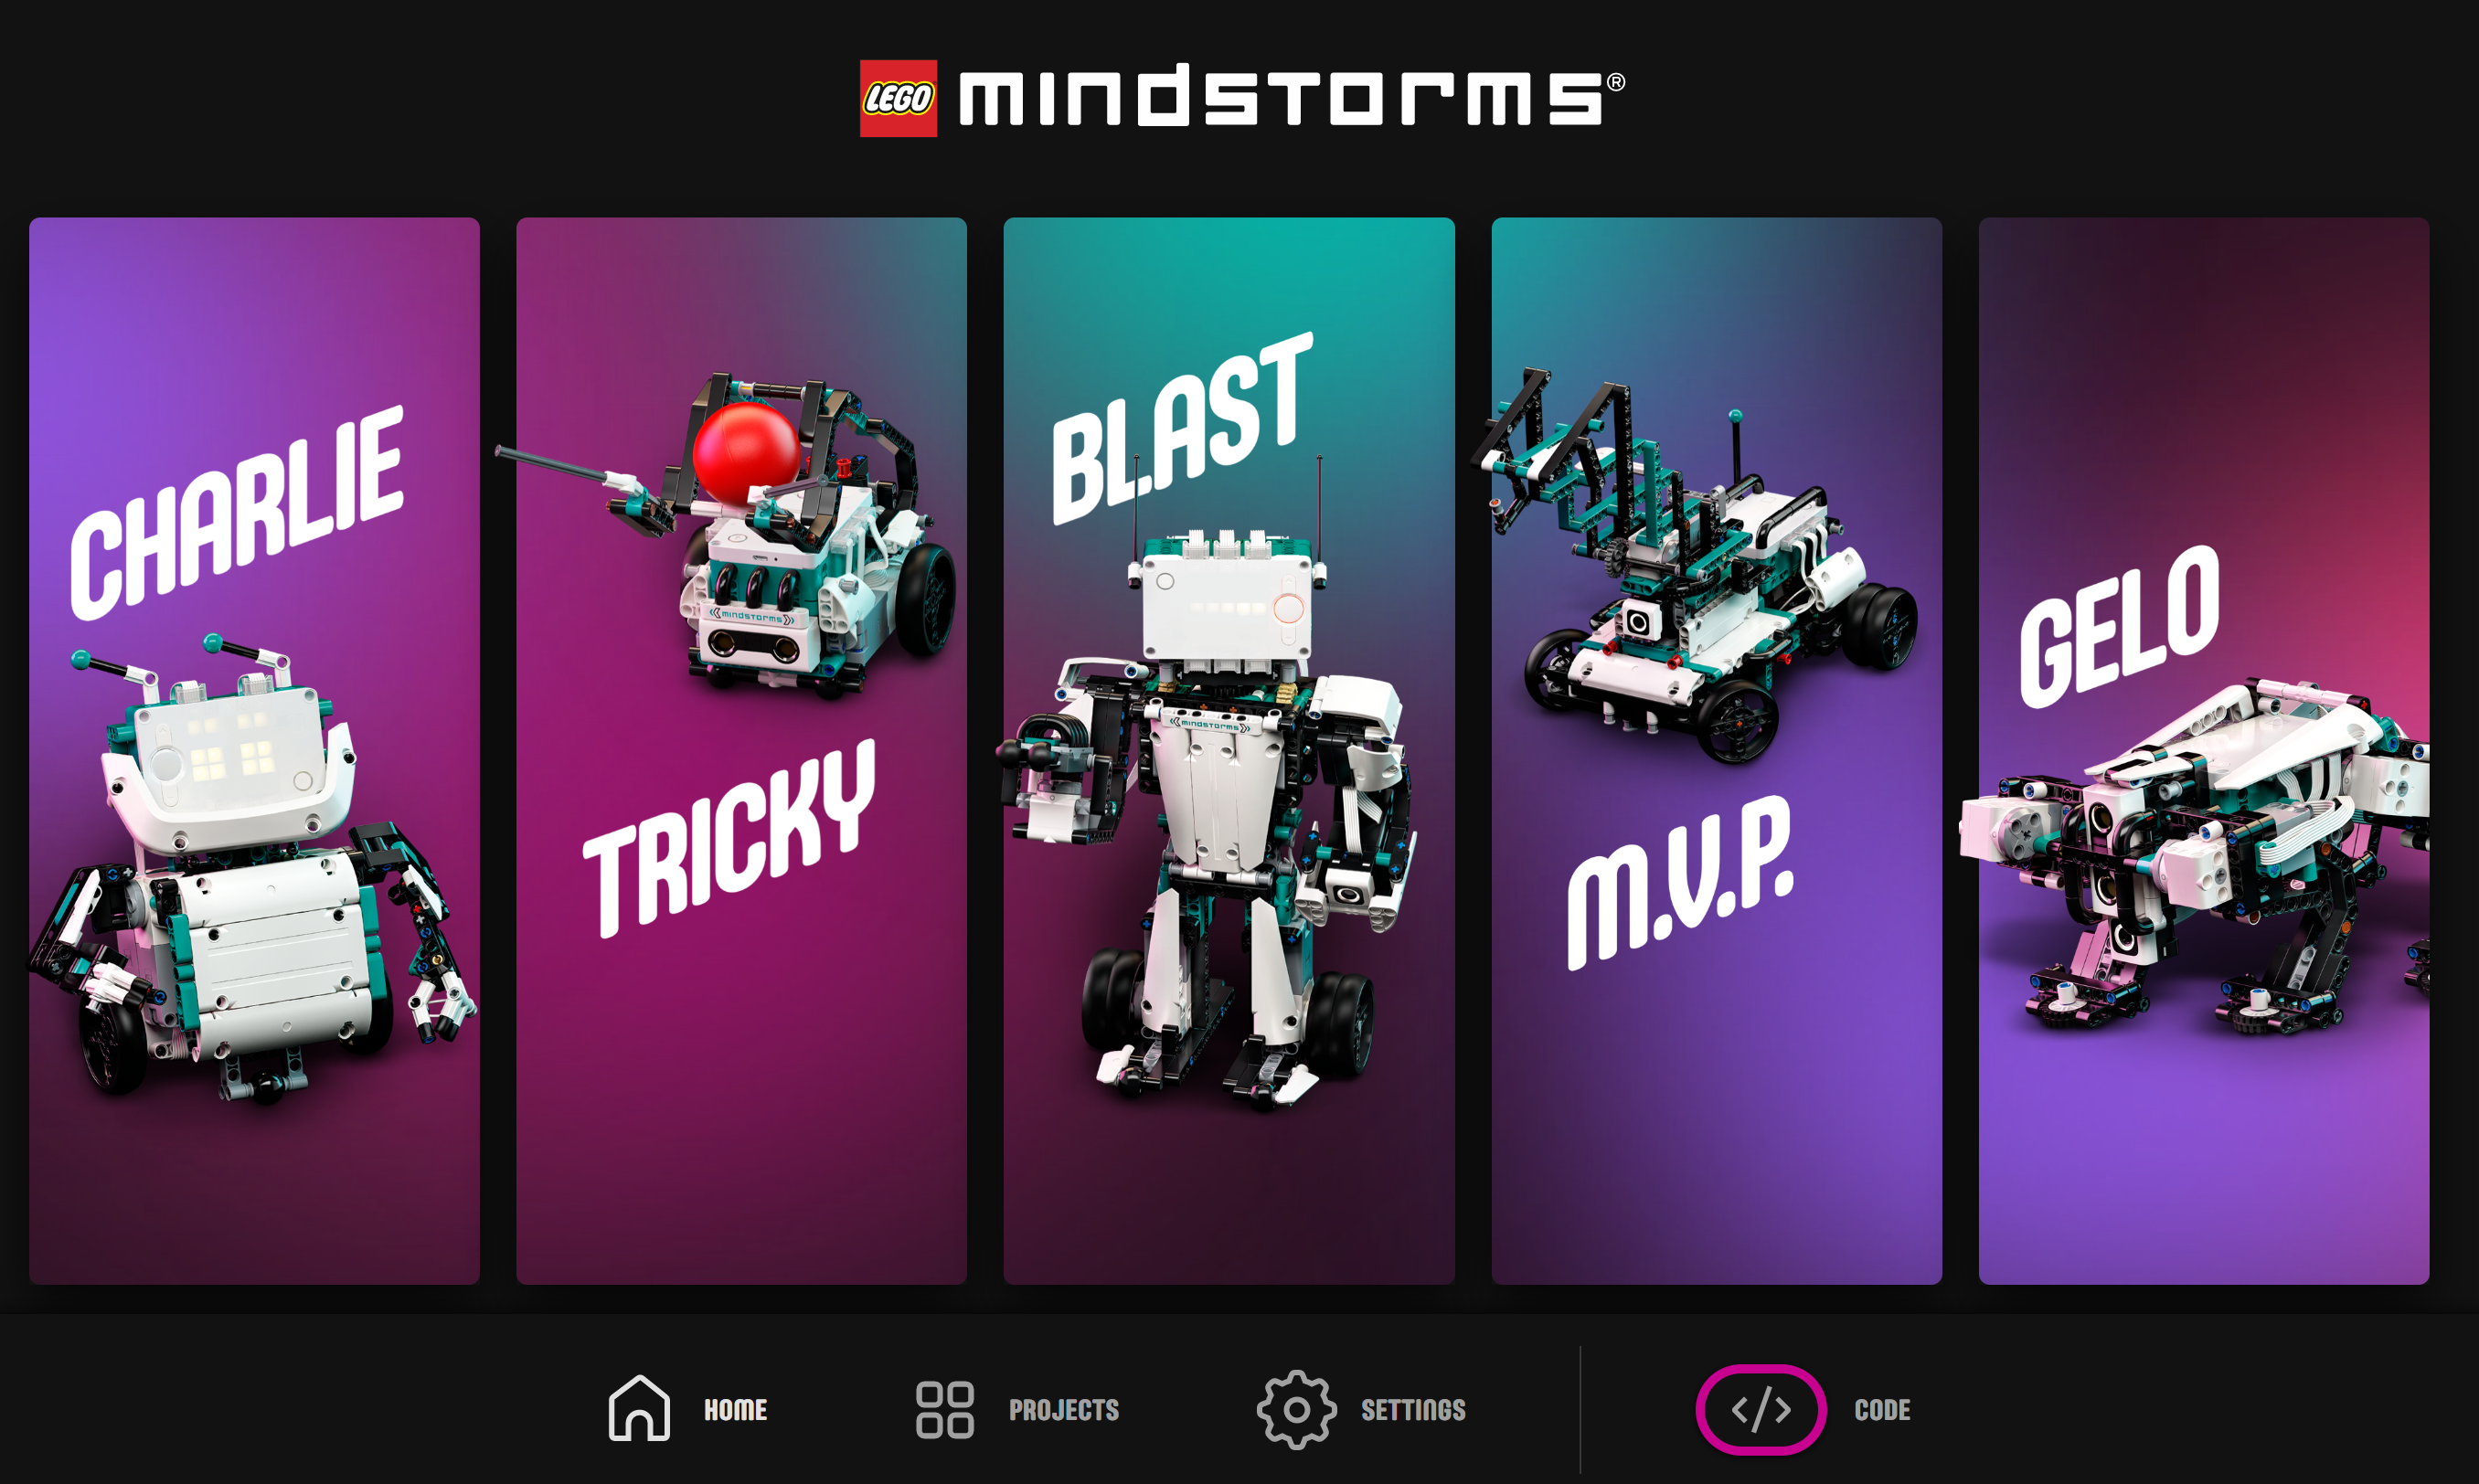
Charlie
The first robot is a simple, two wheeled affair with a couple of arms that can hold small objects. The build is split up into four stages starting with the head. Then the wheels are added followed by the arms then finally some body work to finish it off. It's all fairly straightforward and doesn't take too long. The code after the last stage makes the robot do a short dance. The model has a couple of interesting features: rotating the arms also rotates the head and lifts the front panel.
_202011111413.JPG)
Of the additional projects I decided to build the drum set. The build was simple and there is both the disks to hit as well as a snare box and some drum sticks. Watching the robot play the drums is amusing and there is a final flourish that can be performed as a finale to the drum solo. The only issue I found is that the robot needs to be positioned correctly to complete the drum solo.

I also created a remote control for the robot which was simple to implement and I could drive the robot around quite easily although, due to the way it was built, it had trouble getting over the door thresholds.
Tricky
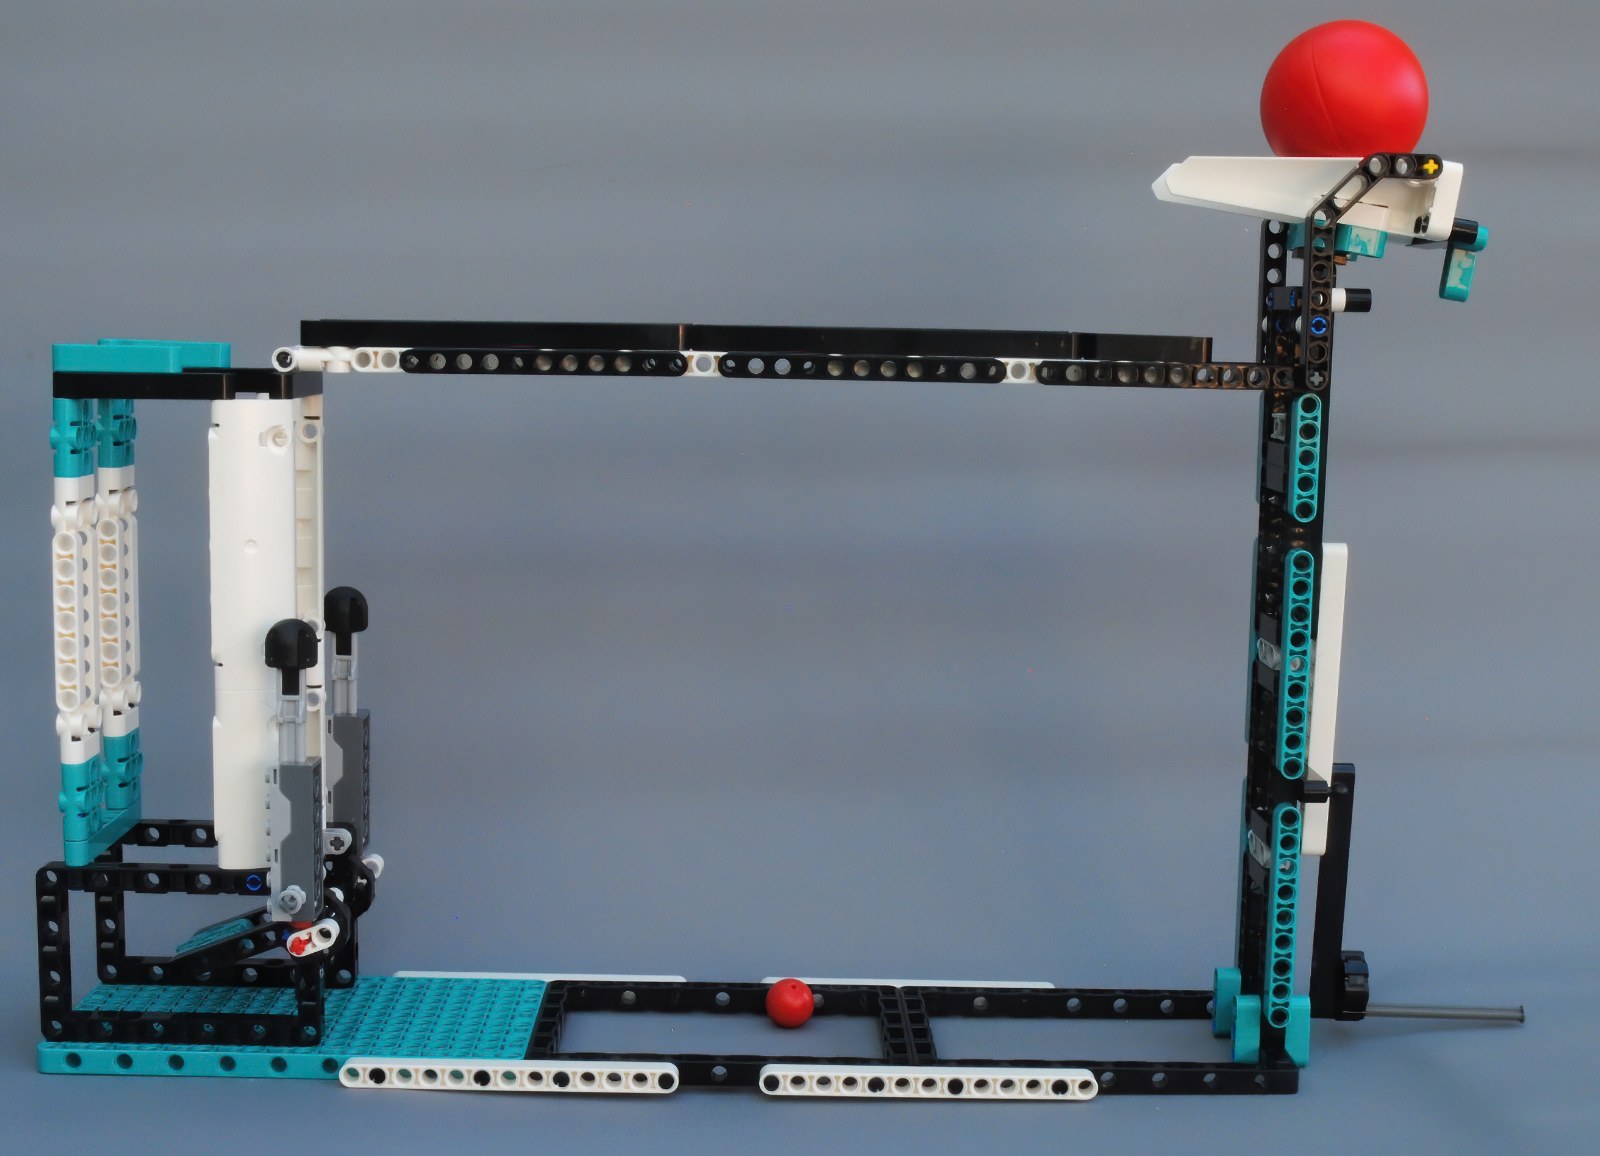
This robot is a very cut down model that only has one building stage. Again, it's a two wheeled robot and isn't that exciting on its own. The fun with this model comes in the additional builds of which I did the slam dunk and the chain reaction projects. The first one, the slam dunk, adds a couple of arms to the front of the model and a sort of basketball hoop. The robot picks up the large ball then throws it, and if you've positioned everything correctly, the ball lands in the hoop and launches the two missiles.
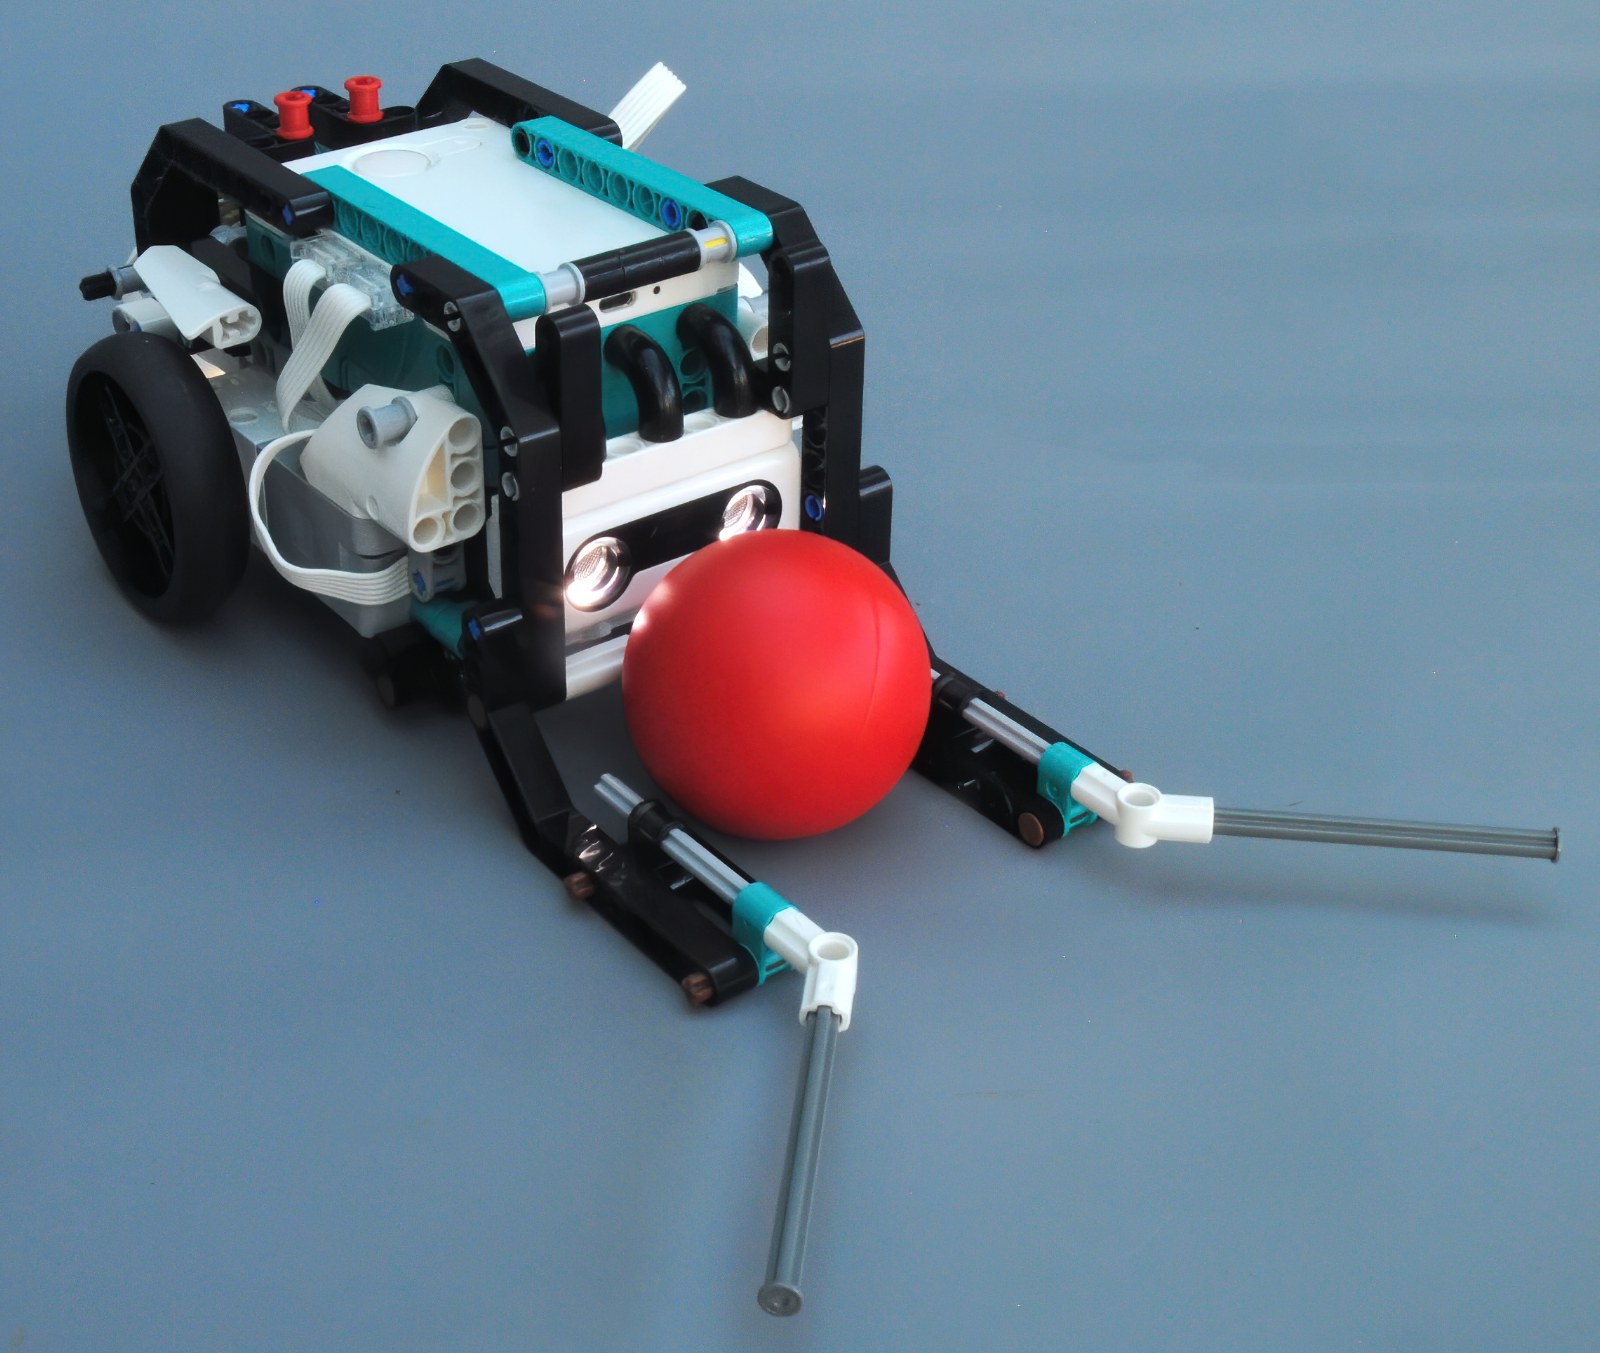
The chain reaction model consists of the robot pushing the small ball towards a large structure with then triggers a chain reaction that sees the large ball fall down the structure and eventually launches the missiles. It wouldn't be hard to expand what happens. The only issue is how little the robot does!
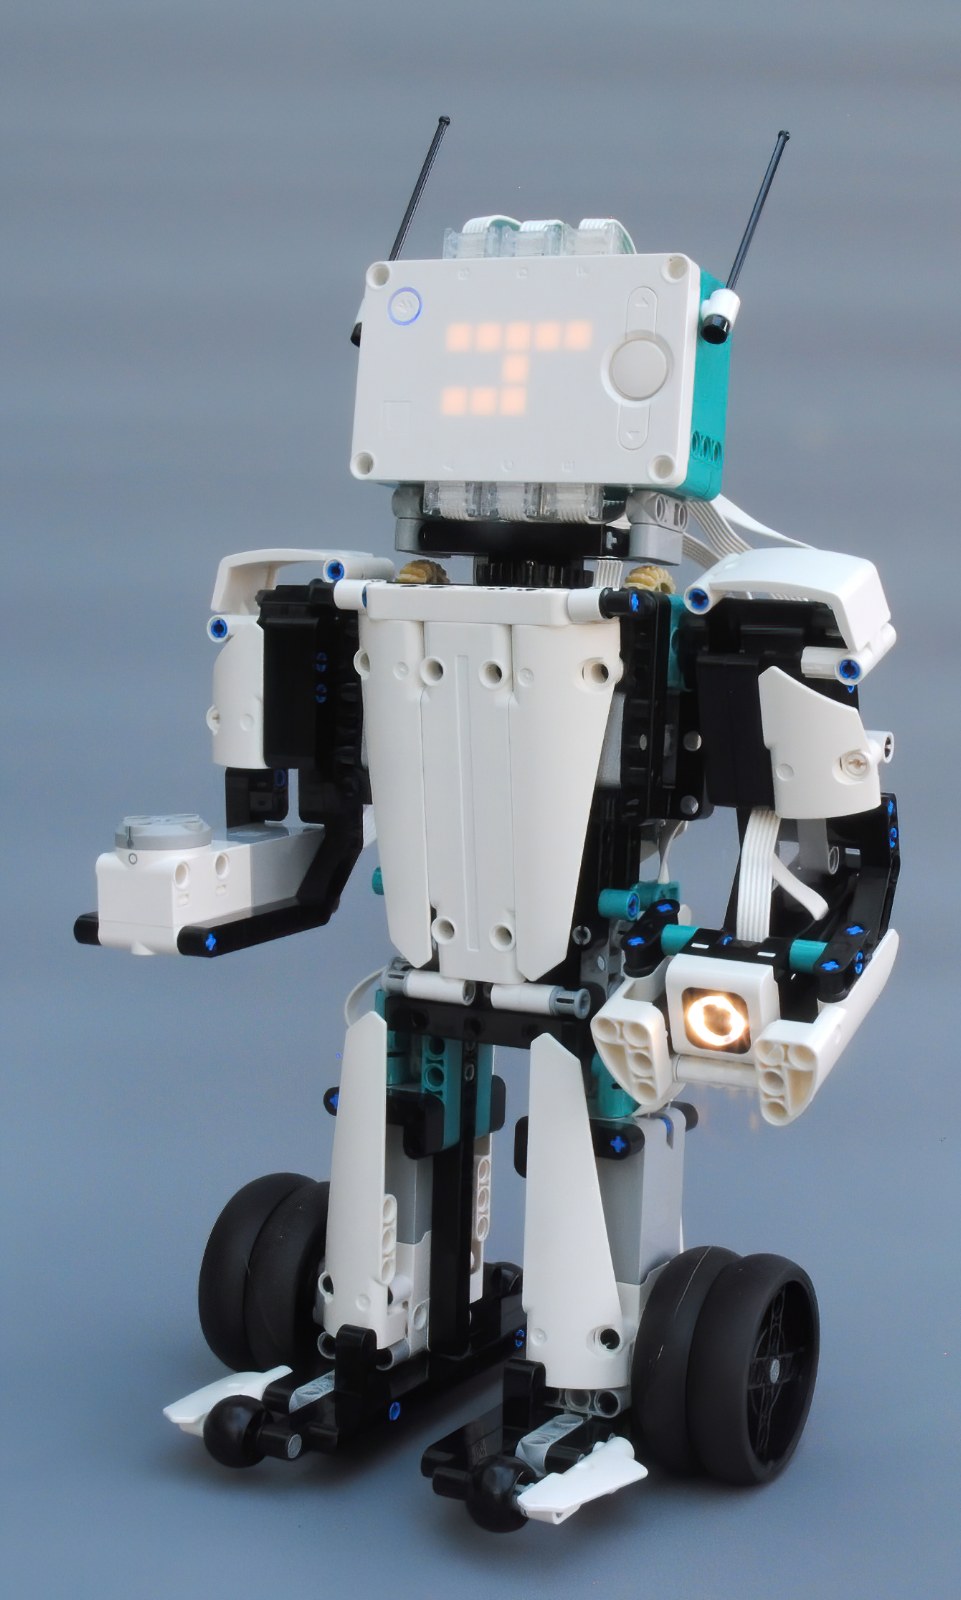
Blast
This is an interesting build. This robot is two legged, with a wheel at the base of each leg and two arms that have sensors and a motor for hands. There are four steps to building the final robot and the process involves building a frame that is used to assemble the robot on as the various parts are added to it. The first stage is just the head, then the body is added and this stage shows why the frame is required, then the arms are added and finally the legs as attached and the frame dissembled. The final code, like most of the robots, doesn't do much other than a quick test of the motors.
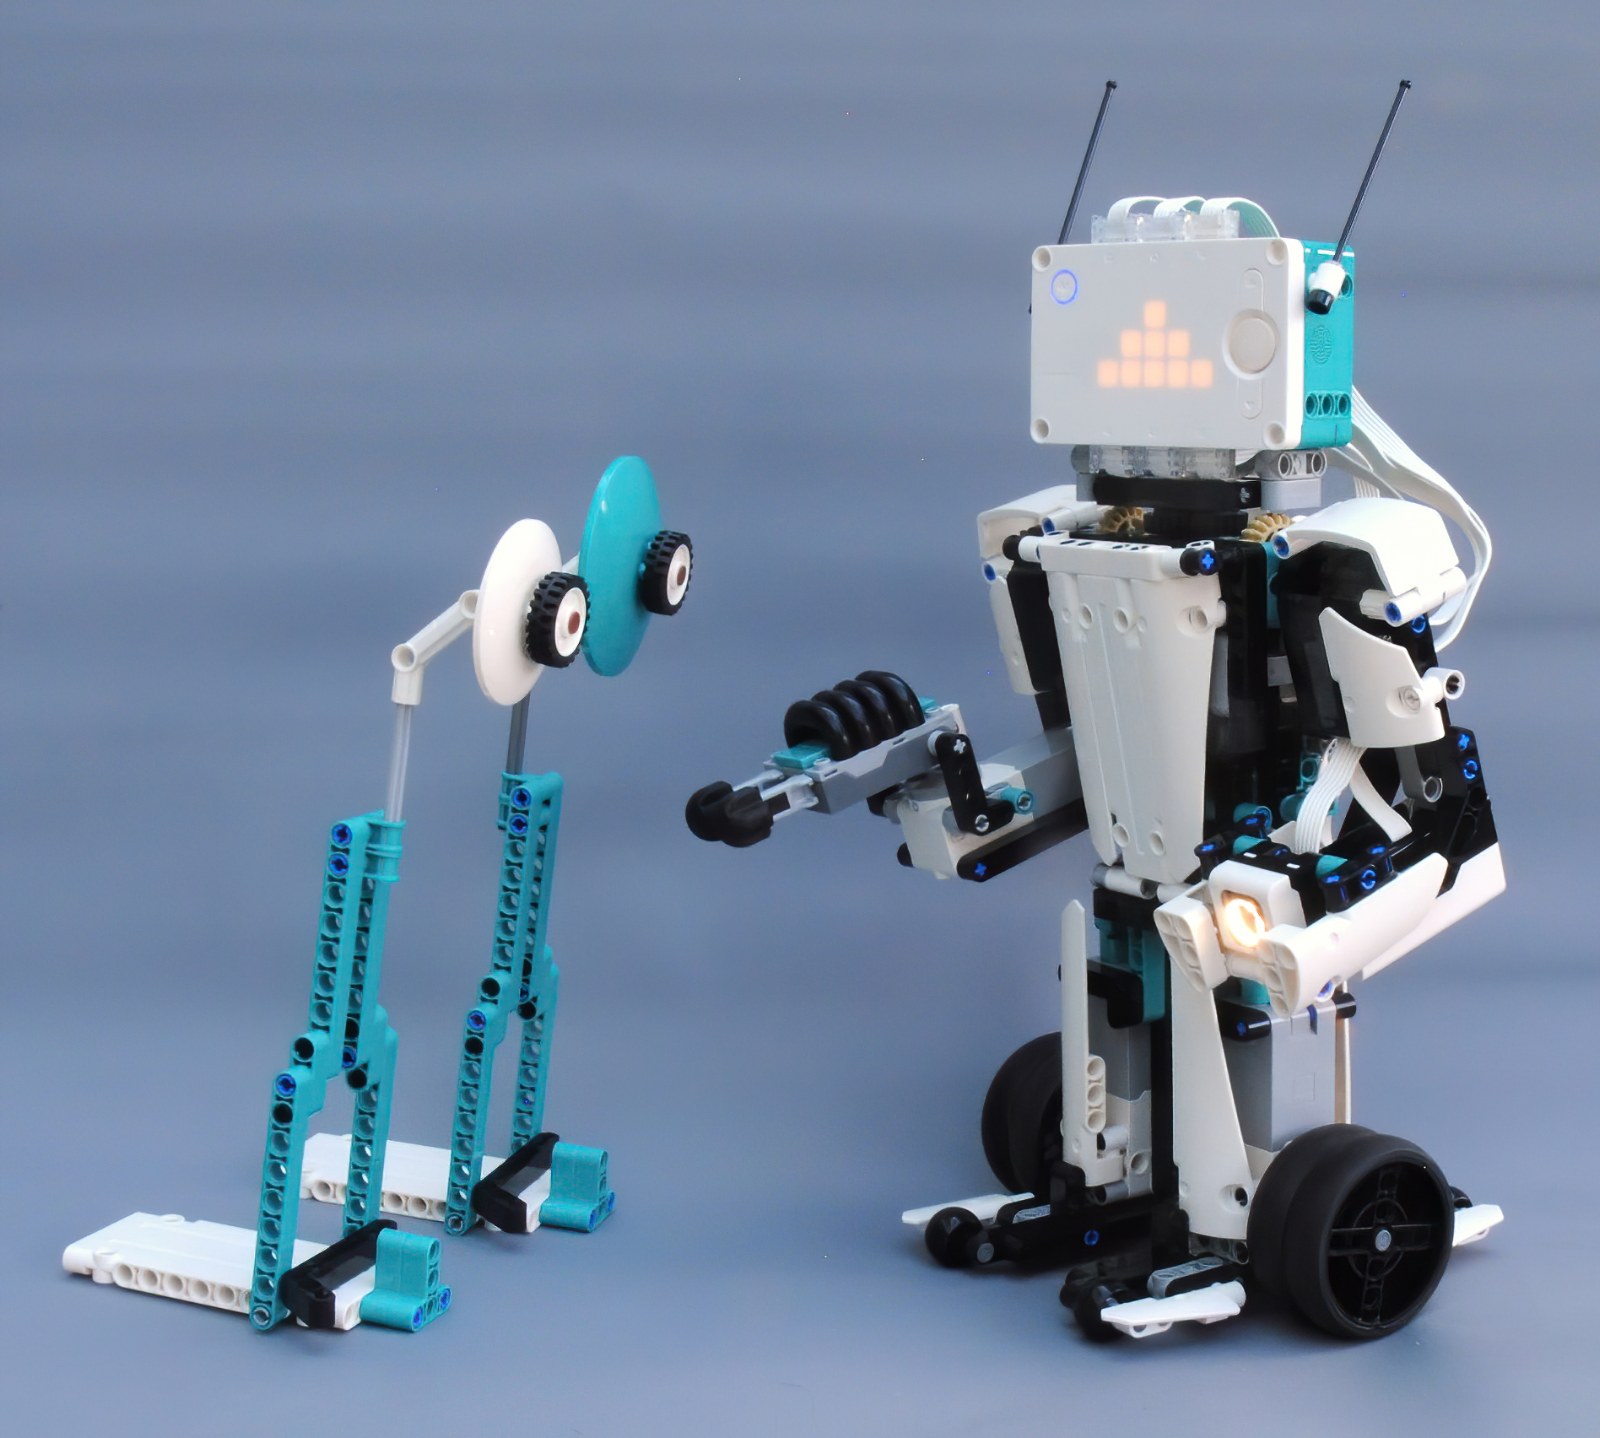
Of the further activities that come with this robot I built the target practice and guard my room projects. In these, the two missile launches are placed in one hand and a couple of targets to shoot at are built. The aim to to launch the missiles and hit the targets and that's not easy to do! The sample code just turns the robot and launches the missiles.
To make this more challenging, I build a remote control for the robot which allowed the robot to move, lift the arms and shoot the missiles (the cats seemed to like chasing the missiles). The other project just makes the robot turn left and right and when the distance sensor detects something close by it launches the missiles.
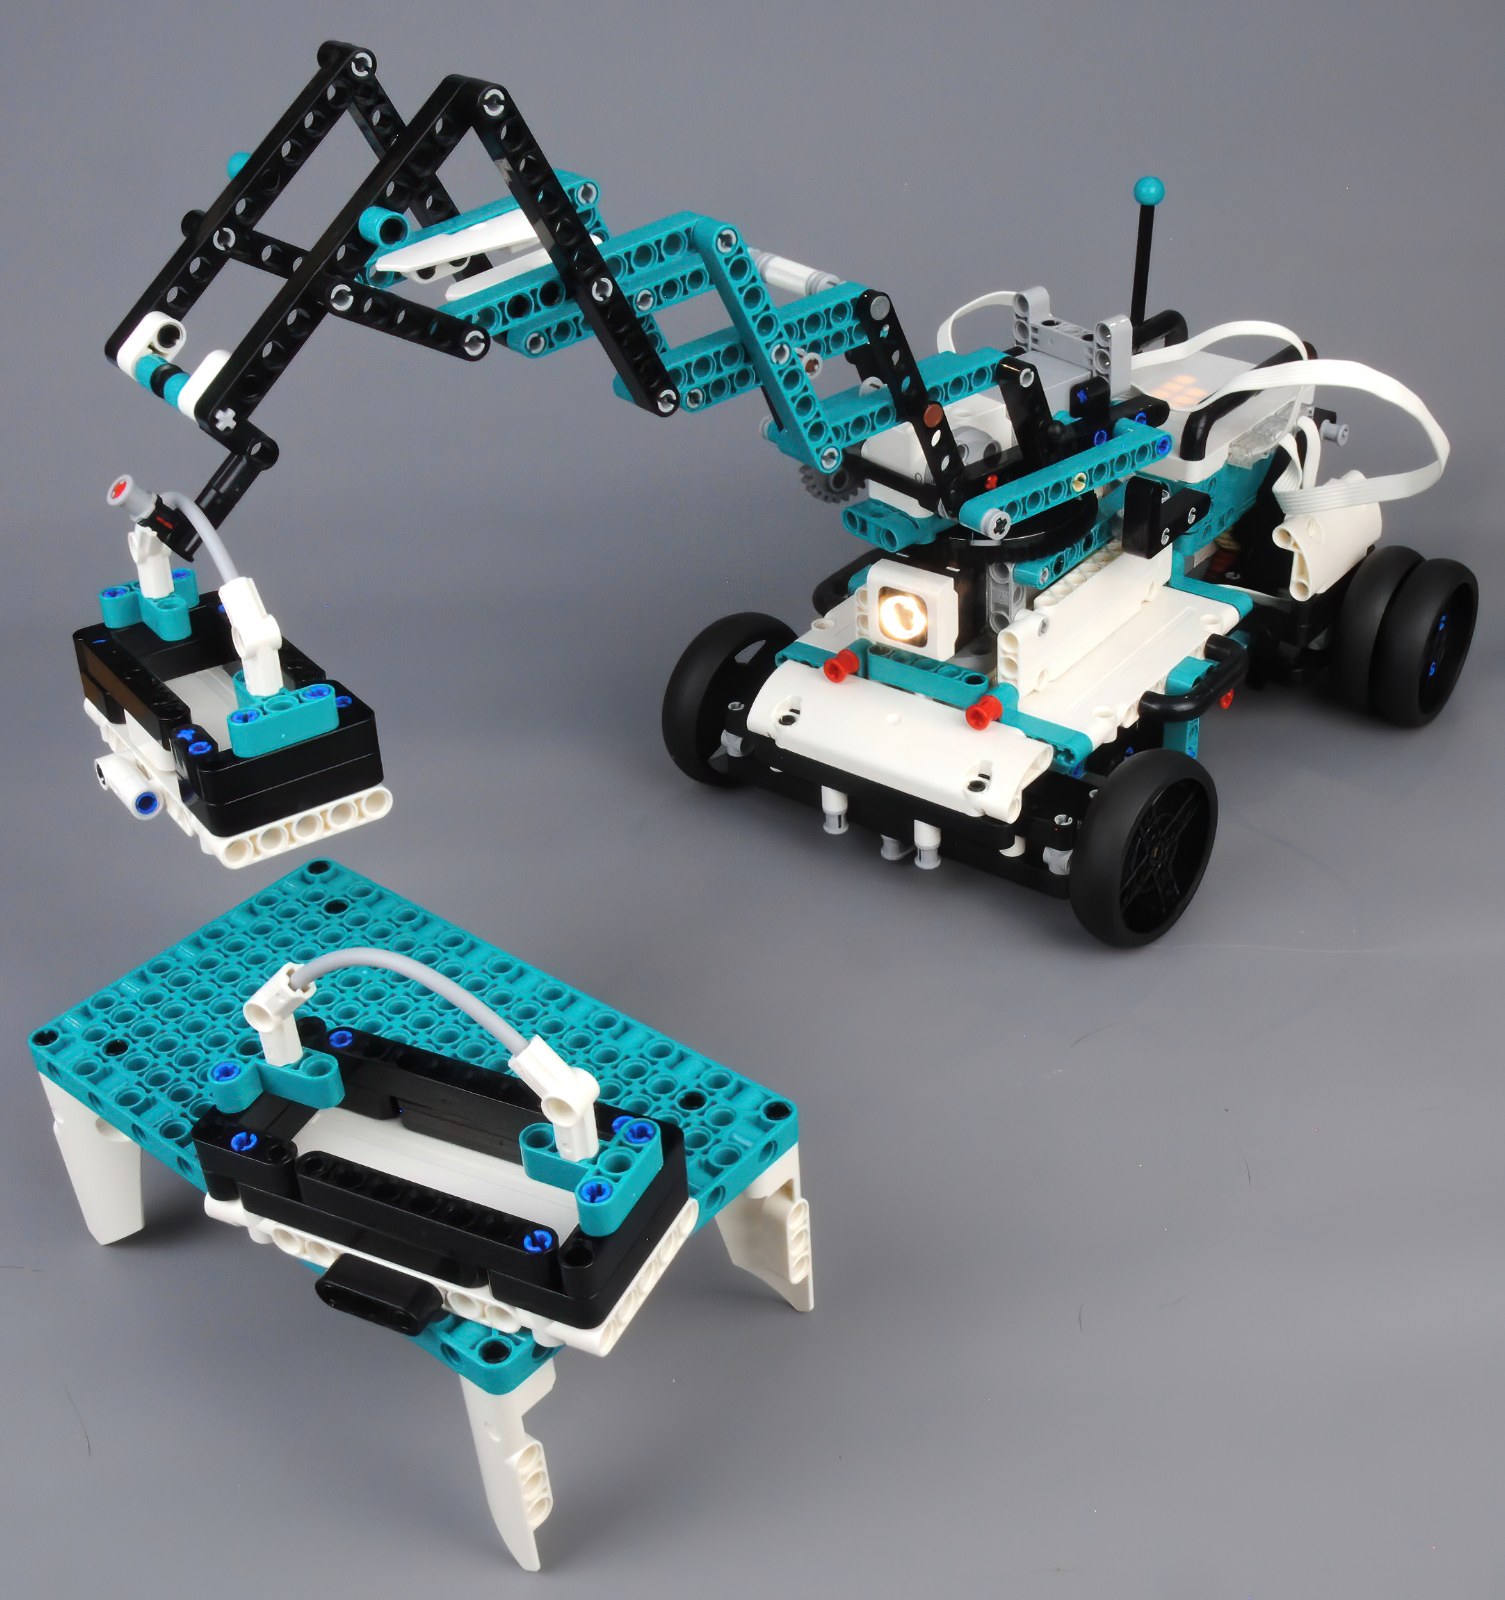
M.V.P.
This robot has lots of potential for doing lots of interesting things. The basic build just consists of building the robot then adding a remote control. The robot is a four wheeled vehicle that uses two motors, one for drive and one for steering. The body pivots in the centre so can be either a flatbed vehicle of have an angled front.
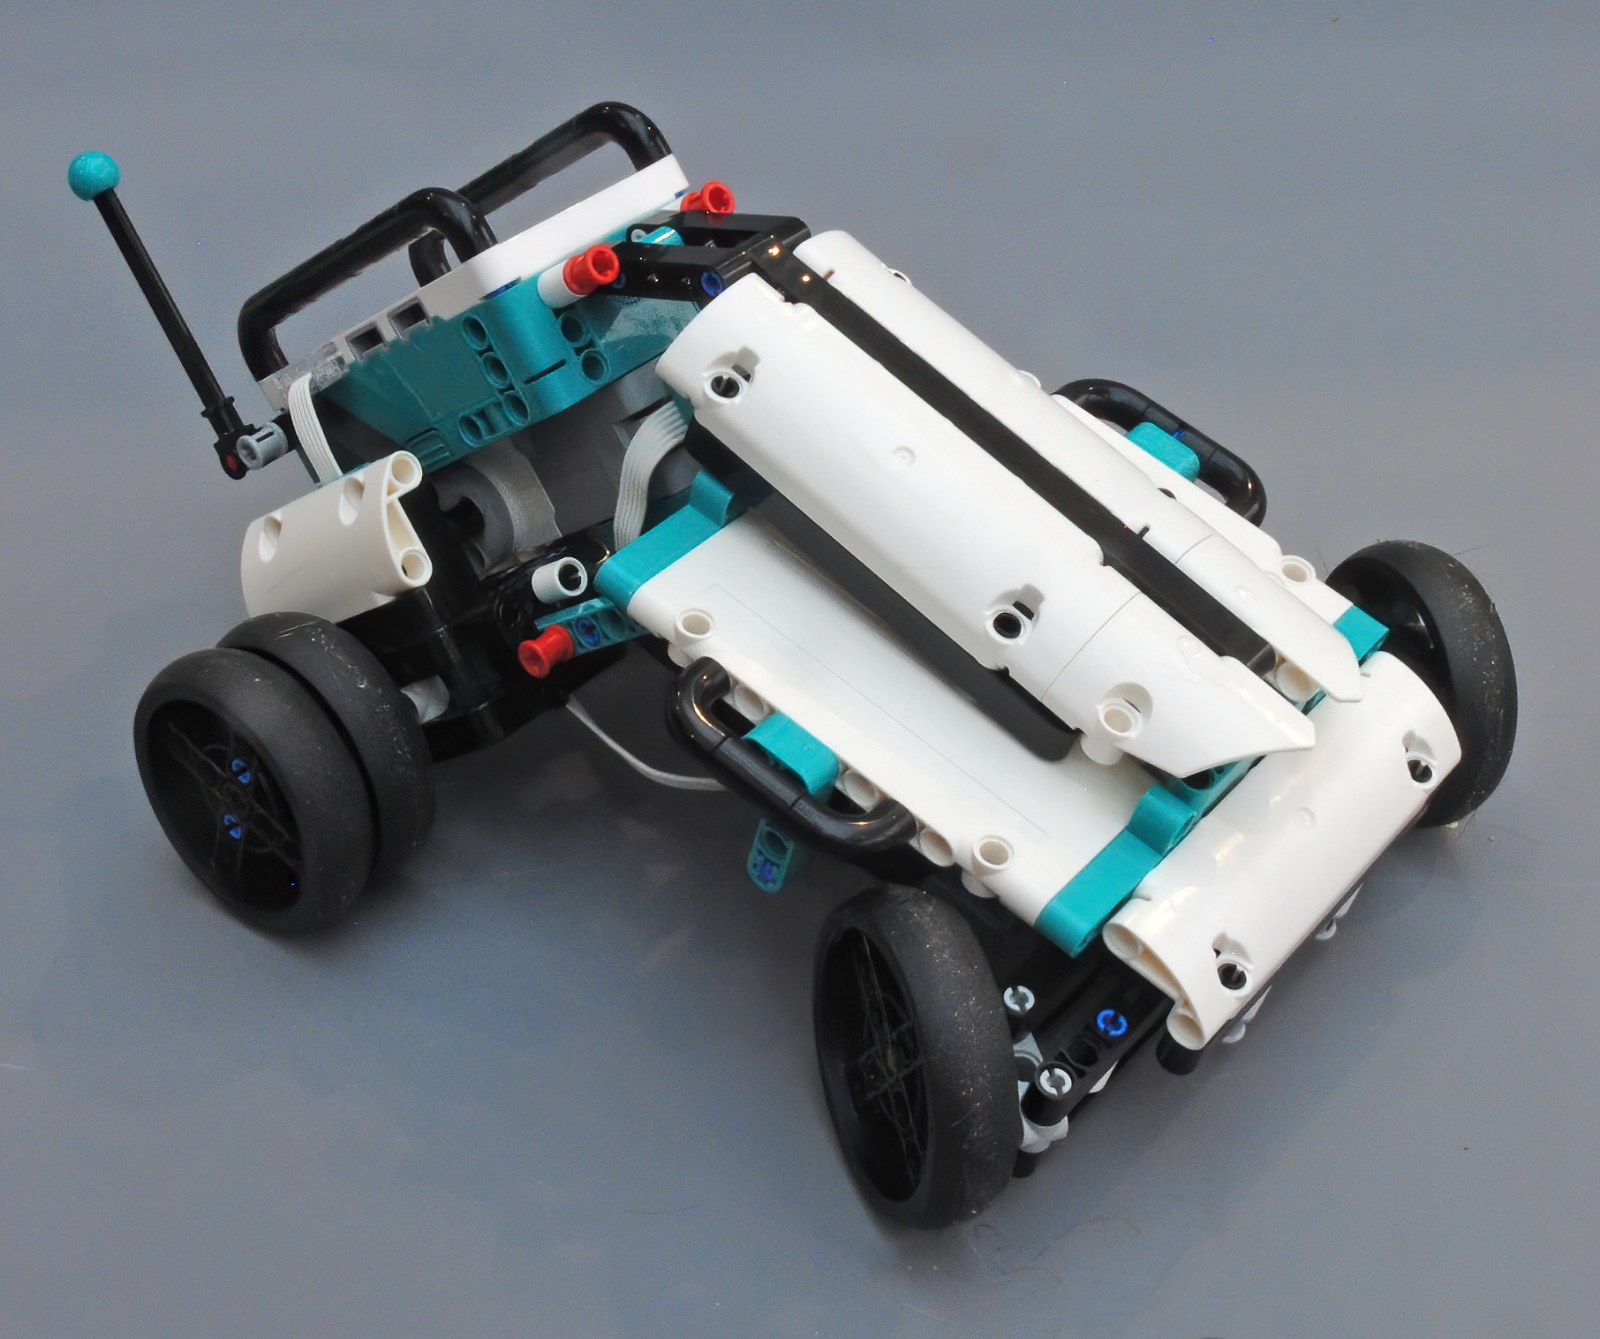
The additional projects are where this robot comes alive. I chose to build the crane. The crane can rotate, extend and retract. It has a hook on the end which can pick up objects that have a handle, of which a few are included in the build instructions (as well as some odd models). Other projects include turning the vehicle into a missile launcher, the turret can be rotated and elevated to aim the missiles.
Gelo
Up until this one, all the robots have been wheeled. This robot marks a change in style as it's a quadruped and walks. The build is split into two parts, building the body then adding the legs. Once built, it was interesting to see if the quadruped style worked. I only tried it on a laminated floor so did slip easily and could only rotate clockwise. Forward and backward movement worked, albeit slowly.
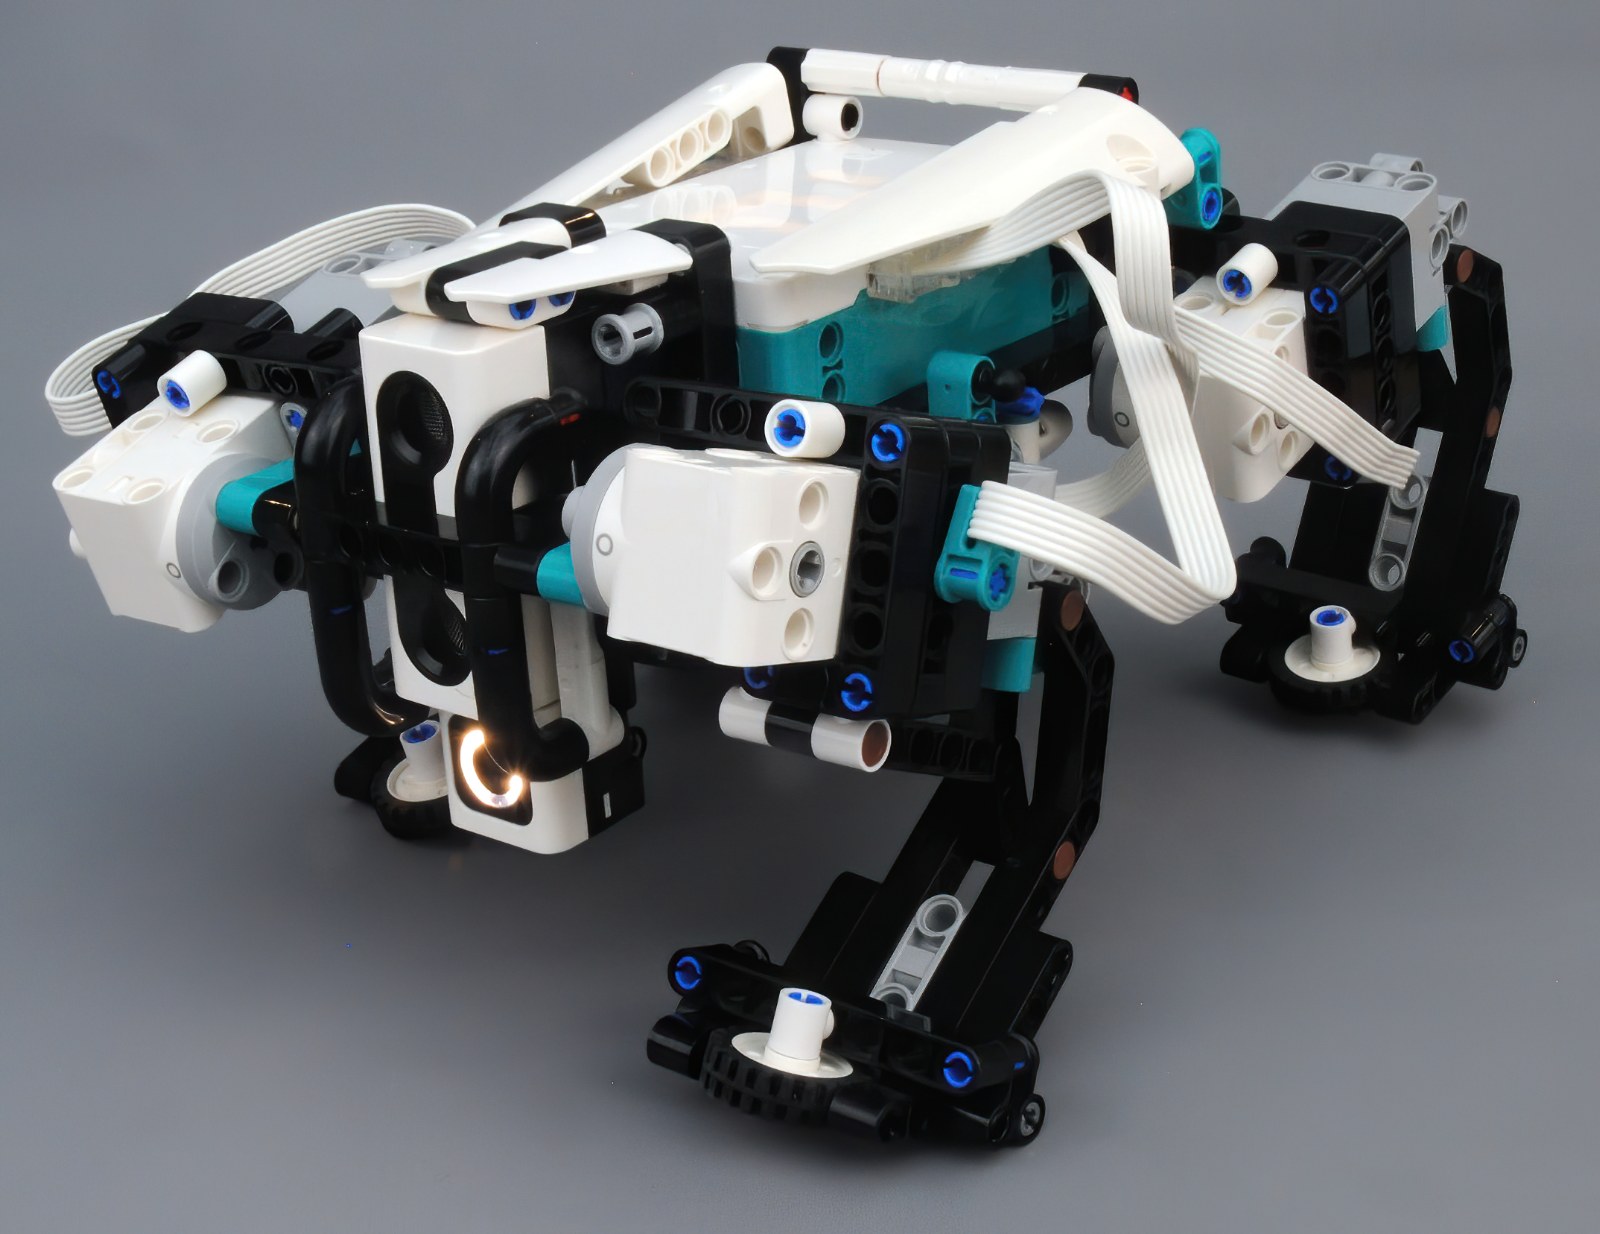
Implementing the object detection activity did give the robot the ability to walk around and avoid obstacle by stopping and turning when it gets close to something. I also built the hang tight model which turns the robot into a moving table and the idea is to make the objects on the platform fall off. The things that are built to put on the platform are quite curious.
The App
(screenshots are from my Windows 10 version -- Huw)
Up until now I've mainly been talking about the physical aspects of this set. The other major part to this model is the app that's used to program the robots. The robots can be programmed using either Scratch or Python. Most children will be familiar with Scratch's drag and drop style and will quickly get something running using it.
.png)
The code mostly runs on the hub with communication to the app used to display the status of the various motors and sensors and to control the hub.
.png)
All the projects provided come with Scratch code that's been commented to help understand how it works and where it can be experimented with. The system has all the usual Scratch blocks as well as some that are specific to this set, each robot comes with specific blocks for that model that do some spooky magic, like calibration.

Projects can be shared with other people, although I've only tested this using Android-Android transfers and that required using Google Drive. The app is fairly robust although it did get into a strange state a few times where code appeared to get downloaded to the hub but then the hub didn't do anything. Resetting everything usually fixed this (the classic switch it off and on again).
I did encounter one problem, the first step of the Gelo model did have the sample code missing entirely. A minor problem as there was code for the completed model.
The most interesting part to this set, for me at least, was the python support and it's here that this set becomes very disappointing. I really wanted to do some interesting things using python, motorising the Technic Bugatti gear box to drive the wheels for starters, but the support for the app let me down a lot.
.png)
The app only works on Windows 10, MacOS and Android and then a bluetooth adapter is required to download the code to the hub. As I use Linux and Windows 7 I couldn't run the app on any of my computers and ended up using my phone to get the building instructions and run the Scratch code.
While this was possible to do, the small screen made it difficult to see the instructions clearly and trying to create Scratch code was unnecessarily hard. As for writing python code, once you've displayed an on-screen keyboard on my phone there's not much space left to see the code.
And this was the biggest issue for me. Before buying this set, make sure you have the hardware and software to support the set as having spent this much on the set then having to spend more to upgrade your hardware can make this a very expensive set.
If LEGO wants to encourage coding they should publish their bluetooth protocols so that the programming community can create environments to make code to run on the hub, and in more languages. And the community would do that, the hardware is great and has lots of possibilities and is something they would want to develop for. Just look at other open projects like the Raspberry Pi and the Arduino platforms and what people are doing with those.
Summary
I enjoyed building the robots and running the pre-written samples but it's when I wanted to try out my own ideas and code that lets down this set, which is a shame and could be easily fixed I think (although I'm sure someone in the comments will correct me on this).
If you already own hardware capable of running the app, or are going to be upgrading soon, then this is a good set with lots of potential. If you need to upgrade then you need to factor this into the cost for getting this set and I don't think the set is good enough to justify doing that.
53 likes
11 comments on this article
@huw thanks for the review. I bought this recently and have enjoyed it with my son. I loved technics as a kid, and have just got back into it with the kids.
While this hub has slightly more processing and a full 6 ports (eg, enough to make most functional machines such as excavators with just one hub) I was a little disappointed with the battery capacity/life as well as the drive voltage .... so i went looking for after market. PUP isn't "new" but there don't seem to be ANY (??) ~sbrick/~buwizz equivalents yet.
I see you've reviewed a few ~kickstarter type projects in the past, such as PFx. Googling I found a current campaign ( https://www.kickstarter.com/projects/spacecadet/evlono-one?ref=user_menu - no affiliation, arduino, interesting workaround to the PUP connectors).
Any thoughts on current/upcoming PUP controllers out there? Thanks!!
I’ve been wondering about this set ever since I got the smaller gwp version. Thanks for the great review.
For those who are into Mindstorms there is a competition this month at Lego ideas for a 6th model with the above 51515 as prizes for both the winners and two random entries. This can be designed and built using EV3 as well as 51515 or Spike. Good luck.
All the little accessory builds like the tiny creatures and static tiny robots that go alongside the big robot builds are giving me lots of Technic Competition and early Bionicle Rahi vibes. Kind of neat to see Technic again being used for arcade like functions and little creatures.
Skizz - is that a reference to the 2000ad ET rip-off?:-)
@skizz: Maybe I don't get it right, but you said twice, that you built a remote control for the models. Isn't your smart device the remote (like in the technic models)? Or is it possible to have a built remote control? What extra pieces/requirements do you need?
@focus72 said:
" @skizz: Maybe I don't get it right, but you said twice, that you built a remote control for the models. Isn't your smart device the remote (like in the technic models)? Or is it possible to have a built remote control? What extra pieces/requirements do you need?"
You don't have to go as far as physically building a controller! In the app there is a view that lets you build a UI using d-pads, sliders, switches and so on and you have to create code to map the UI functions to commands for the robots, there's Scratch blocks to do this. It's all built into the app, you don't need anything extra to do it. I've just noticed Huw hasn't done a screen grab of it - you access it using the gamepad icon on the right hand side of the coding view. I should have also pointed out that there is an option to use an XBox or Playstation controller but as I don't have either of those I couldn't test it out (I'm a Nintendo fan!)
@ChocolateFrog: Yes, 10 Geeky points for knowing that :-)
I wanna see what the brick eater on M.V.P. does
I like Tricky and Gelo
Price is incredible sharp right now, managed to pick one up for 250€. Will make a review as well.